Ga door naar hoofdinhoud

OneLink Safe and Sound Battery Replacement

Wat je nodig hebt

  1. OneLink Safe and Sound Battery Replacement, Cover: stap 1, afbeelding 1 van 2 OneLink Safe and Sound Battery Replacement, Cover: stap 1, afbeelding 2 van 2
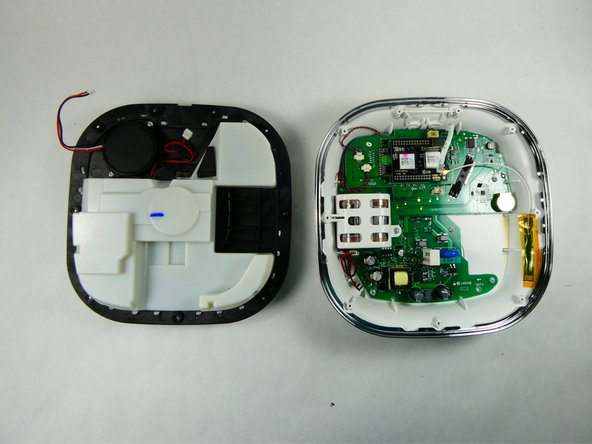
    • Run the metal spudger under the plastic rim and around the perimeter, on the top of the device to loosen the adhesive.

    • Remove plastic rim.

  2. OneLink Safe and Sound Battery Replacement: stap 2, afbeelding 1 van 2 OneLink Safe and Sound Battery Replacement: stap 2, afbeelding 2 van 2
    • Use a Phillips #0 screwdriver to remove nine screws from the top of the device.

  3. OneLink Safe and Sound Battery Replacement: stap 3, afbeelding 1 van 2 OneLink Safe and Sound Battery Replacement: stap 3, afbeelding 2 van 2
    Gereedschap gebruikt in deze stap:
    Tweezers
    $4.99
    Koop
    • Don't yank or pull the lid off as there are ribbons and cables connecting the top of the device to the motherboard. They need to be disconnected before the top is removed.

    • Use tweezers or a spudger to disconnect the ribbon from the motherboard.

  4. OneLink Safe and Sound Battery Replacement: stap 4, afbeelding 1 van 1
    • Use tweezers to unplug the speaker cable from the motherboard.

  5. OneLink Safe and Sound Battery Replacement: stap 5, afbeelding 1 van 2 OneLink Safe and Sound Battery Replacement: stap 5, afbeelding 2 van 2
    • Use the plastic opening tool to remove the microphone connection from the motherboard.

    • Remove the top of the device.

  6. OneLink Safe and Sound Battery Replacement, Battery: stap 6, afbeelding 1 van 1
    • Use the plastic opening tool to disconnect the cable from the motherboard.

  7. OneLink Safe and Sound Battery Replacement: stap 7, afbeelding 1 van 2 OneLink Safe and Sound Battery Replacement: stap 7, afbeelding 2 van 2
    • Use a Phillips #0 screwdriver to remove the single screw securing the plastic battery cage.

  8. OneLink Safe and Sound Battery Replacement: stap 8, afbeelding 1 van 2 OneLink Safe and Sound Battery Replacement: stap 8, afbeelding 2 van 2
    • Remove the plastic cage holding the battery in place.

    • Remove the battery from the device.

Conclusie

To reassemble your device, follow these instructions in reverse order.

Één andere persoon heeft deze handleiding voltooid.

Arianna Roberts

Lid sinds: 11/10/22

639 Reputatie

6 handleidingen geschreven

Team

UMass Dartmouth, Team 2-2, Petersen Fall 2022 Lid van UMass Dartmouth, Team 2-2, Petersen Fall 2022

UMASSD-PETERSEN-F22S2G2

3 Leden

6 handleidingen geschreven

4 opmerkingen

Where do I get this battery replacement

Dallas Massey - Antwoord

people that has purchased this product. If the battery goes dead where can someone purchase a replacement battery from and what size battery would they need

Pamela Wright - Antwoord

Is there a P/N for the battery pack or it needs to be bought individually and then put together

Thank you

Jose Chocano Felice - Antwoord

Bought a 2CR17335A-WK17 battery pack from Amazon for $15 plus tax. Just had to splice wires to existing connector to match the motherboard. So far so good. Had a 5 chirp tone every 2 minutes advising battery had come to end of life. Not sure why a 10 year battery only lasted 3 years from the manufacturing date but oh well.

Mario Garcia - Antwoord

Voeg opmerking toe

Weergavestatistieken:

Afgelopen 24 uren: 0

Afgelopen 7 dagen: 9

Afgelopen 30 dagen: 40

Altijd: 1,299