Ga door naar hoofdinhoud

Olympus Stylus 1030 SW Motherboard Replacement

Wat je nodig hebt

  1. Olympus Stylus 1030 SW Motherboard Replacement, Olympus Stylus 1030 SW Camera Disassembly: stap 1, afbeelding 1 van 3 Olympus Stylus 1030 SW Motherboard Replacement, Olympus Stylus 1030 SW Camera Disassembly: stap 1, afbeelding 2 van 3 Olympus Stylus 1030 SW Motherboard Replacement, Olympus Stylus 1030 SW Camera Disassembly: stap 1, afbeelding 3 van 3
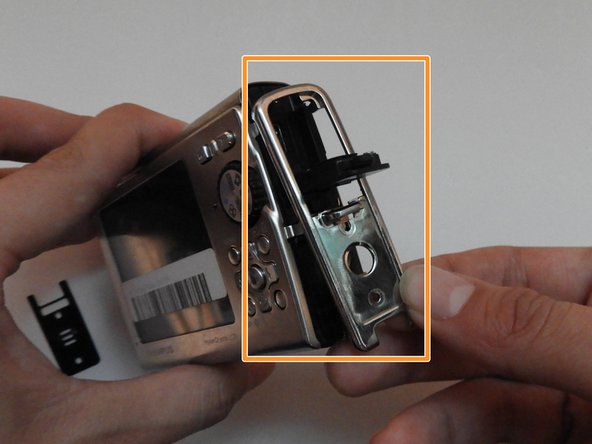
    • Using the iFixit Opening Tool, pry off the plastic part of the lens.

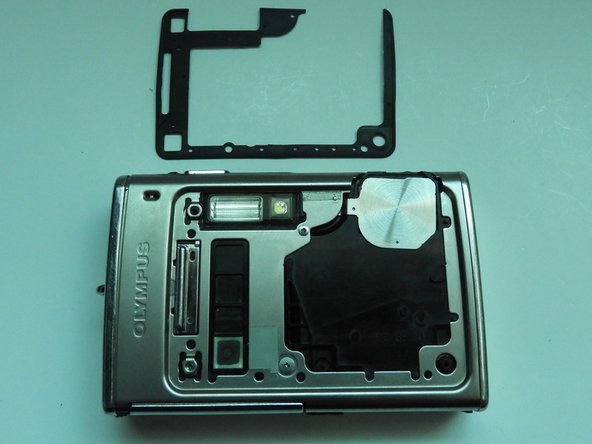
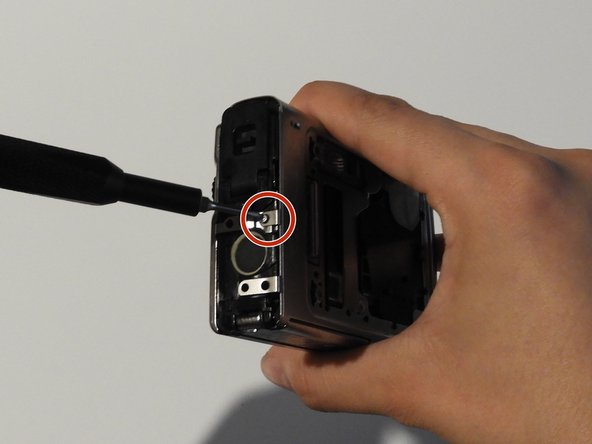
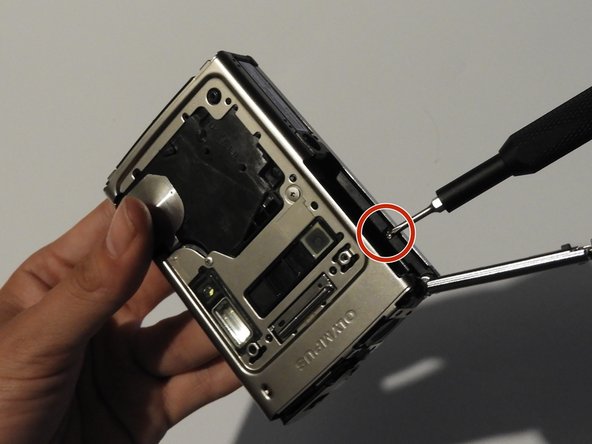
    • Using the T6 Torx screwdriver, unscrew the three screws.

  2. Olympus Stylus 1030 SW Motherboard Replacement: stap 2, afbeelding 1 van 3 Olympus Stylus 1030 SW Motherboard Replacement: stap 2, afbeelding 2 van 3 Olympus Stylus 1030 SW Motherboard Replacement: stap 2, afbeelding 3 van 3
    • Using the Phillips #00 screwdriver, unscrew the three screws.

    • Carefully swivel the metal cover out towards you.

    • Using tweezers, remove the metal washer.

  3. Olympus Stylus 1030 SW Motherboard Replacement: stap 3, afbeelding 1 van 2 Olympus Stylus 1030 SW Motherboard Replacement: stap 3, afbeelding 2 van 2
    • Using the tweezers, slowly peel off the plate.

  4. Olympus Stylus 1030 SW Motherboard Replacement: stap 4, afbeelding 1 van 3 Olympus Stylus 1030 SW Motherboard Replacement: stap 4, afbeelding 2 van 3 Olympus Stylus 1030 SW Motherboard Replacement: stap 4, afbeelding 3 van 3
    • Using the Phillips #00 screwdriver, unscrew the two screws on the side of the camera.

  5. Olympus Stylus 1030 SW Motherboard Replacement: stap 5, afbeelding 1 van 3 Olympus Stylus 1030 SW Motherboard Replacement: stap 5, afbeelding 2 van 3 Olympus Stylus 1030 SW Motherboard Replacement: stap 5, afbeelding 3 van 3
    • On the opposite side, use the Phillips #00 screwdriver to unscrew both screws.

    • Take out the speaker plate.

    • Open the multi-connector cover and slide off the side panel.

  6. Olympus Stylus 1030 SW Motherboard Replacement: stap 6, afbeelding 1 van 3 Olympus Stylus 1030 SW Motherboard Replacement: stap 6, afbeelding 2 van 3 Olympus Stylus 1030 SW Motherboard Replacement: stap 6, afbeelding 3 van 3
    • Using the Phillips #00 screwdriver, unscrew the screw above the speaker.

    • On the bottom side of the camera, unscrew the two screws.

  7. Olympus Stylus 1030 SW Motherboard Replacement: stap 7, afbeelding 1 van 3 Olympus Stylus 1030 SW Motherboard Replacement: stap 7, afbeelding 2 van 3 Olympus Stylus 1030 SW Motherboard Replacement: stap 7, afbeelding 3 van 3
    • Open the battery compartment cover.

    • Use the Phillips #00 screwdriver to unscrew the screw in the battery compartment.

  8. Olympus Stylus 1030 SW Motherboard Replacement: stap 8, afbeelding 1 van 3 Olympus Stylus 1030 SW Motherboard Replacement: stap 8, afbeelding 2 van 3 Olympus Stylus 1030 SW Motherboard Replacement: stap 8, afbeelding 3 van 3
    • On the front of the camera, unscrew the two screws shown.

    • Gently pull on the side until the camera is separated from the back panel.

    • Remove the shutter and power button.

  9. Olympus Stylus 1030 SW Motherboard Replacement: stap 9, afbeelding 1 van 3 Olympus Stylus 1030 SW Motherboard Replacement: stap 9, afbeelding 2 van 3 Olympus Stylus 1030 SW Motherboard Replacement: stap 9, afbeelding 3 van 3
    • Use the Phillips #00 screwdriver to unscrew the four screws on the front of the camera.

    • Unscrew the shutter using the Phillips #00 screwdriver.

  10. Olympus Stylus 1030 SW Motherboard Replacement: stap 10, afbeelding 1 van 2 Olympus Stylus 1030 SW Motherboard Replacement: stap 10, afbeelding 2 van 2
    • Release the top holding using a spudger.

    • Slowly and carefully separate the front and back of the camera, exposing the electrical ribbons.

  11. Olympus Stylus 1030 SW Motherboard Replacement: stap 11, afbeelding 1 van 3 Olympus Stylus 1030 SW Motherboard Replacement: stap 11, afbeelding 2 van 3 Olympus Stylus 1030 SW Motherboard Replacement: stap 11, afbeelding 3 van 3
    • Using the spudger and tweezers if needed, remove the ribbons from the computer chips.

  12. Olympus Stylus 1030 SW Motherboard Replacement, Motherboard: stap 12, afbeelding 1 van 3 Olympus Stylus 1030 SW Motherboard Replacement, Motherboard: stap 12, afbeelding 2 van 3 Olympus Stylus 1030 SW Motherboard Replacement, Motherboard: stap 12, afbeelding 3 van 3
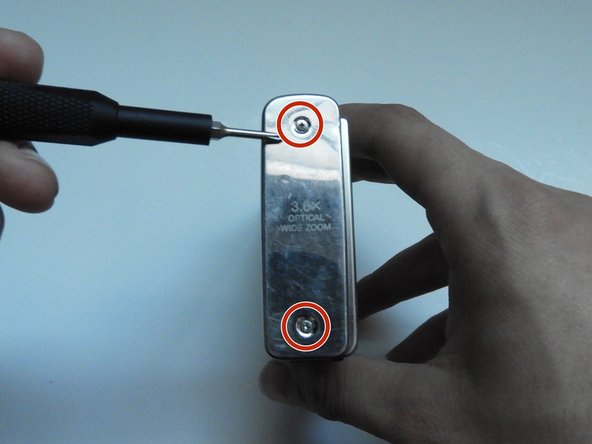
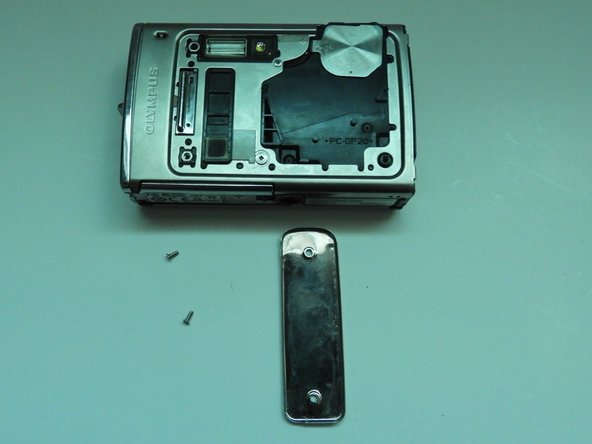
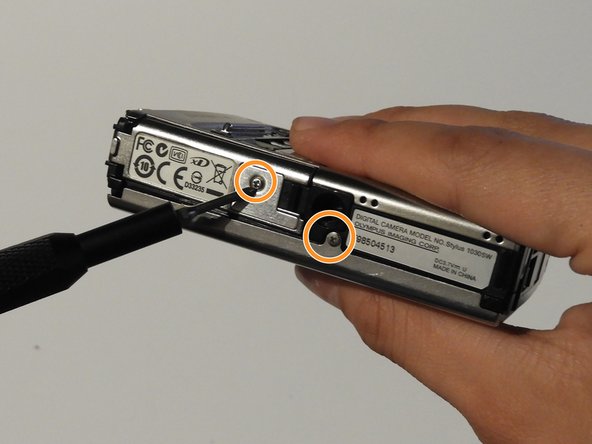
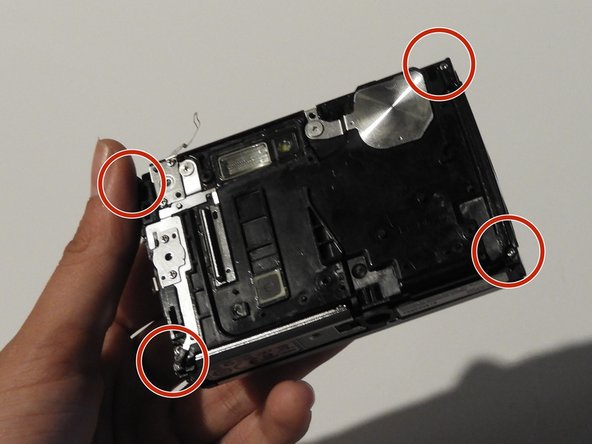
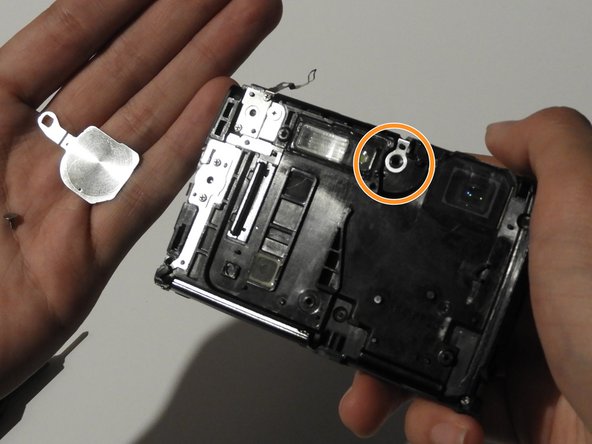
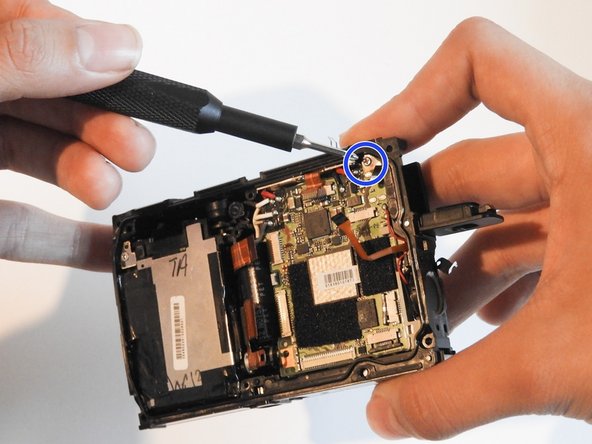
    • Remove the 1.0 cm and the 0.8 mm screws.

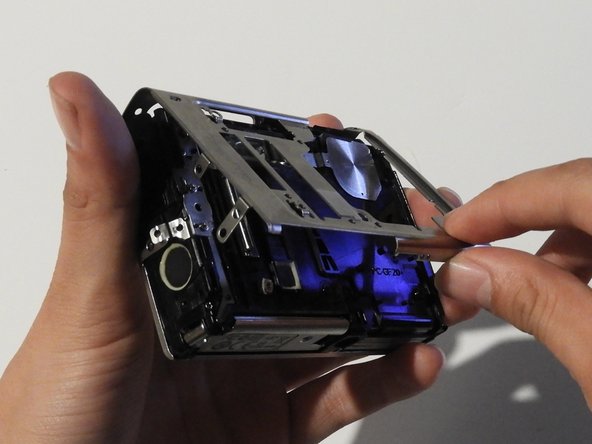
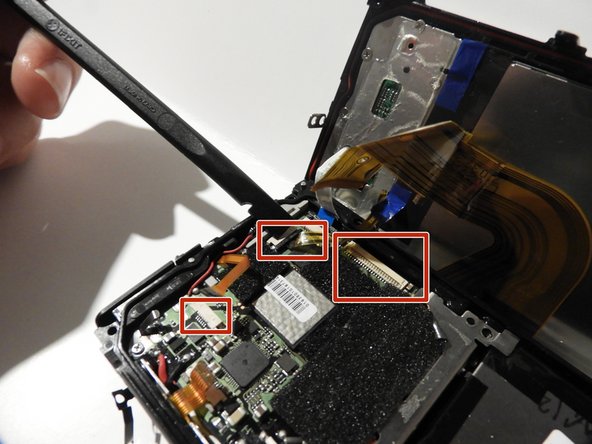
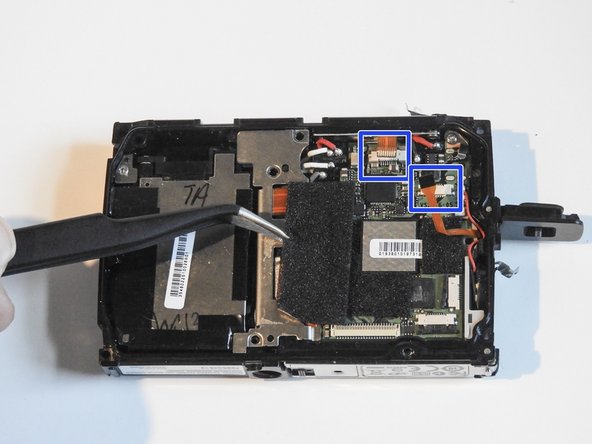
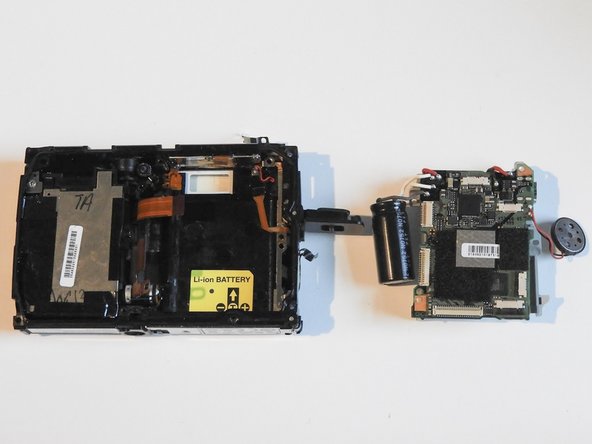
    • Peel off tape and remove ribbons.

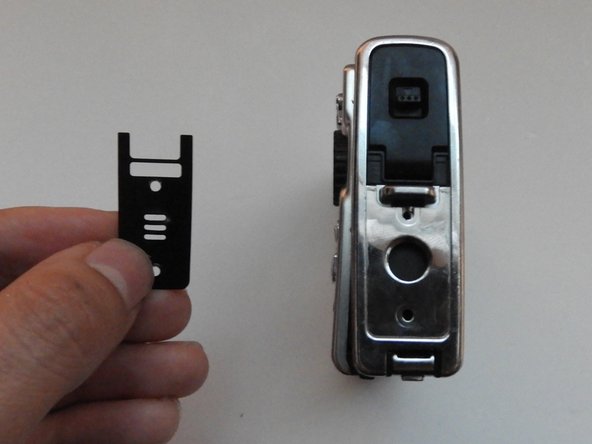
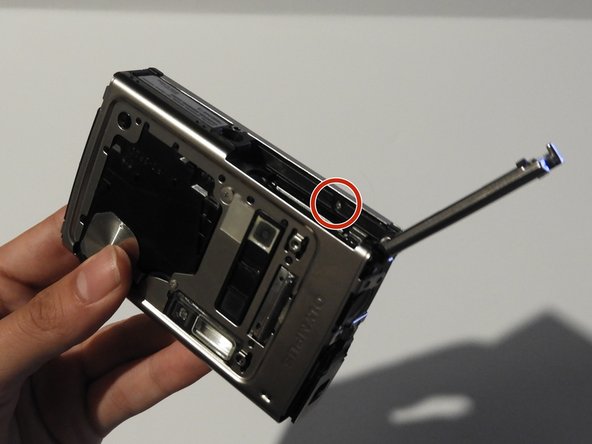
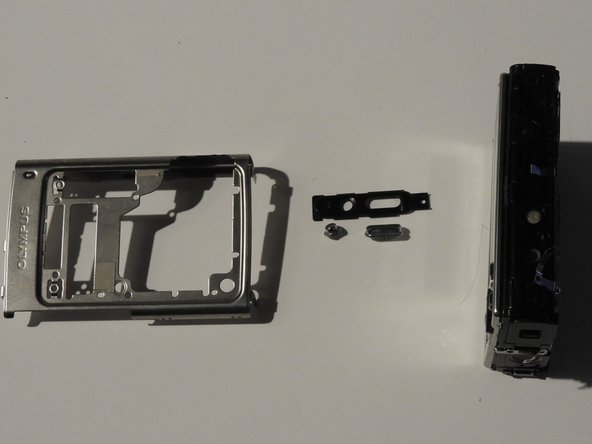
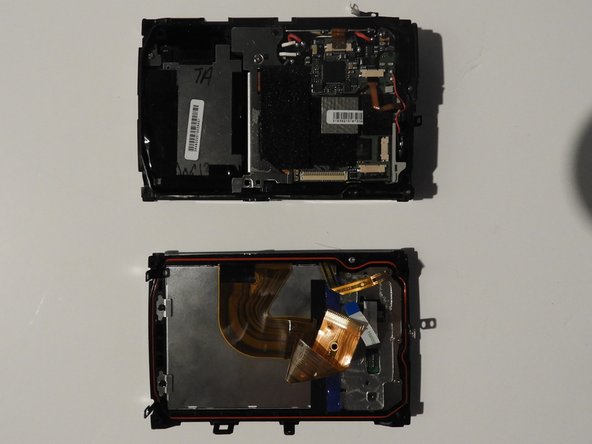
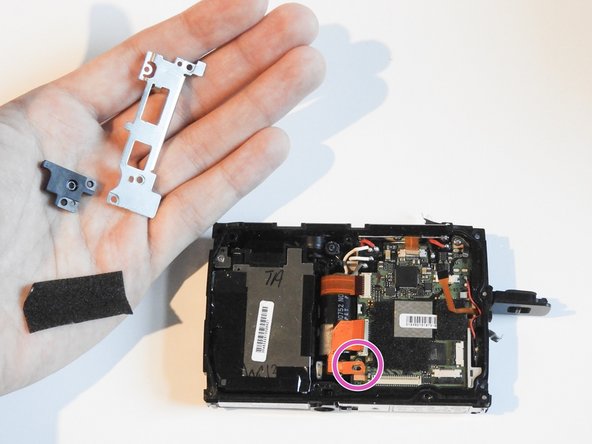
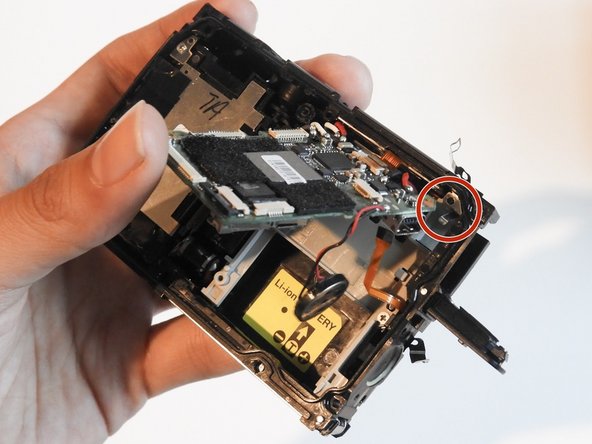
    • Remove black plastic cover and unscrew the 1.1 cm screw.

  13. Olympus Stylus 1030 SW Motherboard Replacement: stap 13, afbeelding 1 van 2 Olympus Stylus 1030 SW Motherboard Replacement: stap 13, afbeelding 2 van 2
    • Release ribbons carefully using either tweezers or a spudger.

    • Remove the 1.1 cm screw.

  14. Olympus Stylus 1030 SW Motherboard Replacement: stap 14, afbeelding 1 van 3 Olympus Stylus 1030 SW Motherboard Replacement: stap 14, afbeelding 2 van 3 Olympus Stylus 1030 SW Motherboard Replacement: stap 14, afbeelding 3 van 3
    • Push A/V port away from you carefully using a spudger.

    • Slowly take out the motherboard and the speaker microphone.

    • Collect the metal washer plate from the top right corner of the motherboard (now loose).

  15. Olympus Stylus 1030 SW Motherboard Replacement: stap 15, afbeelding 1 van 2 Olympus Stylus 1030 SW Motherboard Replacement: stap 15, afbeelding 2 van 2
    • With a spudger or finger, slowly take out the battery hinged to the motherboard.

    • Be careful not to disconnect the wires by pulling it too hard.

    • Take out motherboard.

Conclusie

To reassemble your device, follow these instructions in reverse order.

Één andere persoon heeft deze handleiding voltooid.

3 opmerkingen

what is the voltage, and capacitance of the main flash capacitor? diameter and length? I want to replace mine as my 'flash charging' symbol constantly flashes and flash does not fire.

thanks for the writeup! I have more confidence in repairing my 10+ year old camera

Kevin Kay - Antwoord

the cap is 330uF and 90V

dimensions:

11.94mm diameter

25.65mm length

Kevin Kay - Antwoord

How would I go about extracting the camera module and hooking it up to an arduino?

My cam got saltwater damage however it still turns on for a few seconds before turning off again

GoodNight Tea - Antwoord

Voeg opmerking toe

Weergavestatistieken:

Afgelopen 24 uren: 0

Afgelopen 7 dagen: 5

Afgelopen 30 dagen: 9

Altijd: 1,088