Ga door naar hoofdinhoud

Nvidia Shield Pro Android TV Controller Motherboard Replacement

Wat je nodig hebt

  1. Nvidia Shield Pro Android TV Controller Motherboard Replacement, Bluetooth Controller Thumbsticks: stap 1, afbeelding 1 van 3 Nvidia Shield Pro Android TV Controller Motherboard Replacement, Bluetooth Controller Thumbsticks: stap 1, afbeelding 2 van 3 Nvidia Shield Pro Android TV Controller Motherboard Replacement, Bluetooth Controller Thumbsticks: stap 1, afbeelding 3 van 3
    • Remove the six T6 Torx screws from the back of the controller.

  2. Nvidia Shield Pro Android TV Controller Motherboard Replacement: stap 2, afbeelding 1 van 1
    • Gently pry open the top frame of the cover with a plastic opening tool.

  3. Nvidia Shield Pro Android TV Controller Motherboard Replacement: stap 3, afbeelding 1 van 2 Nvidia Shield Pro Android TV Controller Motherboard Replacement: stap 3, afbeelding 2 van 2
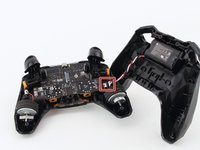
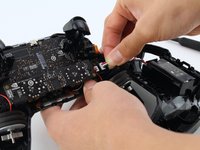
    • Gently pull the wire connector directly out of its socket, separating the two halves of the controller.

  4. Nvidia Shield Pro Android TV Controller Motherboard Replacement: stap 4, afbeelding 1 van 2 Nvidia Shield Pro Android TV Controller Motherboard Replacement: stap 4, afbeelding 2 van 2
    • Remove the two T6 Torx screws.

  5. Nvidia Shield Pro Android TV Controller Motherboard Replacement: stap 5, afbeelding 1 van 2 Nvidia Shield Pro Android TV Controller Motherboard Replacement: stap 5, afbeelding 2 van 2
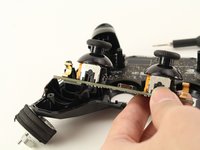
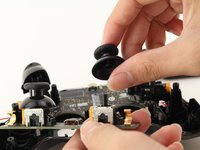
    • Remove the guard piece that secures the thumb-sticks to the controller.

    • Apply vertical pressure with two fingers to carefully pop off the thumb-stick(s) in need of repair.

    • Replace it by sliding a new thumb-stick onto the plastic post that secured the old one.

  6. Nvidia Shield Pro Android TV Controller Motherboard Replacement, Triggers: stap 6, afbeelding 1 van 3 Nvidia Shield Pro Android TV Controller Motherboard Replacement, Triggers: stap 6, afbeelding 2 van 3 Nvidia Shield Pro Android TV Controller Motherboard Replacement, Triggers: stap 6, afbeelding 3 van 3
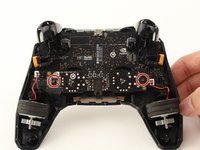
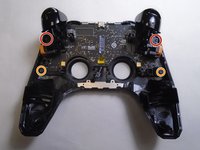
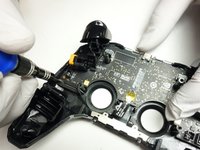
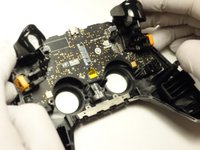
    • Use a Torx T6 screwdriver to remove the two 7 mm screws from the triggers (one on each trigger).

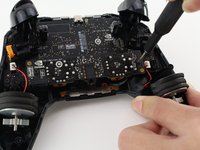
    • Use a Torx T5 screwdriver to remove the two 5 mm screws securing the motherboard.

    • Gently lift the motherboard from the controller housing.

  7. Nvidia Shield Pro Android TV Controller Motherboard Replacement: stap 7, afbeelding 1 van 3 Nvidia Shield Pro Android TV Controller Motherboard Replacement: stap 7, afbeelding 2 van 3 Nvidia Shield Pro Android TV Controller Motherboard Replacement: stap 7, afbeelding 3 van 3
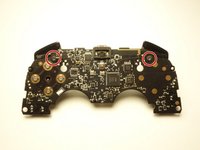
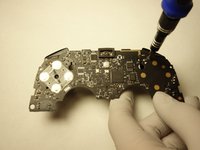
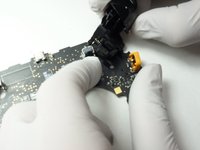
    • Use a Torx T5 screwdriver to remove the two 5 mm screws from the motherboard.

    • Carefully pull the trigger directly out of its socket.

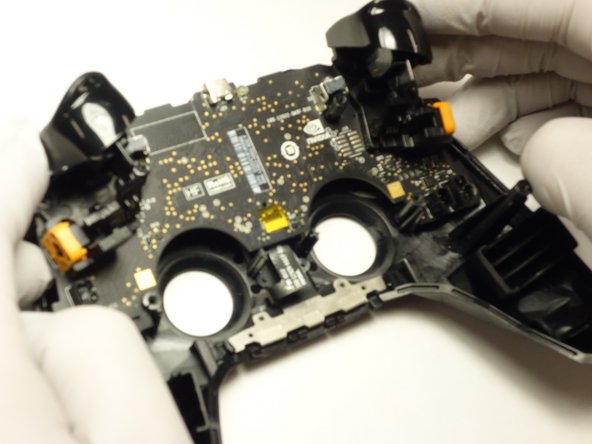
  8. Nvidia Shield Pro Android TV Controller Motherboard Replacement, Controller Motherboard: stap 8, afbeelding 1 van 1
    • After removing the triggers, your motherboard is completely separate and ready to be replaced.

Conclusie

Your motherboard is ready to be replaced.

0 opmerkingen

Voeg opmerking toe

Weergavestatistieken:

Afgelopen 24 uren: 1

Afgelopen 7 dagen: 2

Afgelopen 30 dagen: 9

Altijd: 211