Ga door naar hoofdinhoud

Nvidia Shield Pro Android TV Controller D-Pad Replacement

Wat je nodig hebt

  1. Nvidia Shield Pro Android TV Controller D-Pad Replacement, Bluetooth Controller D-Pad: stap 1, afbeelding 1 van 3 Nvidia Shield Pro Android TV Controller D-Pad Replacement, Bluetooth Controller D-Pad: stap 1, afbeelding 2 van 3 Nvidia Shield Pro Android TV Controller D-Pad Replacement, Bluetooth Controller D-Pad: stap 1, afbeelding 3 van 3
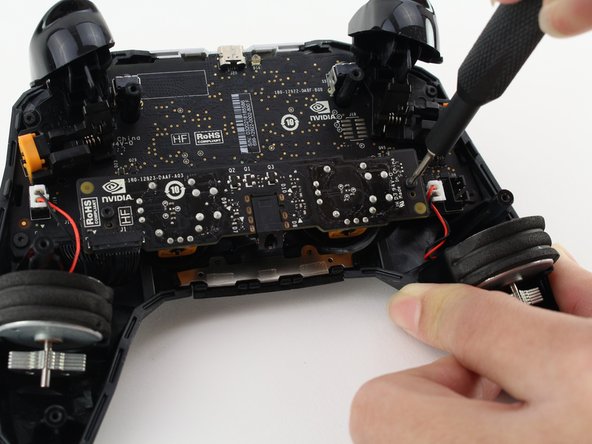
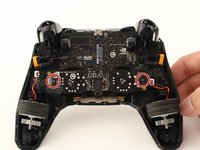
    • Remove the six T6 Torx screws from the back of the controller.

  2. Nvidia Shield Pro Android TV Controller D-Pad Replacement: stap 2, afbeelding 1 van 1
    • Gently open the top frame of the cover with the plastic opening tool.

  3. Nvidia Shield Pro Android TV Controller D-Pad Replacement: stap 3, afbeelding 1 van 2 Nvidia Shield Pro Android TV Controller D-Pad Replacement: stap 3, afbeelding 2 van 2
    • Gently pull the wire connector out of its socket, separating the two halves of the controller.

  4. Nvidia Shield Pro Android TV Controller D-Pad Replacement: stap 4, afbeelding 1 van 1
    • Remove the wire attached to the circular piece.

  5. Nvidia Shield Pro Android TV Controller D-Pad Replacement: stap 5, afbeelding 1 van 2 Nvidia Shield Pro Android TV Controller D-Pad Replacement: stap 5, afbeelding 2 van 2
    • Carefully remove the two T6 Torx screws from either side of the motherboard.

  6. Nvidia Shield Pro Android TV Controller D-Pad Replacement: stap 6, afbeelding 1 van 1
    • Remove the yellow plug from its socket.

  7. Nvidia Shield Pro Android TV Controller D-Pad Replacement: stap 7, afbeelding 1 van 2 Nvidia Shield Pro Android TV Controller D-Pad Replacement: stap 7, afbeelding 2 van 2
    • Remove the two T6 Torx screws.

  8. Nvidia Shield Pro Android TV Controller D-Pad Replacement: stap 8, afbeelding 1 van 1
    • Slowly pull up the primary circuit board of the controller until the D-pad is revealed.

    • Carefully remove the board.

  9. Nvidia Shield Pro Android TV Controller D-Pad Replacement: stap 9, afbeelding 1 van 1
    • Gently remove and replace the D-Pad.

Conclusie

To reassemble your device, follow these instructions in reverse order.

Ben Carrasco

Lid sinds: 01/23/20

332 Reputatie

2 handleidingen geschreven

Team

Cal Poly, Team S18-G2, White Winter 2020 Lid van Cal Poly, Team S18-G2, White Winter 2020

CPSU-WHITE-W20S18G2

4 Leden

6 handleidingen geschreven

0 opmerkingen

Voeg opmerking toe

Weergavestatistieken:

Afgelopen 24 uren: 0

Afgelopen 7 dagen: 2

Afgelopen 30 dagen: 15

Altijd: 1,032