Deze versie kan foutieve bewerkingen bevatten. Schakel over naar de recentste gecontroleerde momentopname.
Wat je nodig hebt
-
Deze stap is niet vertaald. Help het te vertalen
-
With the bottom of the console facing up, remove the following 6 screws hidden underneath the white square stickers:
-
Three 5.1mm Phillips #000 screws
-
Two 6.1mm Tri-wing Y0 screws
-
One 13.2mm Tri-wing Y1 screw
-
-
Deze stap is niet vertaald. Help het te vertalen
-
Rotate the console 180 degrees so that the exhaust vents are facing you.
-
Remove the two 7.1mm Phillips #00 screws.
-
-
Deze stap is niet vertaald. Help het te vertalen
-
On the side opposite of the exhaust vents, slide the cover faceplate towards the back of the console and pull upwards to release it.
-
-
Deze stap is niet vertaald. Help het te vertalen
-
On the bottom of the console beneath the previously removed faceplate, remove the three 13.2mm Tri-wing Y1 screws.
-
-
Deze stap is niet vertaald. Help het te vertalen
-
On the back of the console, lift up and release the main top cover.
-
-
-
Deze stap is niet vertaald. Help het te vertalen
-
Rotate the device so that the front plate is facing you.
-
On each side of the console, remove the 3.5mm Phillips #0 screw connecting the DVD drive to the faceplate.
-
-
Deze stap is niet vertaald. Help het te vertalen
-
Rotate the device so that the front plate is on the right side and the ribbon cable is visible.
-
The ribbon cable is connected to the system by a latch which holds in the blue tab. Flip this latch up to unlock it.
-
Lift up on the blue tab to release the ribbon cable.
-
-
Deze stap is niet vertaald. Help het te vertalen
-
On each side of the DVD drive, remove the two 4.6mm Phillips #0 mounting screws.
-
-
Deze stap is niet vertaald. Help het te vertalen
-
Rotate the device so that the disc drive slot is visible.
-
Lift the disc drive out of the mount and turn over to the right so it lies like a book.
-
Use a spudger to release the ribbon cable.
-
-
Deze stap is niet vertaald. Help het te vertalen
-
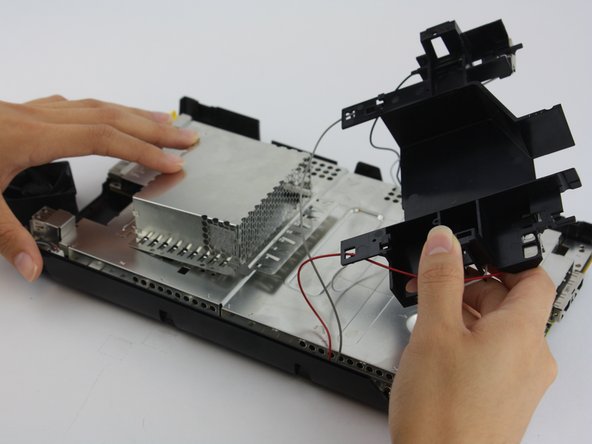
Remove the black plastic shielding by unscrewing connecting screws with a Phillip's Head screwdriver.
-
-
Deze stap is niet vertaald. Help het te vertalen
-
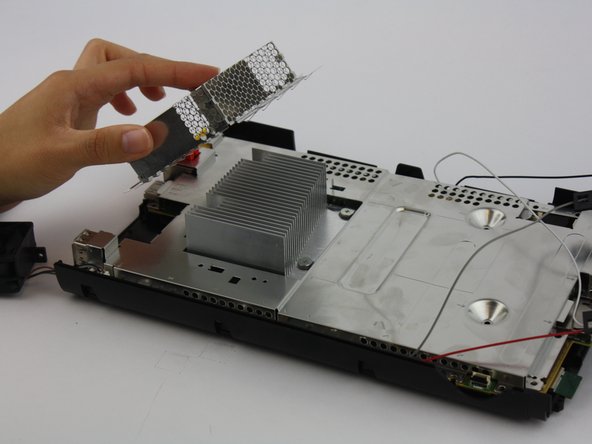
The metal cap does not require unscrewing and should lift up with ease.
-
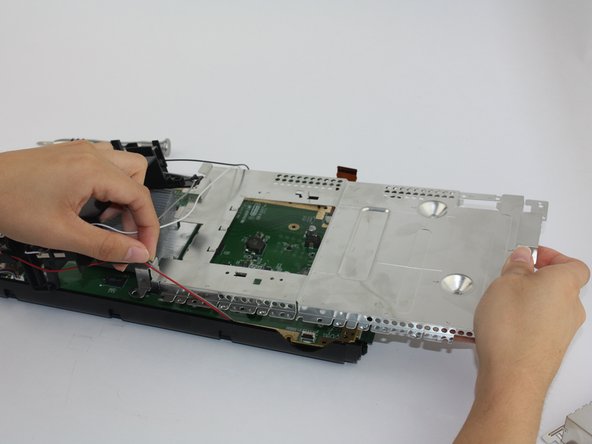
Unscrew all the screws that outline the perimeter of the board using a Phillips Head (PH1) screwdriver.
-
Remove the silver shielding plate once all screws are removed. Be careful when pulling it under the affixed antenna cables.
-
-
Deze stap is niet vertaald. Help het te vertalen
-
At this point, the motherboard should easily separate from the lower tray.
-


Annuleren: ik heb deze handleiding niet afgemaakt.
14 andere personen hebben deze handleiding voltooid.
Team

USF Tampa, Team 1-2, Leahy Spring 2016 Lid van USF Tampa, Team 1-2, Leahy Spring 2016
USFT-LEAHY-S16S1G2
3 Leden
12 handleidingen geschreven
2 opmerkingen
Does anyone knows where I can buy a Wii U Motherboard? mine has a dead CPU/GPU :(((((
This really feels like a "draw the rest of the f***ing owl" kind of guide. "Remove the black plastic shielding by unscrewing connecting screws"? Which ones???