Deze versie kan foutieve bewerkingen bevatten. Schakel over naar de recentste gecontroleerde momentopname.
Wat je nodig hebt
-
Deze stap is niet vertaald. Help het te vertalen
-
Remove the six 13.25mm Phillips screws on the bottom of the game console with a #2.5 flathead screwdriver.
-
Flip the game console right side up and take off the top by pulling it up and away from the rest of the device with your hands.
-
-
Deze stap is niet vertaald. Help het te vertalen
-
Remove the seven 13.25mm Phillips screws from the metal cover with a Phillips head #2 screwdriver.
-
Remove the metal cover by pulling it up and away from the rest of the console with your hands.
-
-
-
Deze stap is niet vertaald. Help het te vertalen
-
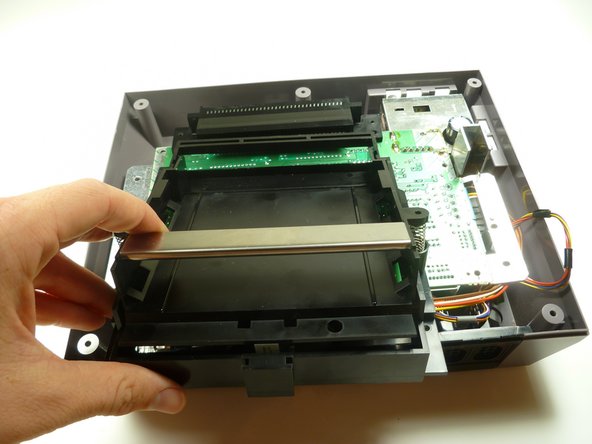
Remove the two silver 17.45mm Phillips screws from the cartridge tray using a Phillips head #2 screwdriver.
-
Remove the two bronze 13.25mm Phillips screws from the cartridge tray using a Phillips head #2 screwdriver.
-
Slide the cartridge tray toward you, away from the 72-PIN connector, and off the motherboard assembly.
-
-
Deze stap is niet vertaald. Help het te vertalen
-
Note: Underneath the cartridge tray is a black trapezoid-shaped tab/lip (see marker). When properly assembled this tab/lip goes below the motherboard and shielding as seen here.
-


Annuleren: ik heb deze handleiding niet afgemaakt.
8 andere personen hebben deze handleiding voltooid.
Team

Cal Poly, Team 14-40, Forte Fall 2010 Lid van Cal Poly, Team 14-40, Forte Fall 2010
CPSU-FORTE-F10S14G40
4 Leden
20 handleidingen geschreven