Deze versie kan foutieve bewerkingen bevatten. Schakel over naar de recentste gecontroleerde momentopname.
Wat je nodig hebt
-
Deze stap is niet vertaald. Help het te vertalen
-
Remove the two Phillips screws securing the battery cover to the back of the handheld console.
-
Lift the battery cover off the back of the DSi XL.
-
-
Deze stap is niet vertaald. Help het te vertalen
-
Remove the four rubber screw covers on the lower case by prying them up with a push pin.
-
-
Deze stap is niet vertaald. Help het te vertalen
-
Remove the following seven Phillips screws that secure the lower case to the rest of the DSi XL:
-
Four silver 5.3 mm screws
-
Two black 5.3 mm screws
-
One black 2.5 mm screw
-
-
-
Deze stap is niet vertaald. Help het te vertalen
-
Insert a spudger between the upper and lower case at the bottom left corner of the DSi.
-
Slide the spudger along the bottom edge of the upper case to release the latches securing the upper case to the lower case.
-
-
Deze stap is niet vertaald. Help het te vertalen
-
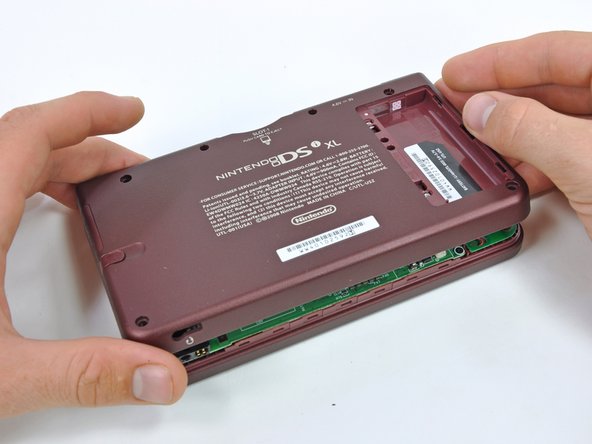
Lift the lower case from the front edge.
-
Rotate the lower case away from the DSi.
-
-
Deze stap is niet vertaald. Help het te vertalen
-
Using a spudger, pry the SD card/right shoulder button connector off its socket.
-
Pry the volume button/left shoulder button connector off its socket on the motherboard with a spudger.
-
-
Deze stap is niet vertaald. Help het te vertalen
-
Remove the two gold 4.0 mm Phillips screws securing the right shoulder button assembly to the back case.
-
Lift the right shoulder button assembly from the back case.
-
The components of the right shoulder button assembly:
-
Right shoulder button
-
Shoulder button spring
-
Retaining pin
-
Right shoulder button holding panel
-
-
Deze stap is niet vertaald. Help het te vertalen
-
Remove the stylus from its housing on the right side of the DSi XL.
-
-
Deze stap is niet vertaald. Help het te vertalen
-
Remove the three 4 mm gold Phillips screws securing the stylus housing to the lower case.
-
Using a spudger, lift the stylus housing off the lower case.
-
Remove the stylus housing from the handheld console.
-
Annuleren: ik heb deze handleiding niet afgemaakt.
4 andere personen hebben deze handleiding voltooid.


