Deze vertaling is door een computer gegenereerd en is nog niet door iemand nagekeken. Spreek je deze taal? Bekijk het hier.
Inleiding
Dit is een handleiding die uitlegt hoe je het moederbord van een Nintendo DS, ook wel een printplaat genoemd, kunt vervangen.
De Nintendo DS is een door Nintendo uitgebrachte spelconsole met twee schermen die samenwerken, voorzien van draadloze verbinding en een ingebouwde microfoon.
De printplaat bevat alle onderdelen en maakt communicatie tussen de componenten van het apparaat mogelijk. Wanneer de communicatie tussen werkende onderdelen langer duurt dan verwacht, of wanneer er helemaal geen communicatie is, is het noodzakelijk om het moederbord te vervangen.
Het verwijderen van het moederbord van de DS is essentieel om toegang te krijgen tot de schermen en om andere noodzakelijke onderdelen te vervangen.
De vervanging kan worden uitgevoerd in 10 eenvoudige stappen.
Wat je nodig hebt
-
-
-
Verwijder de cartridge uit de console.
-
Gebruik een Phillips #00-kruiskopschroevendraaier om de schroef te verwijderen waarmee het batterijklepje aan de achterkant is bevestigd.
-
Verwijder het batterijklepje.
 Vraag FixBot
-
-
-
Gebruik een plastic Open openingsgereedschap of spudger om de accu vanaf de onderkant los te wrikken. Als er geen plastic Open openingsgereedschap of spudger beschikbaar is, kunnen je vingernagels ook werken.
-
-
-
-
-
-
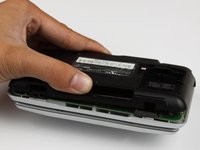
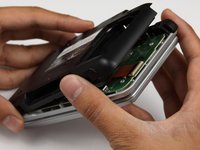
Wrik met je handen het achterpaneel van de hoofdbehuizing los.
-
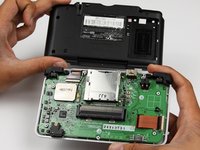
Haal de achterkant van de voorkant en leg deze opzij.
-
-
-
-
Verwijder de vier schroeven op de printplaat met een Phillips #00 kruiskopschroevendraaier.
-
-
-
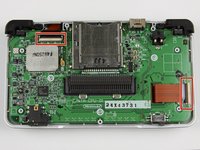
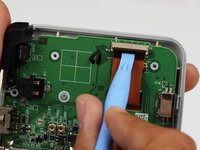
Ontgrendel de twee grote lintkabels door de zwarte clip omhoog te bewegen.
-
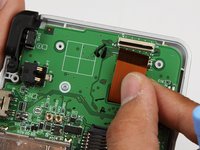
Trek de lintkabels voorzichtig met je vingers naar beneden en eruit.
-
-
Gereedschap gebruikt in deze stap:Tweezers$4.99
-
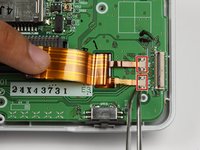
Zoek de twee kleine lintkabels onder de meest rechtse grote lintkabel.
-
Schuif de vergrendelingen van de kleine lintkabels naar beneden en verwijder de kabels.
-
-
-
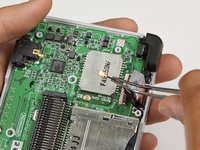
Zoek de (kabel)aansluiting van de wifi-antenne.
-
Verwijder de antenne door deze bij de kop vast te pakken met een pincet. Trek met een licht wiebelende beweging omhoog om de (kabel)aansluiting los te maken.
-
-
-
Voer de lintkabels door de opening op de printplaat.
-
Trek de printplaat omhoog en verwijder deze, en leg hem opzij.
-
-









Volg deze instructies in omgekeerde volgorde om je apparaat weer in elkaar te zetten.
Annuleren: ik heb deze handleiding niet afgemaakt.
24 andere personen hebben deze handleiding voltooid.

Team

Cal Poly, Team 18-3, Maness Fall 2009 Lid van Cal Poly, Team 18-3, Maness Fall 2009
CPSU-MANESS-F09S18G3
4 Leden
60 handleidingen geschreven
2Gids Commentaar
This was really helpful. Thank you!
I need a ds ribbon bale ?
