Inleiding
Heeft je batterij problemen en moet deze worden vervangen? Deze gids leidt je door de nodige stappen om in een handomdraai een nieuwe batterij in je Nintendo 3DS XL te plaatsen!
Wat je nodig hebt
-
-
-
Gebruik een JIS 00-schroevendraaier om de 4,2 mm lange schroeven aan de bovenrand van de achterbehuizing los te draaien.
 Vraag FixBot
-
-
-
-
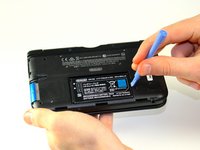
Gebruik een plastic openingsgereedschap om de clips die de achterbehuizing vastzetten los te wrikken, beginnend bij de bovenste hoeken en werk naar beneden.
-
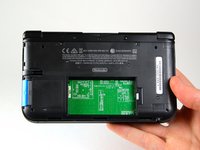
Gebruik je handen om de achterbehuizing te verwijderen.
-
-
-
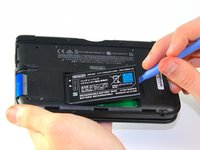
Steek het plastic Openingsgereedschap in de opening aan de rechterkant van de accu.
-
Wrik de accu uit de uitsparing en verwijder deze.
-
-


Na het voltooien van deze stappen kun je de nieuwe batterij plaatsen.
Volg deze instructies in omgekeerde volgorde om je apparaat weer in elkaar te zetten.
Annuleren: ik heb deze handleiding niet afgemaakt.
63 andere personen hebben deze handleiding voltooid.
Met dank aan deze vertalers:
100%

Translation Bot helpt ons de wereld te repareren! Doe je mee?
Begin met vertalen ›
Team

Cal Poly, Team 9-13, Regan Spring 2014 Lid van Cal Poly, Team 9-13, Regan Spring 2014
CPSU-REGAN-S14S9G13
5 Leden
96 handleidingen geschreven
6Gids Commentaar
Time estimate: 3 - 9 hours Difficulty: Very difficult ??????
More like 30-90 seconds, and that's if you have to search for a screwdriver.
It should be noted that the bottom three clips on the bottom of the backplate can’t just be snapped in, they need to be slipped in, so when removing the backplate, it should be tiled away from the system and then pulled up from the bottom, and those three clips on the bottom should be the first clips in when you’re putting it back together, sliding them in with the backplate at an angle, and then the rest of the clips just snap in.
Nice tip. Ty.
Just did this. For reasmbly I recommend putting the bottom/lower part of the case on first before you screw it back on.