Deze versie kan foutieve bewerkingen bevatten. Schakel over naar de recentste gecontroleerde momentopname.
Wat je nodig hebt
-
Deze stap is niet vertaald. Help het te vertalen
-
Unscrew the four Phillips #00 screws along the top of the back cover.
-
-
Deze stap is niet vertaald. Help het te vertalen
-
Grab the top edge of the back cover with your opposite hand so that the cover does not fall back into place.
-
Pull the back cover up and away from the rest of the device to remove it.
-
-
Deze stap is niet vertaald. Help het te vertalen
-
Insert a plastic opening tool into the notch in the lower case above the battery.
-
Pry the battery up with the plastic opening tool.
-
Grab the top edge of the battery and lift it out of the lower case.
-
-
Deze stap is niet vertaald. Help het te vertalen
-
Remove the nine 6.3 mm black Phillips screws from the lower case.
-
Remove the 2.4 mm silver Phillips screw above the game cartridge slot.
-
-
Deze stap is niet vertaald. Help het te vertalen
-
Lift the bottom edge of the lower case off the rest of the 3DS.
-
Use a plastic opening tool to pry the shoulder button ribbon cables off their sockets on the motherboard.
-
Remove the lower case from the device.
-
-
Deze stap is niet vertaald. Help het te vertalen
-
Remove the two 7.7 mm Phillips screws securing the back of the Circle Pad to the motherboard.
-
-
Deze stap is niet vertaald. Help het te vertalen
-
Use the flat end of a spudger to pry the back of the Circle Pad off the motherboard.
-
Lift the Circle Pad joystick off the motherboard and lay it on its back so that the ribbon cable connector is accessible.
-
-
Deze stap is niet vertaald. Help het te vertalen
-
Use the flat end of a spudger or your fingernail to flip up the retaining flap on the Circle Pad ribbon cable ZIF socket.
-
Lift the Circle Pad joystick off the motherboard.
-
-
Deze stap is niet vertaald. Help het te vertalen
-
Use a spudger or screwdriver to lift the pads up and remove them from the device.
-
-
Deze stap is niet vertaald. Help het te vertalen
-
Remove the two 4.5 mm Phillips screws securing the SD board to the motherboard.
-
-
Deze stap is niet vertaald. Help het te vertalen
-
Use the flat end of a spudger to pry the SD board ribbon cable connector off its socket on the motherboard.
-
-
Deze stap is niet vertaald. Help het te vertalen
-
Insert the flat end of a spudger between the SD board and the motherboard.
-
Pry up slowly to loosen the SD board from the RF shield underneath it. If you pry too quickly, you may tear the shield or break its solder points.
-
Run the spudger along the sides of the SD board to free it from the adhesive holding it in place.
-
Once completely freed, lift the SD board straight off the motherboard.
-
-
-
Deze stap is niet vertaald. Help het te vertalen
-
Slide the flat end of a spudger under the corner of the Wi-Fi board, and lift it away from the motherboard.
-
-
Deze stap is niet vertaald. Help het te vertalen
-
Use the flat end of a spudger to pry the Wi-Fi antenna cable connector off its socket on the Wi-Fi board.
-
Remove the Wi-Fi board from the device.
-
-
Deze stap is niet vertaald. Help het te vertalen
-
Grasp the microphone ribbon cable near the microphone with a pair of tweezers.
-
Pull the microphone straight up out of the upper case.
-
-
Deze stap is niet vertaald. Help het te vertalen
-
Use the flat end of a spudger or your fingernail to flip up the retaining flap on the speaker assembly ribbon cable ZIF socket.
-
Disconnect the speaker assembly ribbon cable with a pair of tweezers.
-
-
Deze stap is niet vertaald. Help het te vertalen
-
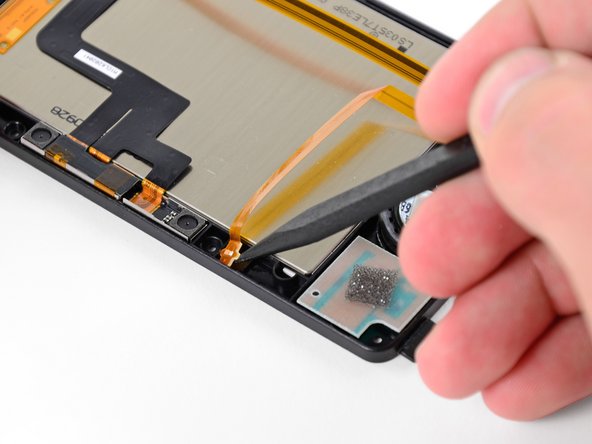
Use the flat end of a spudger or your fingernail to flip up the retaining flap on the camera ribbon cable ZIF socket.
-
-
Deze stap is niet vertaald. Help het te vertalen
-
Remove seven Phillips screws securing the motherboard to the upper case:
-
Four 2.5 mm gold screws
-
Two 3.5 mm black screws
-
One 2.5 mm silver screw
-
Lift the side of the motherboard that sits along the bottom edge of the 3DS.
-
-
Deze stap is niet vertaald. Help het te vertalen
-
Use the flat end of a spudger or your fingernail to flip up the retaining flap on the LCD ribbon cable ZIF socket.
-
-
Deze stap is niet vertaald. Help het te vertalen
-
Remove the motherboard assembly from the rest of the device.
-
-
Deze stap is niet vertaald. Help het te vertalen
-
Before continuing with disassembly, use a pair of tweezers to remove the clear plastic diffuser for the wireless notification LED. The small piece is likely to fall out on its own, and may be difficult to find if it lands on the floor.
-
-
Deze stap is niet vertaald. Help het te vertalen
-
De-route the Wi-Fi antenna cable from the bottom of the upper case.
-
-
Deze stap is niet vertaald. Help het te vertalen
-
Heat the edges of the upper display front panel with a hair dryer or heat gun to soften the adhesive holding it to the display bezel.
-
Begin prying the edges of the front panel off with a plastic opening tool.
-
-
Deze stap is niet vertaald. Help het te vertalen
-
Continue prying the remaining sides of the front panel by sliding the plastic opening tool down each edge.
-
-
Deze stap is niet vertaald. Help het te vertalen
-
With all of the sides free, lift the upper display front panel off the display bezel.
-
-
Deze stap is niet vertaald. Help het te vertalen
-
Remove the six 3.6 mm Phillips screws securing the rear display bezel to the front display bezel.
-
-
Deze stap is niet vertaald. Help het te vertalen
-
Lift the edge of the rear display bezel closest to you and rotate it towards the hinge.
-
Continue to lift the rear display bezel off the rest of the device until it is free.
-
-
Deze stap is niet vertaald. Help het te vertalen
-
Remove the 3D adjustment switch from the front display bezel.
-
-
Deze stap is niet vertaald. Help het te vertalen
-
Insert a metal probe into the space above the ABXY buttons with the point touching the metal hinge.
-
Push the hinge towards the center of the upper case. This will require a fair amount of force.
-
-
Deze stap is niet vertaald. Help het te vertalen
-
Slowly pull the upper display assembly away from the upper case.
-
Make sure that the various ribbon cables are being fed through the slit in the upper case.
-
Separate the upper display assembly from the upper case.
-
-
Deze stap is niet vertaald. Help het te vertalen
-
Carefully feed the speaker assembly ribbon cable through the hole in the upper display bezel.
-
-
Deze stap is niet vertaald. Help het te vertalen
-
Remove the 2.5 mm Phillips screw securing the right speaker board to the upper display bezel.
-
-
Deze stap is niet vertaald. Help het te vertalen
-
Use the flat end of a spudger or your fingernail to flip up the retaining flaps on the parallax barrier ribbon cable ZIF sockets.
-
Use a pair of metal tweezers to disconnect the two ribbon cables.
-
-
Deze stap is niet vertaald. Help het te vertalen
-
Use the flat end of a spudger to pry the left and right speakers out of their places in the upper display bezel.
-
Pry the camera status LED out of the upper display bezel with the tip of a spudger.
-
-
Deze stap is niet vertaald. Help het te vertalen
-
Remove the speaker assembly from the rest of the display assembly.
-


Annuleren: ik heb deze handleiding niet afgemaakt.
22 andere personen hebben deze handleiding voltooid.

6 opmerkingen
Getting the new assembly ribbon cable through the hinge is excruciatingly tedious. I tore my cable when I tried fishing it through with a small hooked pry tool. Learn from my mistakes
Whatever you do, don’t accidentally hook the display ribbon cable into the slot for the speaker ribbon cable when reassembling. It holds it too firmly, and will rip easily. I now have to spend $15 on a new lcd ribbon cable.
This can be fix the error of the 3d screen comprovetion? i have a 3ds with that problem, any advice?
For reassembly: when trying to put the ribbon cable through the hinge, you need to curve the end a bit to make it ‘flush’ with the hinge. I would also reccomend pulling the black hinge part out and lace the ribbon cable throught that way, then lace it through the hinge part, and then put the black hinge part back in the hinge socket.