Ga door naar hoofdinhoud

Nintendo 3DS Microphone Replacement

Wat je nodig hebt

  1. Nintendo 3DS Microphone Replacement, Back Cover: stap 1, afbeelding 1 van 1
    • Unscrew the four Phillips #00 screws along the top of the back cover.

    • The screws are held in place by locking washers, and will not come out of the back cover.

    • The comments section is full of unlucky souls who will tell you that the screws here through step 4 will strip incredibly easily. Press down fairly hard, and go slow.

  2. Nintendo 3DS Microphone Replacement: stap 2, afbeelding 1 van 2 Nintendo 3DS Microphone Replacement: stap 2, afbeelding 2 van 2
    • Hold the device in one hand and turn it over.

    • Grab the top edge of the back cover with your opposite hand so that the cover does not fall back into place.

    • Flip the 3DS over again so that the back cover is facing up.

    • Pull the back cover up and away from the rest of the device to remove it.

  3. Nintendo 3DS Microphone Replacement, Battery: stap 3, afbeelding 1 van 3 Nintendo 3DS Microphone Replacement, Battery: stap 3, afbeelding 2 van 3 Nintendo 3DS Microphone Replacement, Battery: stap 3, afbeelding 3 van 3
    • Insert a plastic opening tool into the notch in the lower case above the battery.

    • Pry the battery up with the plastic opening tool.

    • Grab the top edge of the battery and lift it out of the lower case.

  4. Nintendo 3DS Microphone Replacement, Lower Case: stap 4, afbeelding 1 van 1
    • Remove the nine 6.3 mm black Phillips screws from the lower case.

    • These screws will strip very easily unless you use the correct size bit. Apply pressure to the screws while turning to avoid stripping them.

    • Remove the 2.4 mm silver Phillips screw above the game cartridge slot.

  5. Nintendo 3DS Microphone Replacement: stap 5, afbeelding 1 van 3 Nintendo 3DS Microphone Replacement: stap 5, afbeelding 2 van 3 Nintendo 3DS Microphone Replacement: stap 5, afbeelding 3 van 3
    • Lift the bottom edge of the lower case off the rest of the 3DS.

    • There are still two ribbon cables connecting the mother board to the case, so be sure not to pull the lower case all the way off.

    • Use a plastic opening tool to pry the shoulder button ribbon cables off their sockets on the motherboard.

    • Remove the lower case from the device.

  6. Nintendo 3DS Microphone Replacement, Microphone: stap 6, afbeelding 1 van 2 Nintendo 3DS Microphone Replacement, Microphone: stap 6, afbeelding 2 van 2
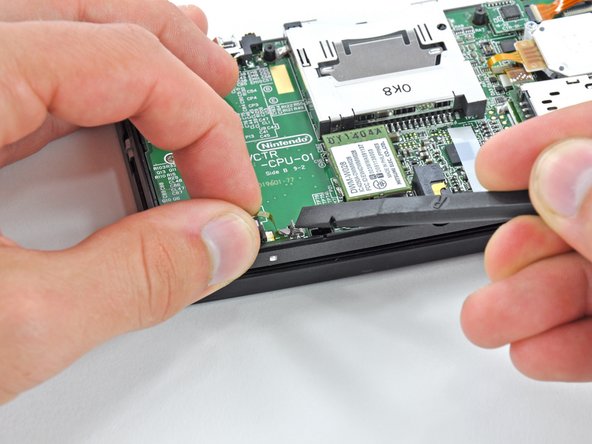
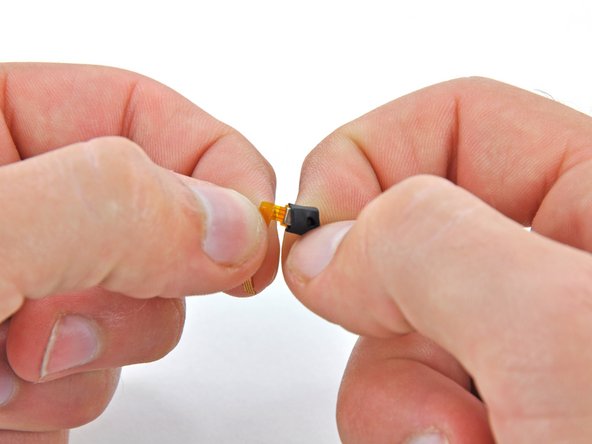
    • Grasp the microphone ribbon cable near the microphone with a pair of tweezers.

    • Pull the microphone straight up out of the upper case.

  7. Nintendo 3DS Microphone Replacement: stap 7, afbeelding 1 van 2 Nintendo 3DS Microphone Replacement: stap 7, afbeelding 2 van 2
    • Use the flat end of a spudger or your fingernail to flip up the retaining flap on the Microphone ribbon cable ZIF socket.

    • Be sure you are prying up on the hinged retaining flap, not the socket itself.

  8. Nintendo 3DS Microphone Replacement: stap 8, afbeelding 1 van 2 Nintendo 3DS Microphone Replacement: stap 8, afbeelding 2 van 2
    • Lift the microphone and its attached ribbon cable off the motherboard.

    • If your replacement microphone doesn't come with a silicone cover, peel the cover off the original one and reuse it.

Conclusie

To reassemble your device, follow these instructions in reverse order.

3 andere personen hebben deze handleiding voltooid.

David Hodson

Lid sinds: 04/13/10

150.352 Reputatie

127 handleidingen geschreven

2 opmerkingen

Can someone please tell me how to acquire a new microphone chip?

Grimmy Animates - Antwoord

You are able to purchase replacement microphones on amazon for less than $10 USD

Julianne McBride -

Voeg opmerking toe

Weergavestatistieken:

Afgelopen 24 uren: 7

Afgelopen 7 dagen: 27

Afgelopen 30 dagen: 94

Altijd: 9,684