Deze versie kan foutieve bewerkingen bevatten. Schakel over naar de recentste gecontroleerde momentopname.
Wat je nodig hebt
-
Deze stap is niet vertaald. Help het te vertalen
-
Unscrew the four Phillips #00 screws along the top of the back cover.
-
-
Deze stap is niet vertaald. Help het te vertalen
-
Grab the top edge of the back cover with your opposite hand so that the cover does not fall back into place.
-
Pull the back cover up and away from the rest of the device to remove it.
-
-
Deze stap is niet vertaald. Help het te vertalen
-
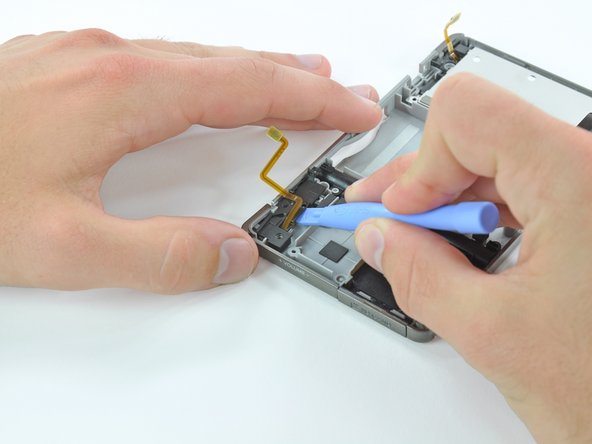
Insert a plastic opening tool into the notch in the lower case above the battery.
-
Pry the battery up with the plastic opening tool.
-
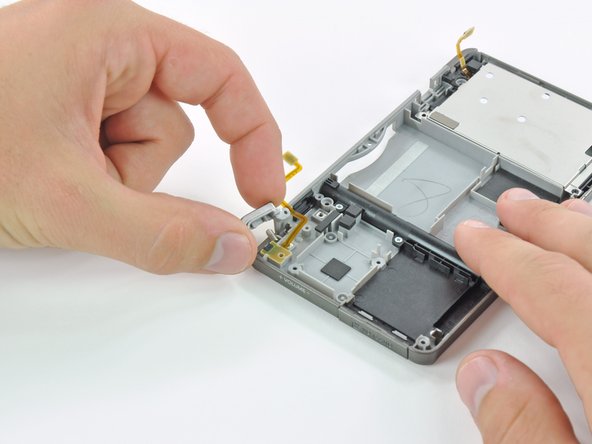
Grab the top edge of the battery and lift it out of the lower case.
-
-
-
Deze stap is niet vertaald. Help het te vertalen
-
Remove the nine 6.3 mm black Phillips screws from the lower case.
-
Remove the 2.4 mm silver Phillips screw above the game cartridge slot.
-
-
Deze stap is niet vertaald. Help het te vertalen
-
Lift the bottom edge of the lower case off the rest of the 3DS.
-
Use a plastic opening tool to pry the shoulder button ribbon cables off their sockets on the motherboard.
-
Remove the lower case from the device.
-
-
Deze stap is niet vertaald. Help het te vertalen
-
Remove the three 3.6 mm Phillips screws from the button housing.
-
-
Deze stap is niet vertaald. Help het te vertalen
-
Insert a plastic opening tool under the left side of the left shoulder button cover.
-
Pry the black plastic cover up from the lower case.
-
Grab the cover and lift it off of the lower case.
-
-
Deze stap is niet vertaald. Help het te vertalen
-
Press lightly on the back of the button until it becomes unattached. Be careful not to lose the small spring and pin behind the plastic button.
-


Annuleren: ik heb deze handleiding niet afgemaakt.
42 andere personen hebben deze handleiding voltooid.
