Inleiding
This guide provides simple step-by-step instructions explaining how to replace the lens of a Nikon COOLPIX P4. The lens on this digital camera allows users to zoom in and out and is protected by a shutter. The camera itself is a basic compact point-and-shoot model.
WARNING: The lens is made of glass. There is a risk of scratches, cracks, or other damage to the glass, so caution should be exercised when handing the lens.
The lens of the Nikon COOLPIX P4 may need to be replaced if there are lens errors, cracks or damage, lens housing problems, or other issues that render the camera faulty and/or inoperable. This is a beginner-friendly guide. No special skills are required to complete this guide, only a basic understanding of how to use a screwdriver and handle a camera.
WARNING: This replacement guide involves disassembling parts of the Nikon COOLPIX P4 in order to complete the lens replacement. Wires, cables, and the motherboard will be exposed. As with disassembling any electronic device, there is potential risk of damage. Specifically, in Step 10, there is potential for device damage, so extra care must be taken.
Wat je nodig hebt
-
-
-
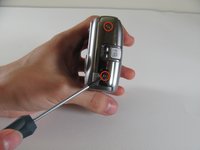
Flip the camera upside down (have the side with the buttons facing away from you)
-
Look for the side with the triangle icon with three lines in it, this is the battery door. Add pressure and slide this door slightly until it clicks and pops open.
 Vraag FixBot
-
-
-
Once the door clicks, you can open it to reveal the slots holding the memory card and the battery.
-
Focusing on the larger slot, this holds the battery. Push the orange tab away from the slot, this will eject the old battery if one was previously inside.
-
Once this slot is open, you can place the new battery inside.
-
-
-
-
-
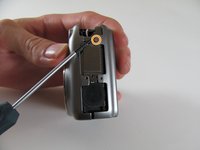
Remove the four 2.2 mm screws located on the bottom of the camera.
-
-
-
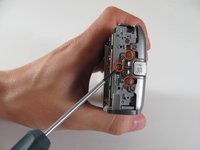
Remove the two 2.9 mm screws from the side panel.
-
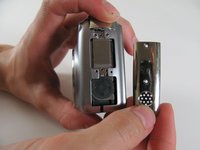
Remove the side panel.
-
-
-
Remove the two 5 mm screws from the right side panel.
-
Remove the panel from the right side.
-
Remove the single 2.1 mm screw set underneath the panel.
-
-
-
Remove the two 4.8 mm screws attaching the back panel to the body on the left side.
-
-
-
Remove the three 4.8 mm screws from the A/V out tab on the left side.
-
Remove the tab.
-
-
-
Remove the two 4.6 mm screws attaching the front panel to the body on the left side.
-
-
-
-
Remove the 2.2 mm screw.
-
Remove the 2.9 mm screw.
-
Remove the 2.1 mm screw.
-
-
-
-
-
Detach the cable that connects the lens to the left side of the motherboard.
-
-
-
Remove the three 2.8 mm screws from the motherboard.
-
Detach the orange tab with the foam on top.
-
-
-
Carefully remove the tab that connects the flash to the motherboard from the port by gently pulling the connector to the right and out of its port.
-
-
-
-
Locate the orange plug on the right side of the lens.
-
Carefully snap the plug out of place.
-
-
-
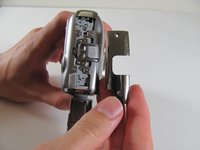
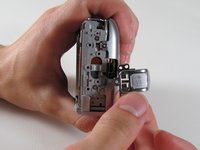
Once the orange piece detaches, gently pull up the flash unit from its place in the camera.
-
-


To reassemble your device, follow these instructions in reverse order.
Annuleren: ik heb deze handleiding niet afgemaakt.
Één andere persoon heeft deze handleiding voltooid.
Team

Cal Poly, Team 8-5, Regan Spring 2011 Lid van Cal Poly, Team 8-5, Regan Spring 2011
CPSU-REGAN-S11S8G5
4 Leden
10 handleidingen geschreven