Ga door naar hoofdinhoud

Nest Learning Thermostat 2nd Generation Auto-Away Sensor Replacement

Wat je nodig hebt

  1. Nest Learning Thermostat 2nd Generation Auto-Away Sensor Replacement, Removal from Wall: stap 1, afbeelding 1 van 2 Nest Learning Thermostat 2nd Generation Auto-Away Sensor Replacement, Removal from Wall: stap 1, afbeelding 2 van 2
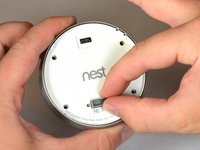
    • Grasp the display's metal outer ring with your fingers and pull directly away from the wall.

  2. Nest Learning Thermostat 2nd Generation Auto-Away Sensor Replacement, Open Display: stap 2, afbeelding 1 van 1
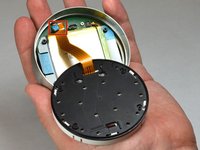
    • Turn the display over.

    • Remove the four 6 mm screws from the back of the display using a Phillips #0 screwdriver.

  3. Nest Learning Thermostat 2nd Generation Auto-Away Sensor Replacement, Remove the back of the display: stap 3, afbeelding 1 van 2 Nest Learning Thermostat 2nd Generation Auto-Away Sensor Replacement, Remove the back of the display: stap 3, afbeelding 2 van 2
    • Pinch the gray 20-pin connector with your fingers and pull directly away from the display.

    • Do NOT pull too far as there is a ribbon on the back panel connecting the 20-pin connector to the display.

  4. Nest Learning Thermostat 2nd Generation Auto-Away Sensor Replacement, Disconnect the base connection ribbon cable.: stap 4, afbeelding 1 van 3 Nest Learning Thermostat 2nd Generation Auto-Away Sensor Replacement, Disconnect the base connection ribbon cable.: stap 4, afbeelding 2 van 3 Nest Learning Thermostat 2nd Generation Auto-Away Sensor Replacement, Disconnect the base connection ribbon cable.: stap 4, afbeelding 3 van 3
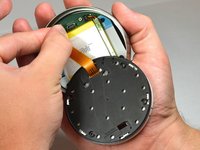
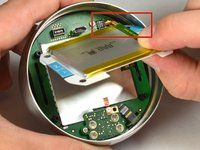
    • Locate the blue pull tab at the end of the ribbon which says, "1. Pull".

    • Grasp the tab with your fingers and pull directly away from the motherboard.

  5. Nest Learning Thermostat 2nd Generation Auto-Away Sensor Replacement, Lift battery from the base: stap 5, afbeelding 1 van 2 Nest Learning Thermostat 2nd Generation Auto-Away Sensor Replacement, Lift battery from the base: stap 5, afbeelding 2 van 2
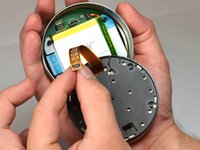
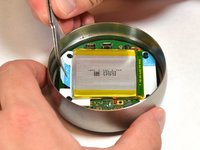
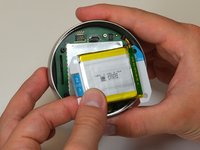
    • Locate the blue tab which says, "2. Pull".

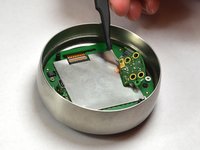
    • Use tweezers to pull the battery up and away from the display.

    • Do NOT pull too far, as the battery is still connected to the motherboard and must be unplugged.

  6. Nest Learning Thermostat 2nd Generation Auto-Away Sensor Replacement, Disconnect the battery from the motherboard: stap 6, afbeelding 1 van 2 Nest Learning Thermostat 2nd Generation Auto-Away Sensor Replacement, Disconnect the battery from the motherboard: stap 6, afbeelding 2 van 2
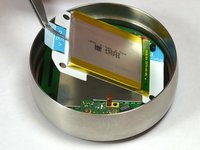
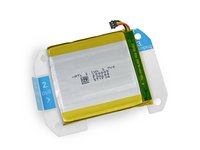
    • Locate the blue tab which says "3 unplug".

    • Grasp the battery with your fingers. Pull gently directly away from the display to unplug the battery from the motherboard.

  7. Nest Learning Thermostat 2nd Generation Auto-Away Sensor Replacement, Remove battery from the display: stap 7, afbeelding 1 van 3 Nest Learning Thermostat 2nd Generation Auto-Away Sensor Replacement, Remove battery from the display: stap 7, afbeelding 2 van 3 Nest Learning Thermostat 2nd Generation Auto-Away Sensor Replacement, Remove battery from the display: stap 7, afbeelding 3 van 3
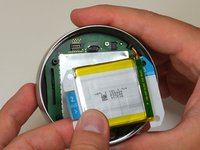
    • Grasp the battery with your fingers and pull directly away from motherboard to separate the battery from the display.

  8. Nest Learning Thermostat 2nd Generation Auto-Away Sensor Replacement, Locate auto-away sensor: stap 8, afbeelding 1 van 1
    • Locate the auto-away sensor.

  9. Nest Learning Thermostat 2nd Generation Auto-Away Sensor Replacement, Remove screws: stap 9, afbeelding 1 van 2 Nest Learning Thermostat 2nd Generation Auto-Away Sensor Replacement, Remove screws: stap 9, afbeelding 2 van 2
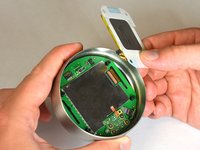
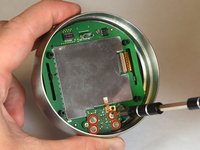
    • Remove the four 3mm screws with a #0 Phillips screwdriver.

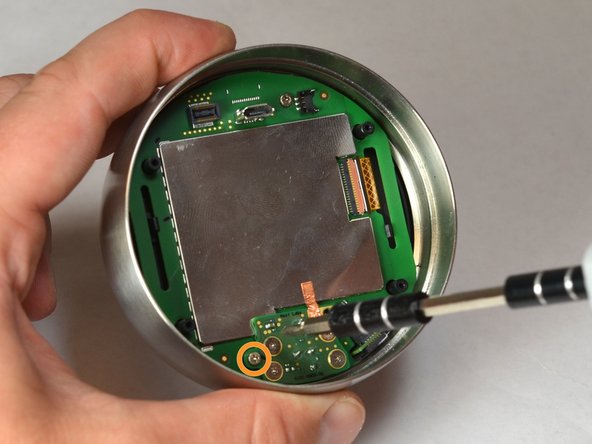
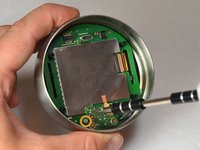
    • Remove the one 4mm screw located at the edge of the auto-away sensor. Use a #0 Phillips screwdriver.

  10. Nest Learning Thermostat 2nd Generation Auto-Away Sensor Replacement, Remove auto-away sensor: stap 10, afbeelding 1 van 3 Nest Learning Thermostat 2nd Generation Auto-Away Sensor Replacement, Remove auto-away sensor: stap 10, afbeelding 2 van 3 Nest Learning Thermostat 2nd Generation Auto-Away Sensor Replacement, Remove auto-away sensor: stap 10, afbeelding 3 van 3
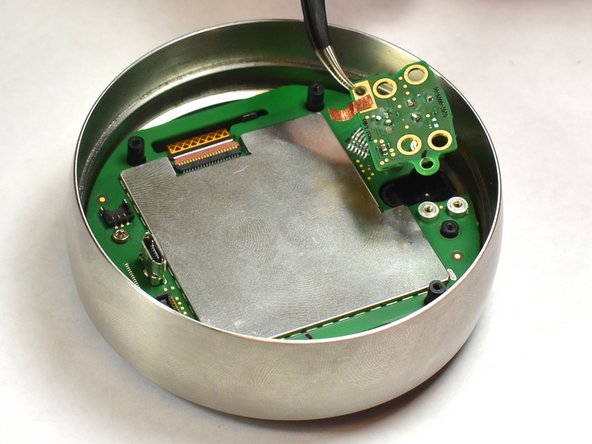
    • Lift the auto-away sensor from motherboard using tweezers.

    • Peel the copper foil gently from the EMI shield.

Conclusie

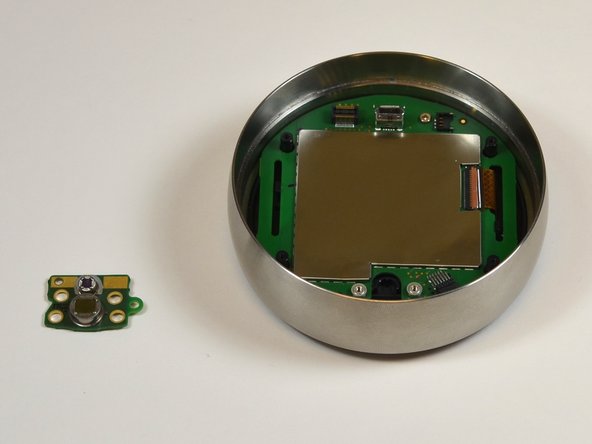
To reassemble your device, follow these instructions in reverse order.

2 andere personen hebben deze handleiding voltooid.

Justin Curry

Lid sinds: 09/23/14

264 Reputatie

2 handleidingen geschreven

Team

USF Tampa, Team 11-5, Blackwell Fall 2014 Lid van USF Tampa, Team 11-5, Blackwell Fall 2014

USFT-BLACKWELL-F14S11G5

5 Leden

12 handleidingen geschreven

0 opmerkingen

Voeg opmerking toe

Weergavestatistieken:

Afgelopen 24 uren: 0

Afgelopen 7 dagen: 1

Afgelopen 30 dagen: 7

Altijd: 2,042