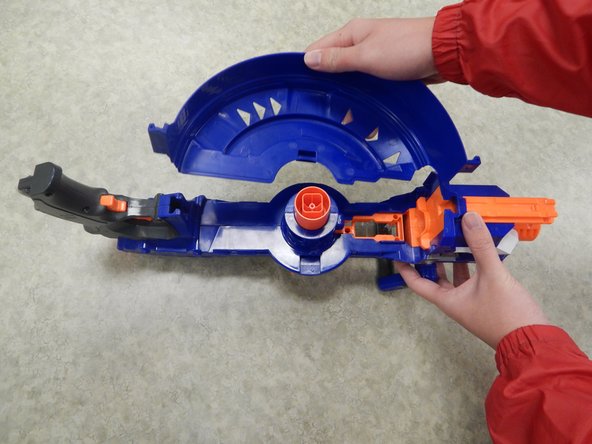
Ga door naar hoofdinhoud

Nerf N-Strike Elite Hail-Fire Inner Plastic Components Replacement

Wat je nodig hebt

  1. Nerf N-Strike Elite Hail-Fire Inner Plastic Components Replacement, Left Shell: stap 1, afbeelding 1 van 3 Nerf N-Strike Elite Hail-Fire Inner Plastic Components Replacement, Left Shell: stap 1, afbeelding 2 van 3 Nerf N-Strike Elite Hail-Fire Inner Plastic Components Replacement, Left Shell: stap 1, afbeelding 3 van 3
    • Before disassembling your Nerf Hail-Fire, be sure to remove the batteries.

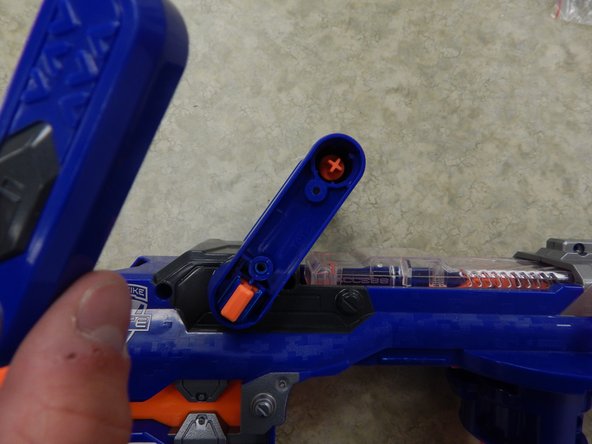
    • Remove the two 9.0 mm Phillips screws securing the battery compartment.

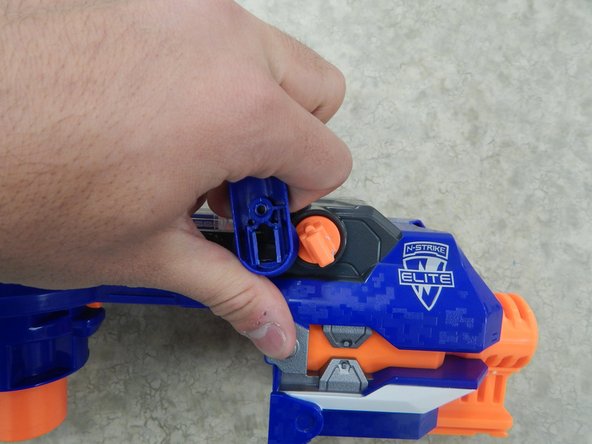
    • Slide the battery compartment out.

  2. Nerf N-Strike Elite Hail-Fire Inner Plastic Components Replacement: stap 2, afbeelding 1 van 1
    • Remove the five 9.0 mm Phillips screws securing the trigger.

  3. Nerf N-Strike Elite Hail-Fire Inner Plastic Components Replacement: stap 3, afbeelding 1 van 2 Nerf N-Strike Elite Hail-Fire Inner Plastic Components Replacement: stap 3, afbeelding 2 van 2
    • Remove the single 11.0 mm Phillips screw securing the magazine cartridge chambers.

    • Pull the entire chamber upwards to separate it from the rest of the Nerf Gun.

  4. Nerf N-Strike Elite Hail-Fire Inner Plastic Components Replacement: stap 4, afbeelding 1 van 3 Nerf N-Strike Elite Hail-Fire Inner Plastic Components Replacement: stap 4, afbeelding 2 van 3 Nerf N-Strike Elite Hail-Fire Inner Plastic Components Replacement: stap 4, afbeelding 3 van 3
    • Remove both halves of the ring by tugging on it upwards until the lock gets freed.

    • This requires quite a bit of force and if you are not careful, you may break the plastic lock.

  5. Nerf N-Strike Elite Hail-Fire Inner Plastic Components Replacement: stap 5, afbeelding 1 van 1
    • Remove the four 9.0 mm Phillips screws from the newly revealed cylinder.

  6. Nerf N-Strike Elite Hail-Fire Inner Plastic Components Replacement: stap 6, afbeelding 1 van 1
    • Remove the three 9.0 mm Phillips screws holding the top latch of the Nerf Gun together.

  7. Nerf N-Strike Elite Hail-Fire Inner Plastic Components Replacement: stap 7, afbeelding 1 van 1
    • Remove the three 9.0 mm Phillips screws holding together the firing chamber.

    • Remove the single 7.0 mm Phillips screw below the barrel.

    • Remove the two 14.0 mm Philips screws using a screwdriver with a length of approximately 4.0 inches and a diameter of approximately 0.2 cm.

  8. Nerf N-Strike Elite Hail-Fire Inner Plastic Components Replacement: stap 8, afbeelding 1 van 1
    • Remove the single 14.0 mm Phillips screw holding together the handle and the Nerf Gun.

  9. Nerf N-Strike Elite Hail-Fire Inner Plastic Components Replacement: stap 9, afbeelding 1 van 2 Nerf N-Strike Elite Hail-Fire Inner Plastic Components Replacement: stap 9, afbeelding 2 van 2
    • Remove the two 9.0 mm Phillips screws holding together the handle.

    • Remove the plastic cover of the handle.

  10. Nerf N-Strike Elite Hail-Fire Inner Plastic Components Replacement: stap 10, afbeelding 1 van 2 Nerf N-Strike Elite Hail-Fire Inner Plastic Components Replacement: stap 10, afbeelding 2 van 2
    • Insert one plastic opening tool inside one side of the orange part depicted in the picture.

    • Insert a second plastic opening tool to the other side of the orange part and gradually pull the piece out, freeing it from the handle.

  11. Nerf N-Strike Elite Hail-Fire Inner Plastic Components Replacement: stap 11, afbeelding 1 van 3 Nerf N-Strike Elite Hail-Fire Inner Plastic Components Replacement: stap 11, afbeelding 2 van 3 Nerf N-Strike Elite Hail-Fire Inner Plastic Components Replacement: stap 11, afbeelding 3 van 3
    • Pull one end of the handle away from the orange latch.

    • Repeat the procedure on the other side to completely remove the handle from the rest of the Nerf Gun.

  12. Nerf N-Strike Elite Hail-Fire Inner Plastic Components Replacement: stap 12, afbeelding 1 van 3 Nerf N-Strike Elite Hail-Fire Inner Plastic Components Replacement: stap 12, afbeelding 2 van 3 Nerf N-Strike Elite Hail-Fire Inner Plastic Components Replacement: stap 12, afbeelding 3 van 3
    • Lift the entire left shell slowly. The process should be easy and if there is any resistance, there is something wrong. You may have forgotten a screw.

    • Completely remove the left shell from the rest of the Nerf Gun.

  13. Nerf N-Strike Elite Hail-Fire Inner Plastic Components Replacement, Inner Plastic Components: stap 13, afbeelding 1 van 3 Nerf N-Strike Elite Hail-Fire Inner Plastic Components Replacement, Inner Plastic Components: stap 13, afbeelding 2 van 3 Nerf N-Strike Elite Hail-Fire Inner Plastic Components Replacement, Inner Plastic Components: stap 13, afbeelding 3 van 3
    • Remove the cartridge support.

  14. Nerf N-Strike Elite Hail-Fire Inner Plastic Components Replacement: stap 14, afbeelding 1 van 3 Nerf N-Strike Elite Hail-Fire Inner Plastic Components Replacement: stap 14, afbeelding 2 van 3 Nerf N-Strike Elite Hail-Fire Inner Plastic Components Replacement: stap 14, afbeelding 3 van 3
    • Remove the handle crank.

  15. Nerf N-Strike Elite Hail-Fire Inner Plastic Components Replacement: stap 15, afbeelding 1 van 2 Nerf N-Strike Elite Hail-Fire Inner Plastic Components Replacement: stap 15, afbeelding 2 van 2
    • Remove the clear plastic barrel cover.

  16. Nerf N-Strike Elite Hail-Fire Inner Plastic Components Replacement: stap 16, afbeelding 1 van 2 Nerf N-Strike Elite Hail-Fire Inner Plastic Components Replacement: stap 16, afbeelding 2 van 2
    • Remove the firing pin.

Conclusie

To reassemble your device, follow these instructions in reverse order.

Één andere persoon heeft deze handleiding voltooid.

sage

Lid sinds: 01/24/14

301 Reputatie

3 handleidingen geschreven

Team

Cal Poly, Team 13-13, Regan Winter 2014 Lid van Cal Poly, Team 13-13, Regan Winter 2014

CPSU-REGAN-W14S13G13

4 Leden

7 handleidingen geschreven

0 opmerkingen

Voeg opmerking toe

Weergavestatistieken:

Afgelopen 24 uren: 0

Afgelopen 7 dagen: 0

Afgelopen 30 dagen: 5

Altijd: 1,186