Ga door naar hoofdinhoud

NP-R540-JA09US Keyboard Replacement

Wat je nodig hebt

  1. NP-R540-JA09US Keyboard Replacement, Battery: stap 1, afbeelding 1 van 1
    • Turn off laptop before starting.

    • Remove power cable before starting.

    • Flip the laptop over so that the bottom of the laptop is facing upwards.

  2. NP-R540-JA09US Keyboard Replacement: stap 2, afbeelding 1 van 1
    • Pull the two latches outward.

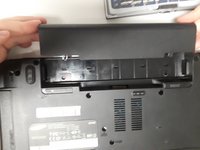
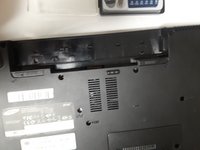
  3. NP-R540-JA09US Keyboard Replacement: stap 3, afbeelding 1 van 2 NP-R540-JA09US Keyboard Replacement: stap 3, afbeelding 2 van 2
    • Slide the battery out of the laptop.

  4. NP-R540-JA09US Keyboard Replacement, Optical Drive: stap 4, afbeelding 1 van 1
    • Remove securing screw with the PH0 head.

  5. NP-R540-JA09US Keyboard Replacement: stap 5, afbeelding 1 van 1
    • Slide the optical drive out and remove it from the device.

  6. NP-R540-JA09US Keyboard Replacement, Keyboard: stap 6, afbeelding 1 van 1
    • Remove the two Phillips #0 screws labeled KBD.

    • There are 5 clips along the top of the keyboard. Insert a thin opener tool (iSessamo tool or similar) between each clip and the keyboard tray to release it.

    • Make sure to pry the metal keyboard base and not the keycaps.

  7. NP-R540-JA09US Keyboard Replacement: stap 8, afbeelding 1 van 1
    • Do not bend your keyboard as shown in this picture.

    • Lift the keyboard up to release catches on the sides, then slide the keyboard towards the screen to slide tabs out of the slots at the bottom.

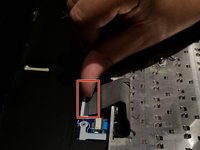
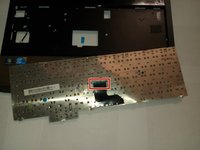
  8. NP-R540-JA09US Keyboard Replacement: stap 9, afbeelding 1 van 2 NP-R540-JA09US Keyboard Replacement: stap 9, afbeelding 2 van 2
    • Disconnect the keyboard cable from the motherboard.

Conclusie

To reassemble your device, follow these instructions in reverse order.

2 andere personen hebben deze handleiding voltooid.

0 opmerkingen

Voeg opmerking toe

Weergavestatistieken:

Afgelopen 24 uren: 5

Afgelopen 7 dagen: 5

Afgelopen 30 dagen: 14

Altijd: 856