Ga door naar hoofdinhoud

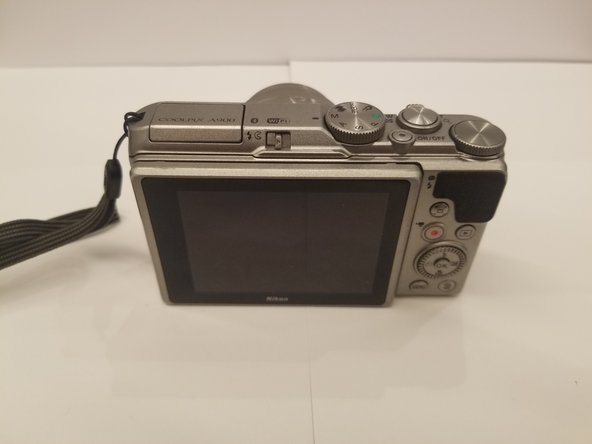
NIkon Coolpix A900 I/O Cover Replacement

Wat je nodig hebt

  1. NIkon Coolpix A900 I/O Cover Replacement, Battery: stap 1, afbeelding 1 van 1
    • Orient the camera so that it is upside down, with the lens facing towards you.

  2. NIkon Coolpix A900 I/O Cover Replacement: stap 2, afbeelding 1 van 2 NIkon Coolpix A900 I/O Cover Replacement: stap 2, afbeelding 2 van 2
    • Slide the battery door lock left to unlock it.

    • The battery door will automatically open.

  3. NIkon Coolpix A900 I/O Cover Replacement: stap 3, afbeelding 1 van 2 NIkon Coolpix A900 I/O Cover Replacement: stap 3, afbeelding 2 van 2
    • Slide the yellow tab up to release the battery.

    • To re-insert a battery, slide the battery back in until the yellow tab locks it in place.

    • There is a diagram on the opposite side of the battery compartment to help you orient the battery correctly.

  4. NIkon Coolpix A900 I/O Cover Replacement, Rear Case: stap 4, afbeelding 1 van 3 NIkon Coolpix A900 I/O Cover Replacement, Rear Case: stap 4, afbeelding 2 van 3 NIkon Coolpix A900 I/O Cover Replacement, Rear Case: stap 4, afbeelding 3 van 3
    • Orient the camera upside down, with the lens facing away from you.

    • Remove the two 3mm Phillips #00 screws from the right.

    • Remove the two 3.4mm Phillips #00 screws from the left.

  5. NIkon Coolpix A900 I/O Cover Replacement: stap 5, afbeelding 1 van 3 NIkon Coolpix A900 I/O Cover Replacement: stap 5, afbeelding 2 van 3 NIkon Coolpix A900 I/O Cover Replacement: stap 5, afbeelding 3 van 3
    • Turn the camera on its side, with the lens facing away from you.

    • Remove the 3.4mm Phillips #00 screw. Repeat this for the opposite side of the camera.

  6. NIkon Coolpix A900 I/O Cover Replacement: stap 6, afbeelding 1 van 3 NIkon Coolpix A900 I/O Cover Replacement: stap 6, afbeelding 2 van 3 NIkon Coolpix A900 I/O Cover Replacement: stap 6, afbeelding 3 van 3
    • Place the camera upright with the lens facing away from you.

    • Move the monitor down, and remove two 4.4 mm screws.

  7. NIkon Coolpix A900 I/O Cover Replacement: stap 7, afbeelding 1 van 2 NIkon Coolpix A900 I/O Cover Replacement: stap 7, afbeelding 2 van 2
    • Remove the two black 2.5 mm screws from the monitor bracket.

  8. NIkon Coolpix A900 I/O Cover Replacement: stap 8, afbeelding 1 van 2 NIkon Coolpix A900 I/O Cover Replacement: stap 8, afbeelding 2 van 2
    • Return the monitor to the closed position.

    • Gently open the rear case.

    • You may need opening tools to help separate the rear case.

    • Be careful when opening the rear case to not damage the ribbon connectors.

  9. NIkon Coolpix A900 I/O Cover Replacement: stap 9, afbeelding 1 van 3 NIkon Coolpix A900 I/O Cover Replacement: stap 9, afbeelding 2 van 3 NIkon Coolpix A900 I/O Cover Replacement: stap 9, afbeelding 3 van 3
    • Place the camera lens down, while supporting the rear case.

    • Unlock the two ribbons by using your finger to lift the plastic hinge on the ribbon connector.

    • With the ribbons disconnected, you can now remove the rear case.

  10. NIkon Coolpix A900 I/O Cover Replacement, I/O Cover: stap 10, afbeelding 1 van 3 NIkon Coolpix A900 I/O Cover Replacement, I/O Cover: stap 10, afbeelding 2 van 3 NIkon Coolpix A900 I/O Cover Replacement, I/O Cover: stap 10, afbeelding 3 van 3
    • Locate the I/O cover on the rear case.

    • On the inside of the case, unhook the I/O cover by lifting up.

    • You may not need the spudger to remove the cover.

  11. NIkon Coolpix A900 I/O Cover Replacement: stap 11, afbeelding 1 van 1
    • Remove the I/O cover by gently pulling away from the rear case.

Conclusie

To reassemble your device, follow these instructions in reverse order.

0 opmerkingen

Voeg opmerking toe

Weergavestatistieken:

Afgelopen 24 uren: 1

Afgelopen 7 dagen: 2

Afgelopen 30 dagen: 6

Altijd: 425