Ga door naar hoofdinhoud

Mr. Coffee DW13 O Ring Replacement

Wat je nodig hebt

  1. Mr. Coffee DW13 O Ring Replacement, Base: stap 1, afbeelding 1 van 2 Mr. Coffee DW13 O Ring Replacement, Base: stap 1, afbeelding 2 van 2
    • Before performing this repair, be sure that your machine is unplugged and dry and that your work space is clean.

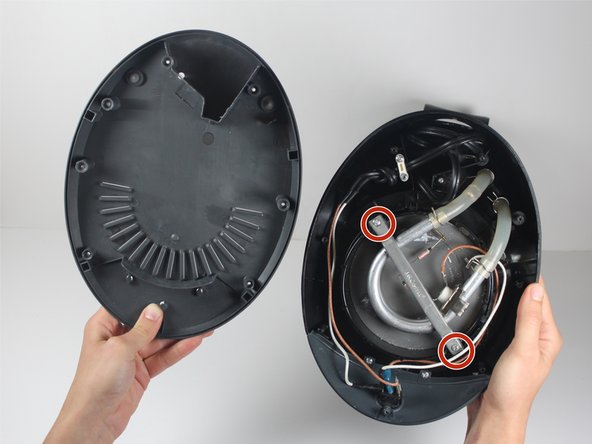
    • Flip the Mr. Coffee DW13 over so that the lid is facing away from you and the base is facing toward you.

  2. Mr. Coffee DW13 O Ring Replacement: stap 2, afbeelding 1 van 2 Mr. Coffee DW13 O Ring Replacement: stap 2, afbeelding 2 van 2
    • Remove the eight 11 mm screws that secure the base of the machine with a Phillips Head #2 screwdriver.

  3. Mr. Coffee DW13 O Ring Replacement: stap 3, afbeelding 1 van 1
    • Gently lift the base cover to expose the inside of the coffee machine.

  4. Mr. Coffee DW13 O Ring Replacement, O Ring: stap 4, afbeelding 1 van 2 Mr. Coffee DW13 O Ring Replacement, O Ring: stap 4, afbeelding 2 van 2
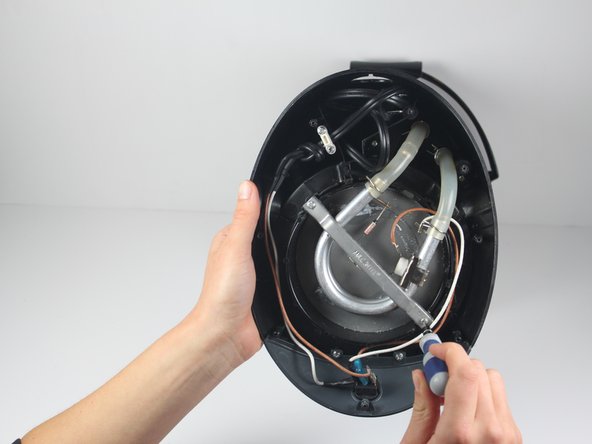
    • Remove the two 13mm screws securing the silver support bracket using a #2 Phillips head screwdriver.
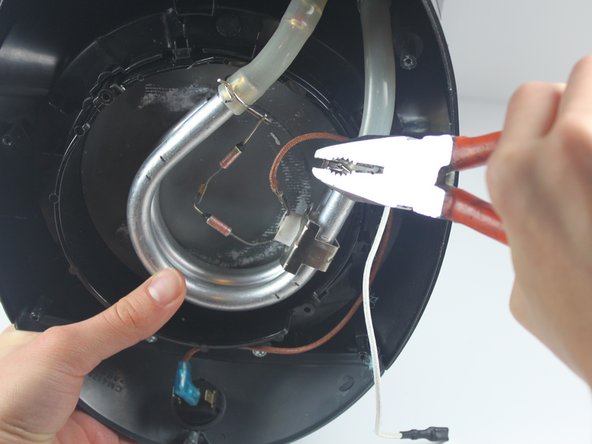
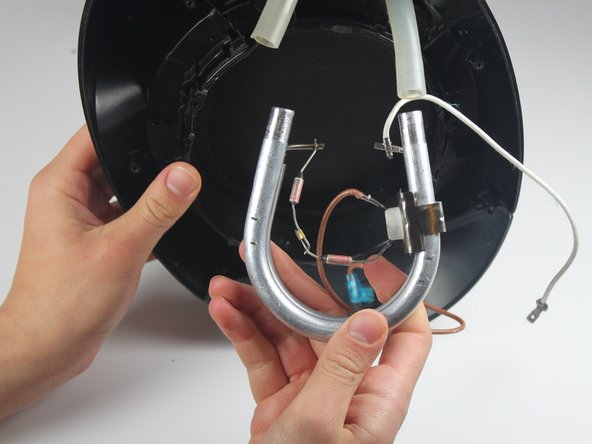
  5. Mr. Coffee DW13 O Ring Replacement: stap 5, afbeelding 1 van 1
    • Gently lift the silver support bracket freeing the heating plate from the heating coil.

  6. Mr. Coffee DW13 O Ring Replacement: stap 6, afbeelding 1 van 2 Mr. Coffee DW13 O Ring Replacement: stap 6, afbeelding 2 van 2
    • Use needle-nose pilers to pinch and loosen the crimps

  7. Mr. Coffee DW13 O Ring Replacement: stap 7, afbeelding 1 van 1
    • Once the crimps are loosened, slide them down the tubing.

  8. Mr. Coffee DW13 O Ring Replacement: stap 8, afbeelding 1 van 2 Mr. Coffee DW13 O Ring Replacement: stap 8, afbeelding 2 van 2
    • Separate the tubing from the heating coil by grasping the tubing in one hand and the heating coil in the other and gently pulling apart.

  9. Mr. Coffee DW13 O Ring Replacement: stap 9, afbeelding 1 van 2 Mr. Coffee DW13 O Ring Replacement: stap 9, afbeelding 2 van 2
    • Place one of your hands on the front side of the heating plate.

    • Use this hand to gently push the heating plate towards yourself and out of the machine.

  10. Mr. Coffee DW13 O Ring Replacement: stap 10, afbeelding 1 van 2 Mr. Coffee DW13 O Ring Replacement: stap 10, afbeelding 2 van 2
    Gereedschap gebruikt in deze stap:
    Flathead 3/32" or 2.5 mm Screwdriver
    $5.49
    Koop
Conclusie

To reassemble your device, follow these instructions in reverse order.

3 andere personen hebben deze handleiding voltooid.

Madeline Landis

Lid sinds: 01/21/14

137 Reputatie

1 Handleiding geschreven

Team

Cal Poly, Team 10-31, Maness Winter 2014 Lid van Cal Poly, Team 10-31, Maness Winter 2014

CPSU-MANESS-W14S10G31

4 Leden

6 handleidingen geschreven

0 opmerkingen

Voeg opmerking toe

Weergavestatistieken:

Afgelopen 24 uren: 0

Afgelopen 7 dagen: 1

Afgelopen 30 dagen: 4

Altijd: 1,018