Ga door naar hoofdinhoud

Mr. Coffee 5-Cup Mini Brew Thermal Fuse Replacement

Wat je nodig hebt

  1. Mr. Coffee 5-Cup Mini Brew Thermal Fuse Replacement, Thermal Fuse: stap 1, afbeelding 1 van 3 Mr. Coffee 5-Cup Mini Brew Thermal Fuse Replacement, Thermal Fuse: stap 1, afbeelding 2 van 3 Mr. Coffee 5-Cup Mini Brew Thermal Fuse Replacement, Thermal Fuse: stap 1, afbeelding 3 van 3
    • Remove the coffee pot.

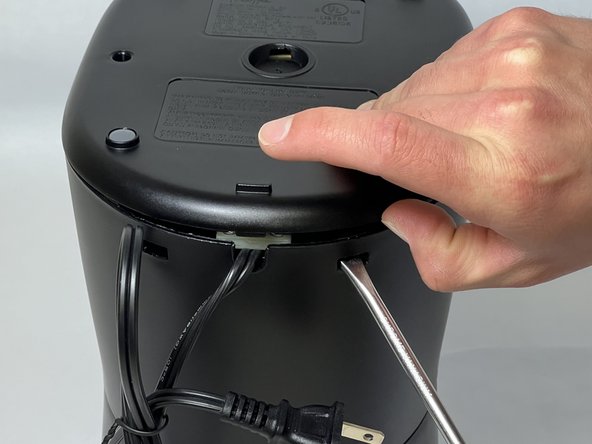
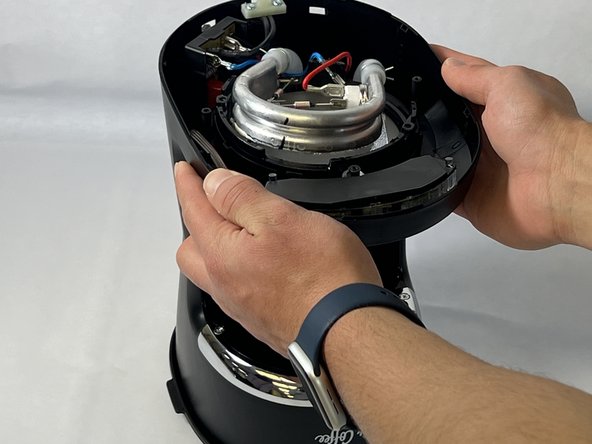
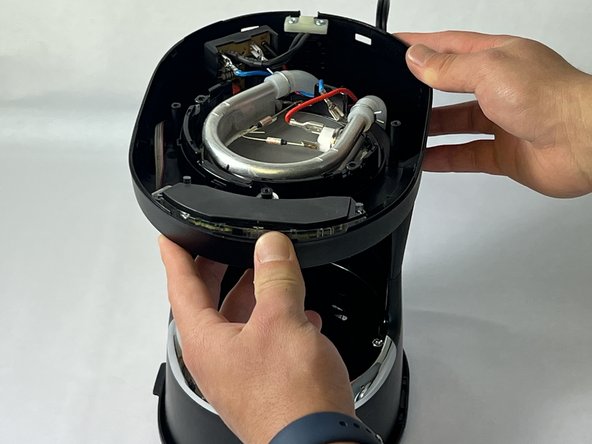
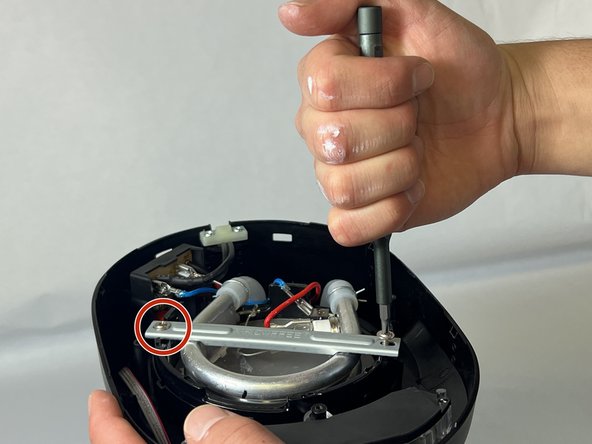
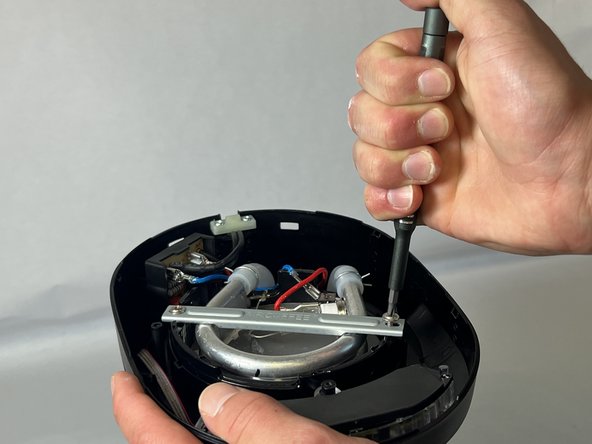
    • Flip the Mr. Coffee machine over so the base is facing up.

  2. Mr. Coffee 5-Cup Mini Brew Thermal Fuse Replacement: stap 2, afbeelding 1 van 2 Mr. Coffee 5-Cup Mini Brew Thermal Fuse Replacement: stap 2, afbeelding 2 van 2
    • Use the Y1 Tri-point screwdriver to remove the three 1.5 cm screws from the baseplate.

  3. Mr. Coffee 5-Cup Mini Brew Thermal Fuse Replacement: stap 3, afbeelding 1 van 3 Mr. Coffee 5-Cup Mini Brew Thermal Fuse Replacement: stap 3, afbeelding 2 van 3 Mr. Coffee 5-Cup Mini Brew Thermal Fuse Replacement: stap 3, afbeelding 3 van 3
    • Use a flat-head screwdriver to unclip the two clips from the back of the baseplate.

    • Unsnap the front clips and remove the baseplate.

  4. Mr. Coffee 5-Cup Mini Brew Thermal Fuse Replacement: stap 4, afbeelding 1 van 3 Mr. Coffee 5-Cup Mini Brew Thermal Fuse Replacement: stap 4, afbeelding 2 van 3 Mr. Coffee 5-Cup Mini Brew Thermal Fuse Replacement: stap 4, afbeelding 3 van 3
    • Use a Phillips #1 screwdriver to remove the two 1.5 cm screws on the metal bracket.

  5. Mr. Coffee 5-Cup Mini Brew Thermal Fuse Replacement: stap 5, afbeelding 1 van 3 Mr. Coffee 5-Cup Mini Brew Thermal Fuse Replacement: stap 5, afbeelding 2 van 3 Mr. Coffee 5-Cup Mini Brew Thermal Fuse Replacement: stap 5, afbeelding 3 van 3
    • Rotate the Mr. Coffee machine around so the front is facing you.

  6. Mr. Coffee 5-Cup Mini Brew Thermal Fuse Replacement: stap 6, afbeelding 1 van 1
    • Locate the two thermal fuses.

    • The thermal fuses are attached to two different mounts and to each other.

  7. Mr. Coffee 5-Cup Mini Brew Thermal Fuse Replacement: stap 7, afbeelding 1 van 3 Mr. Coffee 5-Cup Mini Brew Thermal Fuse Replacement: stap 7, afbeelding 2 van 3 Mr. Coffee 5-Cup Mini Brew Thermal Fuse Replacement: stap 7, afbeelding 3 van 3
    • Clip each fuse where it connects with its mount with wire cutters.

    • Discard the fuses.

  8. Mr. Coffee 5-Cup Mini Brew Thermal Fuse Replacement: stap 8, afbeelding 1 van 3 Mr. Coffee 5-Cup Mini Brew Thermal Fuse Replacement: stap 8, afbeelding 2 van 3 Mr. Coffee 5-Cup Mini Brew Thermal Fuse Replacement: stap 8, afbeelding 3 van 3
    • Do not touch the hot soldering iron. Use in a well ventilated area.

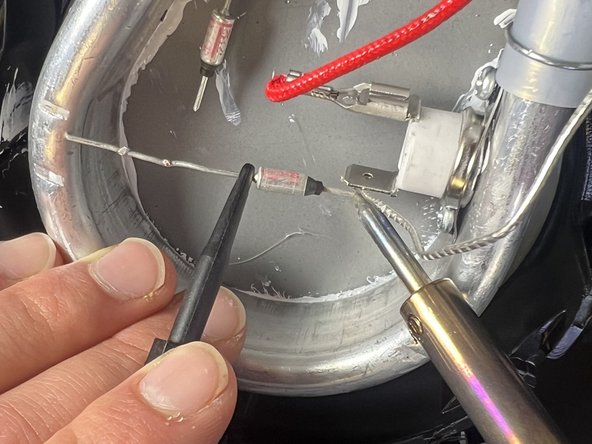
    • Hold the tail of the fuse with tweezers at the contact point from the previous fuse.

    • Avoid contact with soldering iron and other internal components.

    • Melt the solder material with the soldering iron at the point of contact until it melts and beads onto the tail of the fuse.

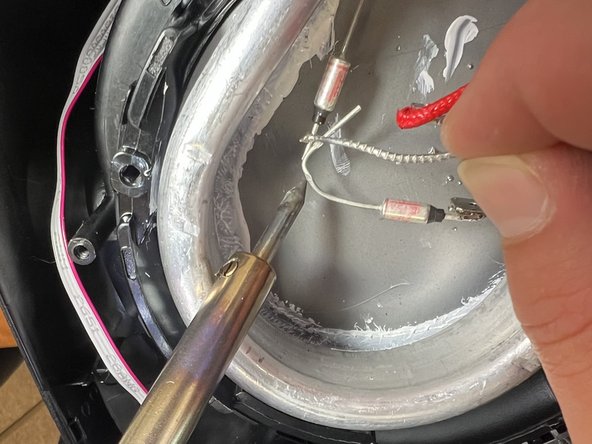
    • Hold the head of the new fuse with the tweezers at the contact point from the removed fuse.

    • Melt the solder material with the soldering iron at the point of contact until it melts and beads onto the head of the fuse.

    • While touching the wires of the fuses together, melt the soldering material with the soldering iron until it melts and beads onto the two wires.

  9. Mr. Coffee 5-Cup Mini Brew Thermal Fuse Replacement: stap 9, afbeelding 1 van 3 Mr. Coffee 5-Cup Mini Brew Thermal Fuse Replacement: stap 9, afbeelding 2 van 3 Mr. Coffee 5-Cup Mini Brew Thermal Fuse Replacement: stap 9, afbeelding 3 van 3
    • Place the support beam back into the original place.

    • Use a Phillips #1 screwdriver to fasten the 1.5 cm screws into place on the metal bracket.

    • The screws can be distinguished by looking at the head type. The two phillips-head type screws are for the metal support beam on the inside. The three tri-point head type screws are for securing the baseplate on the outside.

  10. Mr. Coffee 5-Cup Mini Brew Thermal Fuse Replacement: stap 10, afbeelding 1 van 1
    • Clip baseplate back into place by snapping the front into the clips first and then the back clips (by the cord).

  11. Mr. Coffee 5-Cup Mini Brew Thermal Fuse Replacement: stap 11, afbeelding 1 van 2 Mr. Coffee 5-Cup Mini Brew Thermal Fuse Replacement: stap 11, afbeelding 2 van 2
    • Use a Y1 Tri-point screwdriver to fasten the three 1.5 cm screws into place on the baseplate.

Eindstreep

Megan Wood

Lid sinds: 01/22/24

193 Reputatie

1 Handleiding geschreven

Team

UC Davis, Team 1-3, Morris Winter 2024 Lid van UC Davis, Team 1-3, Morris Winter 2024

UCD-MORRIS-W24S1G3

3 Leden

1 handleiding geschreven

0 opmerkingen

Voeg opmerking toe

Weergavestatistieken:

Afgelopen 24 uren: 1

Afgelopen 7 dagen: 5

Afgelopen 30 dagen: 24

Altijd: 95