Ga door naar hoofdinhoud

Motorola V60s Logic Board Replacement

Wat je nodig hebt

  1. Motorola V60s Logic Board Replacement, Battery: stap 1, afbeelding 1 van 3 Motorola V60s Logic Board Replacement, Battery: stap 1, afbeelding 2 van 3 Motorola V60s Logic Board Replacement, Battery: stap 1, afbeelding 3 van 3
    • Push in release lever towards top of phone, then use blue spudger to pry case off.

    • After case is removed from the back of the phone, you can simply use your hands to take it the rest of the way off.

    • Set cover aside in a safe location.

  2. Motorola V60s Logic Board Replacement: stap 2, afbeelding 1 van 2 Motorola V60s Logic Board Replacement: stap 2, afbeelding 2 van 2
    • Carefully grab battery towards bottom of phone.

    • Lift from bottom and take out of phone, set aside in a safe location.

  3. Motorola V60s Logic Board Replacement, Logic Board: stap 3, afbeelding 1 van 2 Motorola V60s Logic Board Replacement, Logic Board: stap 3, afbeelding 2 van 2
    • Unscrew four corner screws with T6 screwdriver.

    • Note: The two top screws are short and silver. The two bottom screws are black and long.

  4. Motorola V60s Logic Board Replacement: stap 4, afbeelding 1 van 3 Motorola V60s Logic Board Replacement: stap 4, afbeelding 2 van 3 Motorola V60s Logic Board Replacement: stap 4, afbeelding 3 van 3
    • Use a spudger to gently pry off back chassis. Wedge the spudger in crevice between back panel and phone and lift.

  5. Motorola V60s Logic Board Replacement: stap 5, afbeelding 1 van 3 Motorola V60s Logic Board Replacement: stap 5, afbeelding 2 van 3 Motorola V60s Logic Board Replacement: stap 5, afbeelding 3 van 3
    • Starting from left side of phone, remove side buttons and place aside.

    • Note: There should be three buttons. One on each side, and the top.

    • Return phone to starting orientation when done.

  6. Motorola V60s Logic Board Replacement: stap 6, afbeelding 1 van 3 Motorola V60s Logic Board Replacement: stap 6, afbeelding 2 van 3 Motorola V60s Logic Board Replacement: stap 6, afbeelding 3 van 3
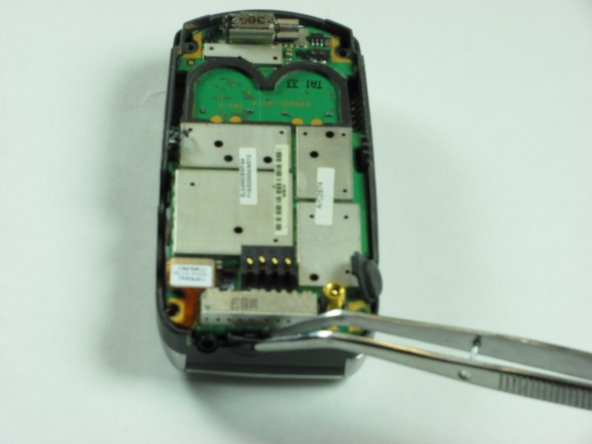
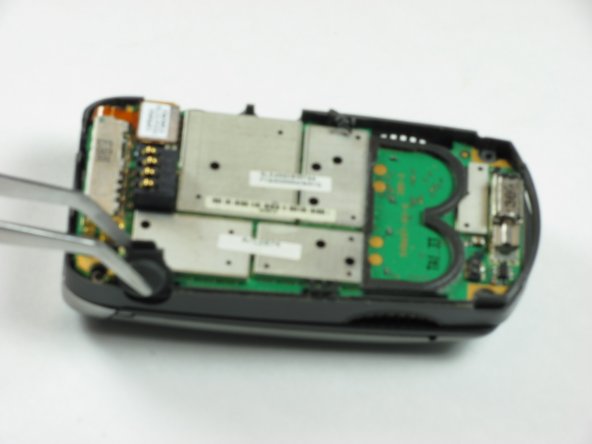
    • Gently remove orange ribbon cable by prying up with spudger.

  7. Motorola V60s Logic Board Replacement: stap 7, afbeelding 1 van 2 Motorola V60s Logic Board Replacement: stap 7, afbeelding 2 van 2
    • Use a spudger to pry up logic board by wedging in between logic board and chassis and lifting.

    • Note: Orange ribbon cable is fragile and can be broken.

Conclusie

To reassemble your device, follow these instructions in reverse order.

Één andere persoon heeft deze handleiding voltooid.

Eric Freeman

Lid sinds: 01/26/10

10 Reputatie

7 handleidingen geschreven

Team

Cal Poly, Team 8-48, Regan Winter 2010 Lid van Cal Poly, Team 8-48, Regan Winter 2010

CPSU-REGAN-W10S8G48

4 Leden

13 handleidingen geschreven

0 opmerkingen

Voeg opmerking toe

Weergavestatistieken:

Afgelopen 24 uren: 0

Afgelopen 7 dagen: 0

Afgelopen 30 dagen: 2

Altijd: 1,867