Ga door naar hoofdinhoud

Motorola V2397 Motherboard/Screen Replacement

Wat je nodig hebt

  1. Motorola V2397 Motherboard/Screen Replacement, Battery: stap 1, afbeelding 1 van 3 Motorola V2397 Motherboard/Screen Replacement, Battery: stap 1, afbeelding 2 van 3 Motorola V2397 Motherboard/Screen Replacement, Battery: stap 1, afbeelding 3 van 3
    • Press and hold the button on the battery cover

    • Pull the battery cover down and out to remove it

  2. Motorola V2397 Motherboard/Screen Replacement: stap 2, afbeelding 1 van 2 Motorola V2397 Motherboard/Screen Replacement: stap 2, afbeelding 2 van 2
    • Remove the batteries by pulling them away from the phone

  3. Motorola V2397 Motherboard/Screen Replacement, Back Cover: stap 3, afbeelding 1 van 2 Motorola V2397 Motherboard/Screen Replacement, Back Cover: stap 3, afbeelding 2 van 2
    • Using the Torx T4 screwdriver remove the six screws highlighted in the picture to the left

  4. Motorola V2397 Motherboard/Screen Replacement: stap 4, afbeelding 1 van 2 Motorola V2397 Motherboard/Screen Replacement: stap 4, afbeelding 2 van 2
    • Use your fingers or a spudger to remove the back cover

  5. Motorola V2397 Motherboard/Screen Replacement, Phone: stap 5, afbeelding 1 van 2 Motorola V2397 Motherboard/Screen Replacement, Phone: stap 5, afbeelding 2 van 2
    • Place your plastic opening tool in between the motherboard and the front cover of the phone

    • Apply a small force to lift the motherboard away from the front cover

  6. Motorola V2397 Motherboard/Screen Replacement, Motherboard/Screen: stap 6, afbeelding 1 van 2 Motorola V2397 Motherboard/Screen Replacement, Motherboard/Screen: stap 6, afbeelding 2 van 2
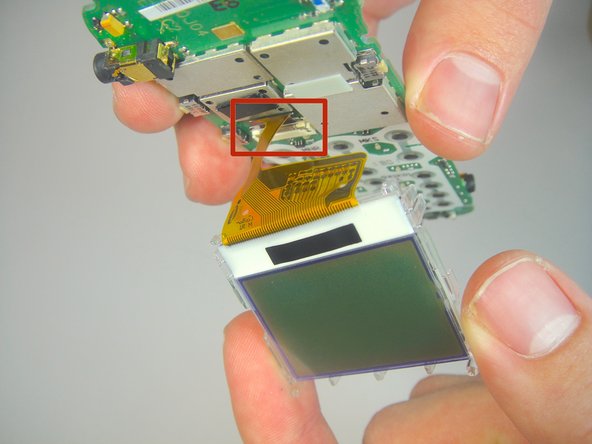
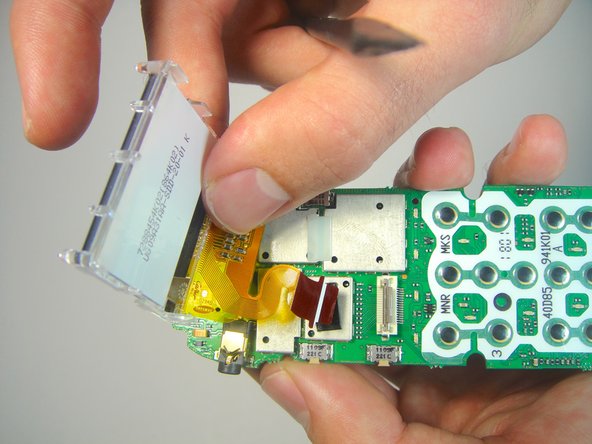
    • Use your fingers to unhook the highlighted plastic frame of the screen from motherboard

    • Carefully separate the screen from the motherboard

    • Note the cable connecting the screen to the motherboard. Do not pull the screen too far from the motherboard or you may damage the cable

  7. Motorola V2397 Motherboard/Screen Replacement: stap 7, afbeelding 1 van 2 Motorola V2397 Motherboard/Screen Replacement: stap 7, afbeelding 2 van 2
    • Lift the flap of the connector on the motherboard using a spudger

    • Carefully remove the FFC cable from the connector

    • The screen should now be free from the motherboard

Conclusie

To reassemble your device, follow these instructions in reverse order.

Chris

Lid sinds: 01/13/15

501 Reputatie

5 handleidingen geschreven

Team

USF Tampa, Team 1-6, Sullivan Winter 2015 Lid van USF Tampa, Team 1-6, Sullivan Winter 2015

USFT-SULLIVAN-W15S1G6

4 Leden

16 handleidingen geschreven

0 opmerkingen

Voeg opmerking toe

Weergavestatistieken:

Afgelopen 24 uren: 0

Afgelopen 7 dagen: 3

Afgelopen 30 dagen: 7

Altijd: 144