Inleiding
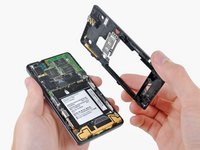
This guide will take you through the process of installing a new front panel on your Motorola Droid 2.
Wat je nodig hebt
-
-
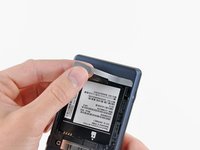
Slide the battery cover toward the bottom edge of the phone.
-
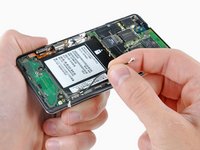
Remove the battery cover from the rear of the phone.
-
-
-
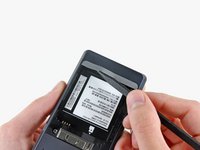
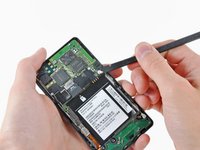
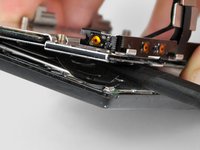
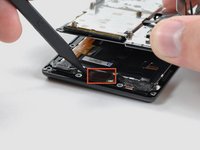
Using the tip of a spudger, peel up one corner of the silver ribbon below the battery compartment.
-
Peel the ribbon off the phone.
-
-
-
-
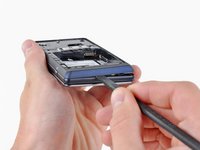
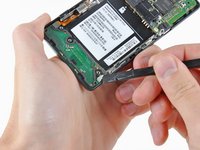
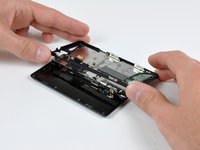
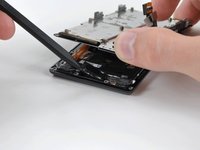
Use a spudger to pry the antenna cable connectors from their respective sockets on the motherboard and the speaker/antenna board.
-
De-route the antenna cable by pulling it out of the metal clips along the side of the front case.
-
-
-
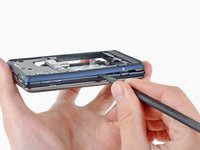
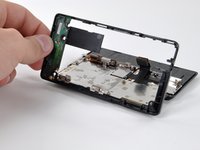
Disconnect the camera button/vibrator connector by prying it straight up off its socket on the speaker board with a spudger.
-


To reassemble your device, follow these instructions in reverse order.
Annuleren: ik heb deze handleiding niet afgemaakt.
22 andere personen hebben deze handleiding voltooid.

3Gids Commentaar
This phone is also called the Motorola Milestone 2. On my phone the keyboard screws were T3 as stated. It did not have the rubber cover over the battery connector in step 16. I had to replace the screen so I heated the old one slightly over a gas flame to help remove the adhesive and carefully lifted it off the front panel after step 32. The new screen already had a self adhesive backing so just dropped into place. I'm not sure it was necessary to peel back the LCD ribbon in step 26 as I was not replacing the LCD?