Ga door naar hoofdinhoud

Moto X Pure Edition Back Panel Removal

Gearchiveerde handleiding
Deze handleiding wordt enkel nog bijgehouden voor historische doeleinden. Gebruik de laatste versie van deze gids om uw reparatie uit te voeren.
Alleen vereisten
Deze handleiding is alleen bedoeld als vereiste voor andere handleidingen. Het staat niet op zichzelf.

Wat je nodig hebt

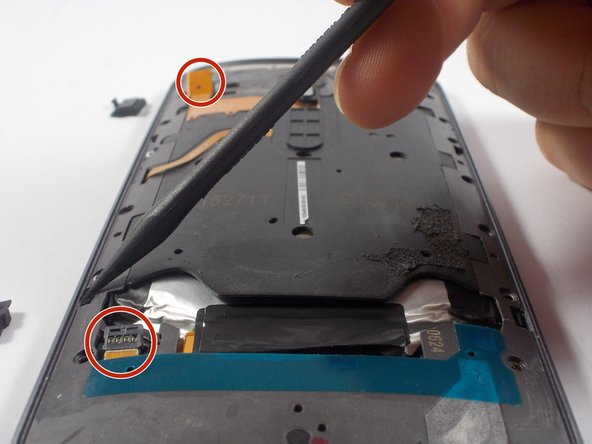
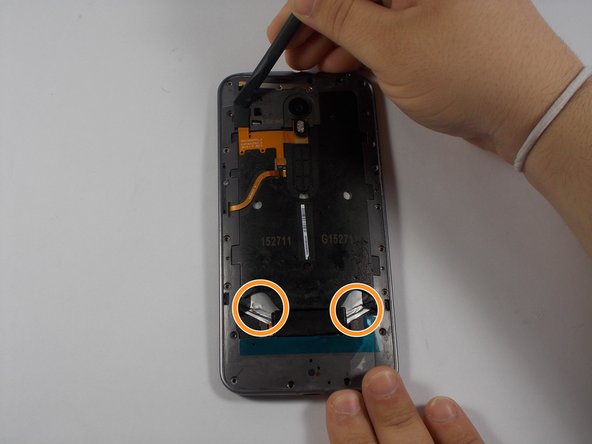
  1. Moto X Pure Edition Back Panel Removal, Back Panel: stap 1, afbeelding 1 van 3 Moto X Pure Edition Back Panel Removal, Back Panel: stap 1, afbeelding 2 van 3 Moto X Pure Edition Back Panel Removal, Back Panel: stap 1, afbeelding 3 van 3
    • Disconnect the two battery connections.

    • Remove the two parallel black tabs by pulling on them.

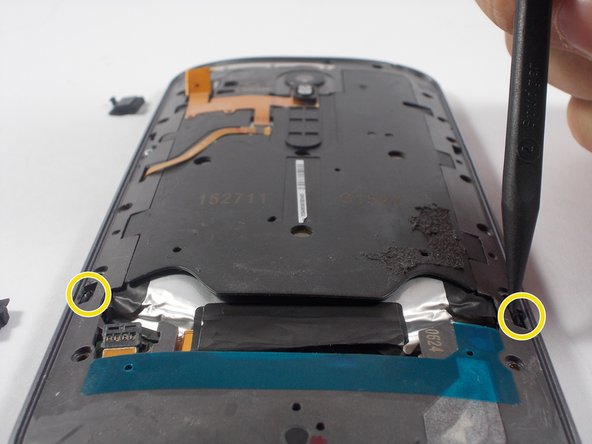
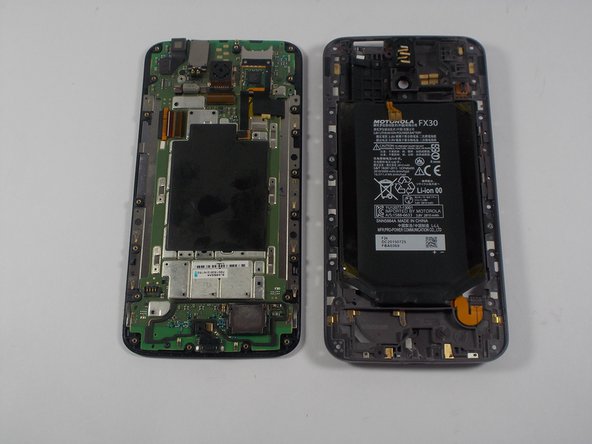
  2. Moto X Pure Edition Back Panel Removal: stap 2, afbeelding 1 van 3 Moto X Pure Edition Back Panel Removal: stap 2, afbeelding 2 van 3 Moto X Pure Edition Back Panel Removal: stap 2, afbeelding 3 van 3
    • All screw lengths are 2.5mm

    • Using the T3 screw driver, remove all 20 T3 screws.

    • Do NOT remove the silver screw circled in orange.

    • This holds in the Power/Volume buttons and is not necessary to remove. There are 2 very tiny springs behind the volume buttons that are easy to lose if you remove this screw.

    • Using the nylon spudger, remove the two clips holding the panel in place.

Conclusie

To reassemble your device, follow these instructions in reverse order.

2 andere personen hebben deze handleiding voltooid.

Lucas Dos Santos

Lid sinds: 03/06/16

1.053 Reputatie

5 handleidingen geschreven

Team

UMass Dartmouth, Team 5-2, Landers Spring 2016 Lid van UMass Dartmouth, Team 5-2, Landers Spring 2016

UMASSD-LANDERS-S16S5G2

3 Leden

15 handleidingen geschreven

0 opmerkingen

Voeg opmerking toe

Weergavestatistieken:

Afgelopen 24 uren: 0

Afgelopen 7 dagen: 0

Afgelopen 30 dagen: 0

Altijd: 148