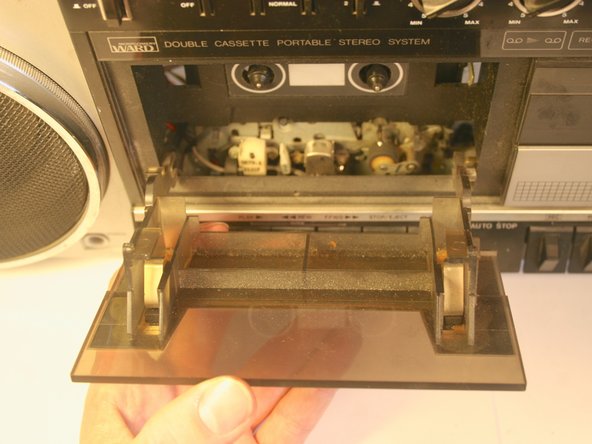
Ga door naar hoofdinhoud

Montgomery Ward GEN-39500 Cassette Player Replacement (Left Side)

Wat je nodig hebt

  1. Montgomery Ward GEN-39500 Cassette Player Replacement (Left Side), Back Cover: stap 1, afbeelding 1 van 1
    • Remove the nine 35 mm Phillips screws securing the back cover of the case.

  2. Montgomery Ward GEN-39500 Cassette Player Replacement (Left Side): stap 2, afbeelding 1 van 1
    • Carefully remove the back cover.

    • Soldered wires connect electronics on the back cover to the internal electronics. Be careful not to break any connections.

  3. Montgomery Ward GEN-39500 Cassette Player Replacement (Left Side): stap 3, afbeelding 1 van 2 Montgomery Ward GEN-39500 Cassette Player Replacement (Left Side): stap 3, afbeelding 2 van 2
    • Unplug the black and yellow wires connecting the power supply unit to the rest of the electronics:

    • This is not necessarily required. This step is to allow the back cover more movement as you work on the inside of the unit.

  4. Montgomery Ward GEN-39500 Cassette Player Replacement (Left Side), Cassette Player (Left Side): stap 4, afbeelding 1 van 1
    • Remove the following 6 screws:

    • Four 25 mm Phillips

    • Two 2.5 mm Flathead

  5. Montgomery Ward GEN-39500 Cassette Player Replacement (Left Side): stap 5, afbeelding 1 van 1
    • Remove the small steel plate on the right-hand side.

  6. Montgomery Ward GEN-39500 Cassette Player Replacement (Left Side): stap 6, afbeelding 1 van 1
    • Move the brass plate with attached pneumatic cylinder on the left-hand side.

    • Detach the plate at the pneumatic cylinder and leave the plate attached to the torsional spring.

  7. Montgomery Ward GEN-39500 Cassette Player Replacement (Left Side): stap 7, afbeelding 1 van 3 Montgomery Ward GEN-39500 Cassette Player Replacement (Left Side): stap 7, afbeelding 2 van 3 Montgomery Ward GEN-39500 Cassette Player Replacement (Left Side): stap 7, afbeelding 3 van 3
    • Stand the unit up and press eject to open the door on the cassette player.

    • Gripping the cassette player from the back, lift upwards on the door to unclip it from the bar around which it rotates. This may take some effort.

  8. Montgomery Ward GEN-39500 Cassette Player Replacement (Left Side): stap 8, afbeelding 1 van 1
    • Remove the 5 mm Phillips screw holding the blue and yellow wires in place.

  9. Montgomery Ward GEN-39500 Cassette Player Replacement (Left Side): stap 9, afbeelding 1 van 3 Montgomery Ward GEN-39500 Cassette Player Replacement (Left Side): stap 9, afbeelding 2 van 3 Montgomery Ward GEN-39500 Cassette Player Replacement (Left Side): stap 9, afbeelding 3 van 3
    • Unsolder the red and white wires leading from the cassette player unit.

  10. Montgomery Ward GEN-39500 Cassette Player Replacement (Left Side): stap 10, afbeelding 1 van 1
    • Unplug the grey wire leading from the cassette player.

  11. Montgomery Ward GEN-39500 Cassette Player Replacement (Left Side): stap 11, afbeelding 1 van 1
    • Remove the cassette player.

Conclusie

To reassemble your device, follow these instructions in reverse order.

Dustin Platt

Lid sinds: 04/01/15

931 Reputatie

6 handleidingen geschreven

Team

Cal Poly, Team 12-5, Lancaster Spring 2015 Lid van Cal Poly, Team 12-5, Lancaster Spring 2015

CPSU-LANCASTER-S15S12G5

4 Leden

13 handleidingen geschreven

0 opmerkingen

Voeg opmerking toe

Weergavestatistieken:

Afgelopen 24 uren: 0

Afgelopen 7 dagen: 0

Afgelopen 30 dagen: 0

Altijd: 206