Ga door naar hoofdinhoud

Mitsubishi Diamondpoint NXM76LCD Motherboard Replacement

Wat je nodig hebt

  1. Mitsubishi Diamondpoint NXM76LCD Motherboard Replacement, Removing the stand.: stap 1, afbeelding 1 van 3 Mitsubishi Diamondpoint NXM76LCD Motherboard Replacement, Removing the stand.: stap 1, afbeelding 2 van 3 Mitsubishi Diamondpoint NXM76LCD Motherboard Replacement, Removing the stand.: stap 1, afbeelding 3 van 3
    • Lift the black cover off.

    • Remove all 4 Phillips #2 screws.

  2. Mitsubishi Diamondpoint NXM76LCD Motherboard Replacement, Remove the 5 screws: stap 2, afbeelding 1 van 1
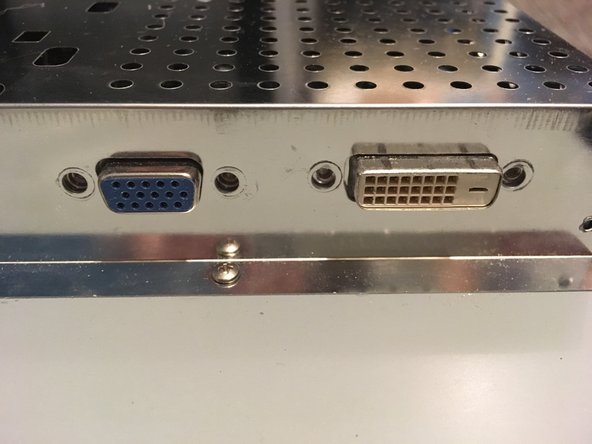
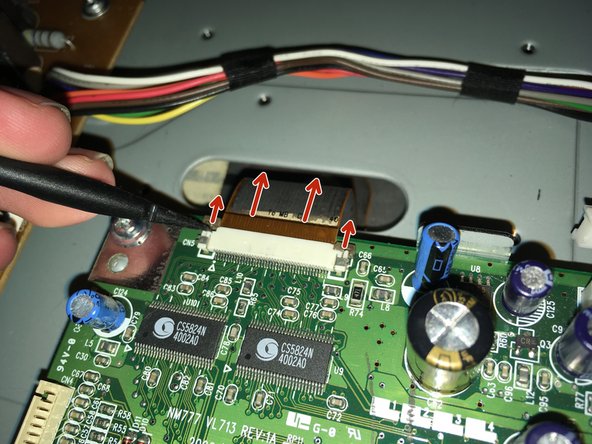
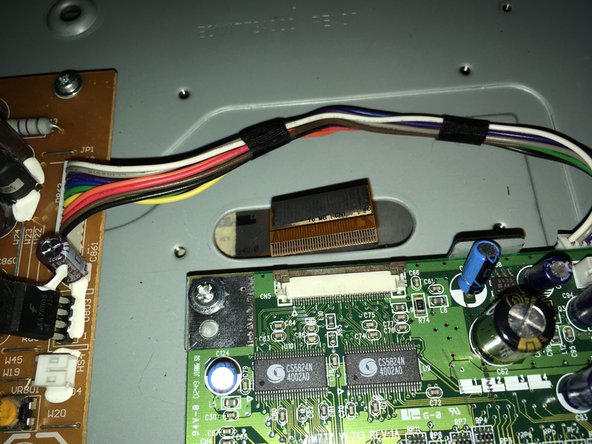
    • Remove the two 24mm Phillips #2 screws.

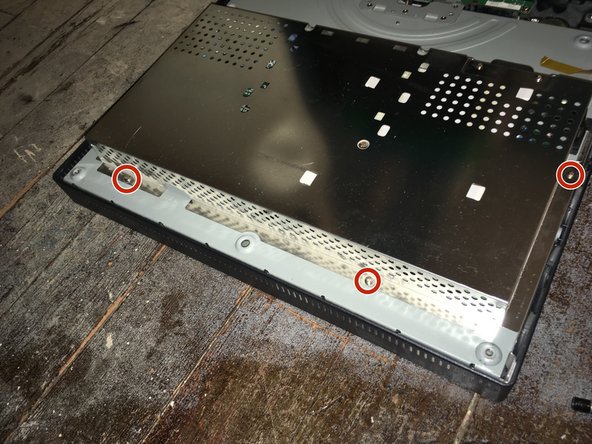
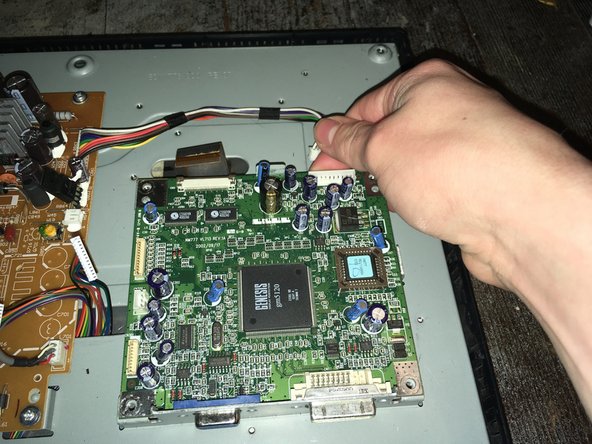
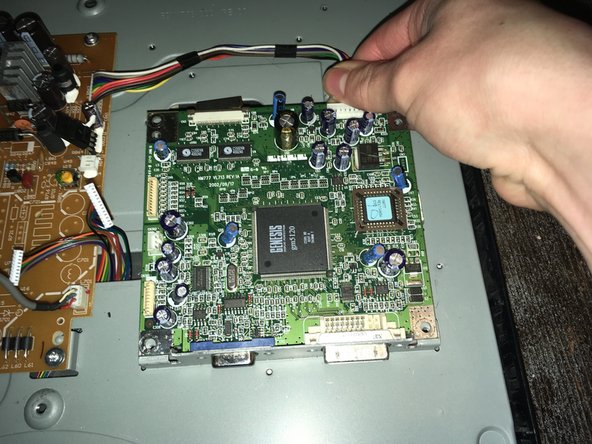
    • Remove the three 8mm Phillips #2 screws.

  3. Mitsubishi Diamondpoint NXM76LCD Motherboard Replacement, Remove the back panel: stap 3, afbeelding 1 van 3 Mitsubishi Diamondpoint NXM76LCD Motherboard Replacement, Remove the back panel: stap 3, afbeelding 2 van 3 Mitsubishi Diamondpoint NXM76LCD Motherboard Replacement, Remove the back panel: stap 3, afbeelding 3 van 3
    • Lift the back and pry the back off.

    • The panel is held in with clips on the side. It needs a lot of force the take it off.

  4. Mitsubishi Diamondpoint NXM76LCD Motherboard Replacement, Remove the four screws: stap 4, afbeelding 1 van 2 Mitsubishi Diamondpoint NXM76LCD Motherboard Replacement, Remove the four screws: stap 4, afbeelding 2 van 2
    • Remove the four 5mm nut screws.

  5. Mitsubishi Diamondpoint NXM76LCD Motherboard Replacement, Remove the 5 screws: stap 5, afbeelding 1 van 2 Mitsubishi Diamondpoint NXM76LCD Motherboard Replacement, Remove the 5 screws: stap 5, afbeelding 2 van 2
    • Remove the seven Phillips #1 screws.

  6. Mitsubishi Diamondpoint NXM76LCD Motherboard Replacement, Remove the cables: stap 6, afbeelding 1 van 3 Mitsubishi Diamondpoint NXM76LCD Motherboard Replacement, Remove the cables: stap 6, afbeelding 2 van 3 Mitsubishi Diamondpoint NXM76LCD Motherboard Replacement, Remove the cables: stap 6, afbeelding 3 van 3
    • Remove all the cables.

  7. Mitsubishi Diamondpoint NXM76LCD Motherboard Replacement, Remove the motherboard: stap 7, afbeelding 1 van 3 Mitsubishi Diamondpoint NXM76LCD Motherboard Replacement, Remove the motherboard: stap 7, afbeelding 2 van 3 Mitsubishi Diamondpoint NXM76LCD Motherboard Replacement, Remove the motherboard: stap 7, afbeelding 3 van 3
    • Remove the four screws.

    • Pull the motherboard up and off.

  8. Mitsubishi Diamondpoint NXM76LCD Motherboard Replacement: stap 8, afbeelding 1 van 1
    • Now you can replace it with a new one.

Conclusie

To reassemble your device, follow these instructions in reverse order.

Één andere persoon heeft deze handleiding voltooid.

Padraic Hoselton

Lid sinds: 08/22/17

4.180 Reputatie

12 handleidingen geschreven

Team

Master Techs Lid van Master Techs

Community

322 Leden

2.535 handleidingen geschreven

0 opmerkingen

Voeg opmerking toe

Weergavestatistieken:

Afgelopen 24 uren: 1

Afgelopen 7 dagen: 4

Afgelopen 30 dagen: 4

Altijd: 133