Ga door naar hoofdinhoud

Mavic 2 Arm Replacement

Wat je nodig hebt

  1. Mavic 2 Arm Replacement, Front Arm (Left or Right): stap 1, afbeelding 1 van 1
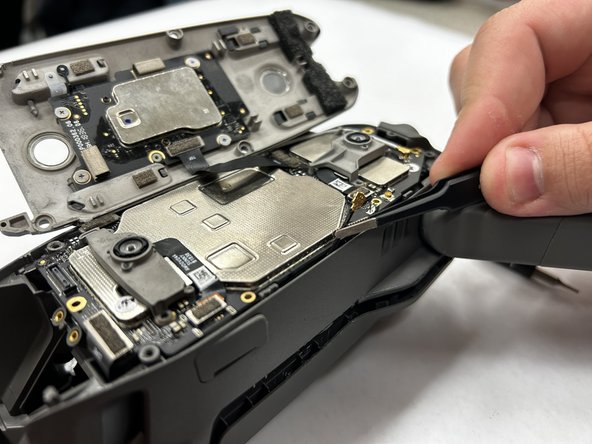
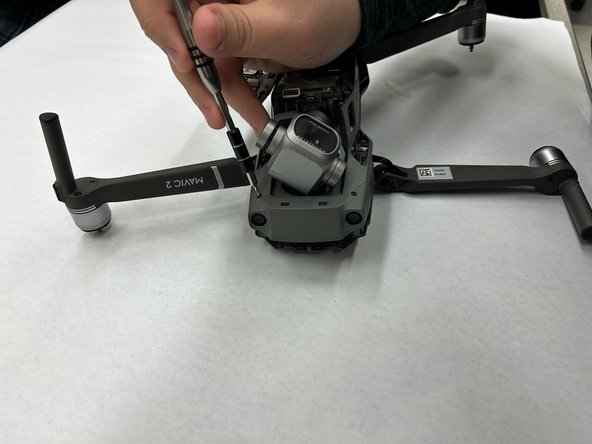
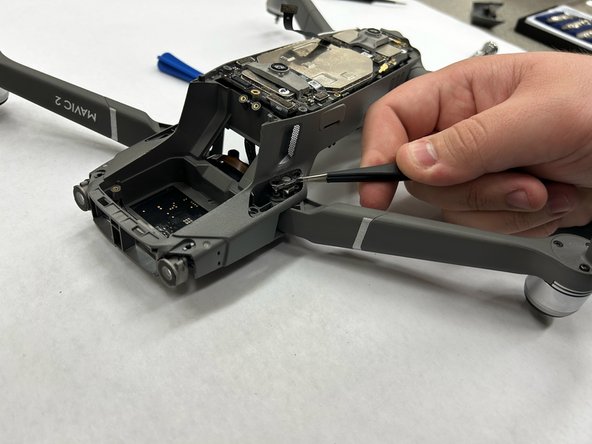
    • Remove the two M2x5 screws from the plastic cover by the camera using and H1.5 Allen bit.

  2. Mavic 2 Arm Replacement: stap 2, afbeelding 1 van 1
    • Gently remove the cover by the front camera by wiggling out the clips holding it in on both sides.

  3. Mavic 2 Arm Replacement: stap 3, afbeelding 1 van 3 Mavic 2 Arm Replacement: stap 3, afbeelding 2 van 3 Mavic 2 Arm Replacement: stap 3, afbeelding 3 van 3
    • Remove the six M2x5 screws from the bottom plastic cover using a H1.5 Allen bit.

    • Remove the plastic cover once all screws are extracted.

  4. Mavic 2 Arm Replacement: stap 4, afbeelding 1 van 2 Mavic 2 Arm Replacement: stap 4, afbeelding 2 van 2
    • Using tweezers or a plastic pick, remove either the white or black wire plugging into the board.

    • Be gentle removing the wire from the plug, you can damage the plug on the board.

    • The wire being pulled depends on which arm is being replaced. The wire that is closest to the arm being replaced is the one to unplug.

  5. Mavic 2 Arm Replacement: stap 5, afbeelding 1 van 3 Mavic 2 Arm Replacement: stap 5, afbeelding 2 van 3 Mavic 2 Arm Replacement: stap 5, afbeelding 3 van 3
    • Unscrew the two M2x5 screws holding on the front nose.

    • Using a plastic pry tool, gently pry along the seem around the front nose to remove it.

  6. Mavic 2 Arm Replacement: stap 6, afbeelding 1 van 2 Mavic 2 Arm Replacement: stap 6, afbeelding 2 van 2
    • Remove all ten M2x5 mm screws holding the top plastic cover of the drone. Two at the back, four in the battery bay, and two at each front arm joint.

    • At each arm joint, only one screw is visible. The second screw is under the plastic piece being held on by the first screw.

  7. Mavic 2 Arm Replacement: stap 7, afbeelding 1 van 3 Mavic 2 Arm Replacement: stap 7, afbeelding 2 van 3 Mavic 2 Arm Replacement: stap 7, afbeelding 3 van 3
    • Using a plastic pry tool, pry along the seem around the top cover to separate it from the chassis. Be patient as it does take a bit of time and effort to get it off.

  8. Mavic 2 Arm Replacement: stap 8, afbeelding 1 van 2 Mavic 2 Arm Replacement: stap 8, afbeelding 2 van 2
    • Use a Phillips #0 screwdriver to remove the screw that secures the arm spring.

    • Then remove the spring, use either tweezers or a flat-head screwdriver to lift it up out of the arm.

  9. Mavic 2 Arm Replacement: stap 9, afbeelding 1 van 2 Mavic 2 Arm Replacement: stap 9, afbeelding 2 van 2
    • On the topside of the drone,desolder the wires from the main board that correspond to the arm trying to be replaced, there should be six in total.

    • Remove the arm once all wires are desoldered.

    • Make note of where each wire goes on the board as the colors may not be the same across all models.

Conclusie

To reassemble your device, follow these instructions in reverse order.

Één andere persoon heeft deze handleiding voltooid.

Nick Imel

Lid sinds: 11/09/23

178 Reputatie

1 Handleiding geschreven

Team

IUPUI, Team 2-3, Harley Fall 2023 Lid van IUPUI, Team 2-3, Harley Fall 2023

IUPUI-HARLEY-F23S2G3

3 Leden

3 handleidingen geschreven

0 opmerkingen

Voeg opmerking toe

Weergavestatistieken:

Afgelopen 24 uren: 1

Afgelopen 7 dagen: 15

Afgelopen 30 dagen: 71

Altijd: 255