Ga door naar hoofdinhoud

Main access cover

Gearchiveerde handleiding
Deze handleiding wordt enkel nog bijgehouden voor historische doeleinden. Gebruik de laatste versie van deze gids om uw reparatie uit te voeren.

Wat je nodig hebt

  1. Main access cover, Battery: stap 1, afbeelding 1 van 3 Main access cover, Battery: stap 1, afbeelding 2 van 3 Main access cover, Battery: stap 1, afbeelding 3 van 3
    • Open the latch on the right side that secures the battery in place.

    • Open the latch on the left side that secures the battery in place.

    • Now remove the battery.

  2. Main access cover, Main access cover: stap 2, afbeelding 1 van 3 Main access cover, Main access cover: stap 2, afbeelding 2 van 3 Main access cover, Main access cover: stap 2, afbeelding 3 van 3
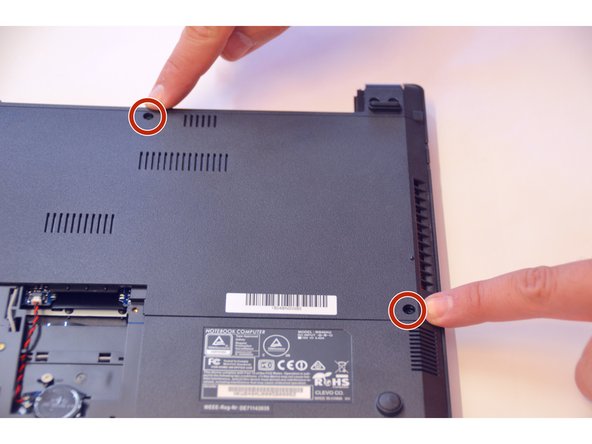
    • Using a Philips-head screwdriver remove highlighted screws.

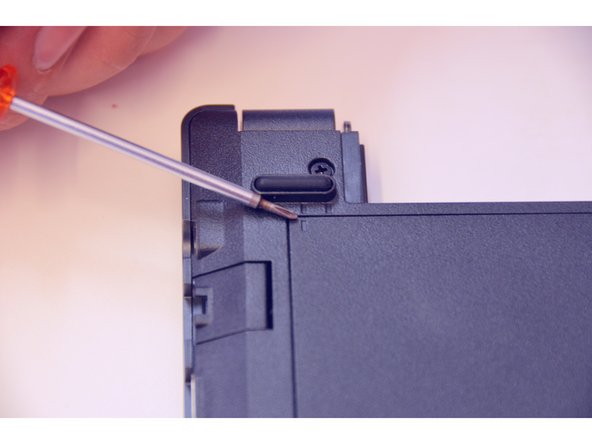
    • Look at the marking to see how to remove the access cover.

    • Remove the access cover as shown by the marker.

  3. Main access cover: stap 3, afbeelding 1 van 1
    • You now have access to all components of this laptop.

Conclusie

To put the device back together, follow these steps in reverse order.

Met dank aan deze vertalers:

de en

100%

Alex Niculescu helpt ons de wereld te herstellen! Wil je bijdragen?
Begin met vertalen ›

Felice Suglia

Lid sinds: 06/15/13

30.884 Reputatie

264 handleidingen geschreven

0 opmerkingen

Voeg opmerking toe

Weergavestatistieken:

Afgelopen 24 uren: 0

Afgelopen 7 dagen: 1

Afgelopen 30 dagen: 2

Altijd: 80