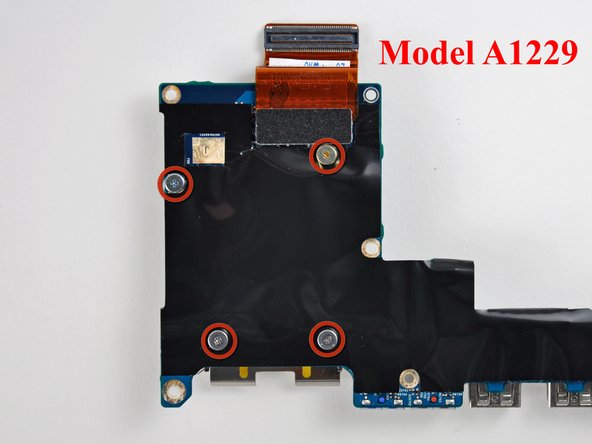
Ga door naar hoofdinhoud
Word lid van de reparatiegemeenschap - Account aanmaken

MacBook Pro 17" Models A1151 A1212 A1229 and A1261 Left I/O Board Replacement

Wat je nodig hebt

  1. MacBook Pro 17" Models A1151 A1212 A1229 and A1261 Left I/O Board Replacement, Battery: stap 1, afbeelding 1 van 1
    • Use your fingers to push both battery release tabs away from the battery and lift the battery out of the computer.

    Vraag FixBot

    Voeg opmerking toe

  2. MacBook Pro 17" Models A1151 A1212 A1229 and A1261 Left I/O Board Replacement, RAM Shield: stap 2, afbeelding 1 van 1
    • Remove the four identical Phillips 3.4 mm screws from the memory door. These screws have 4 mm diameter heads rather than the 3 mm heads on the body screws.

    Vraag FixBot

    Voeg opmerking toe

  3. MacBook Pro 17" Models A1151 A1212 A1229 and A1261 Left I/O Board Replacement: stap 3, afbeelding 1 van 1
    • Lift the memory door up enough to get a grip on it, and slide it toward you, pulling it away from the casing.

    Vraag FixBot

    Voeg opmerking toe

  4. MacBook Pro 17" Models A1151 A1212 A1229 and A1261 Left I/O Board Replacement, Upper Case: stap 4, afbeelding 1 van 1
    • Remove the three Phillips screws in the battery compartment near the latch. Apple was nice enough to tilt these screws at a slight angle to make them easier to remove. On the A1261 these screws have 4 mm diameter heads rather than the 3 mm heads on the body screws.

    Vraag FixBot

    Voeg opmerking toe

  5. MacBook Pro 17" Models A1151 A1212 A1229 and A1261 Left I/O Board Replacement: stap 5, afbeelding 1 van 1
    • Remove the following six screws:

    • Two 14.5 mm T6 Torx screws on either side of the RAM slot.

    • Four 3.4 mm Phillips screws along the hinge.

    Vraag FixBot

    Voeg opmerking toe

  6. MacBook Pro 17" Models A1151 A1212 A1229 and A1261 Left I/O Board Replacement: stap 6, afbeelding 1 van 1
    • Remove the four 3.4 mm Phillips screws on the port side of the computer.

    Vraag FixBot

    Voeg opmerking toe

  7. MacBook Pro 17" Models A1151 A1212 A1229 and A1261 Left I/O Board Replacement: stap 7, afbeelding 1 van 1
    • Rotate the computer 90 degrees and remove the two Phillips screws from the rear of the computer.

    Vraag FixBot

    Voeg opmerking toe

  8. MacBook Pro 17" Models A1151 A1212 A1229 and A1261 Left I/O Board Replacement: stap 8, afbeelding 1 van 1
    • Rotate the computer 90 degrees again and remove the four Phillips screws from the side of the computer.

    Vraag FixBot

    Voeg opmerking toe

  9. MacBook Pro 17" Models A1151 A1212 A1229 and A1261 Left I/O Board Replacement: stap 9, afbeelding 1 van 1
    • Do not yank the upper case off quickly. The case is attached to the logic board via a ribbon cable.

    • Lift up the back of the case and work your fingers along the sides, freeing the case as you go. Once you have freed the sides, you may need to rock the case up and down to free the front of the upper case.

    Vraag FixBot

    Voeg opmerking toe

  10. MacBook Pro 17" Models A1151 A1212 A1229 and A1261 Left I/O Board Replacement: stap 10, afbeelding 1 van 1
    • Disconnect the trackpad and keyboard ribbon cable from the logic board.

    • Remove the upper case.

    Vraag FixBot

    Voeg opmerking toe

  11. MacBook Pro 17" Models A1151 A1212 A1229 and A1261 Left I/O Board Replacement, Left Speaker: stap 11, afbeelding 1 van 2 MacBook Pro 17" Models A1151 A1212 A1229 and A1261 Left I/O Board Replacement, Left Speaker: stap 11, afbeelding 2 van 2
    • Disconnect the two antenna cables attached to the AirPort Extreme card.

    • The cable with the gray shielding attaches to the left side connector, while the cable with the white shielding attaches to the right side.

    • For the A1261 model, The cable with the black shielding attaches to the left side connector, while the cable with the blue shielding attaches to the right side.

    • If you have a MacBook Pro 17" Model A1229 or A1212, there are three antenna cables attached to the AirPort Extreme card instead of two.

    Vraag FixBot

    Voeg opmerking toe

  12. MacBook Pro 17" Models A1151 A1212 A1229 and A1261 Left I/O Board Replacement: stap 12, afbeelding 1 van 1
    • Remove the single black 4.3 mm T6 Torx screw from the top right corner of the AirPort Extreme card.

    Vraag FixBot

    Voeg opmerking toe

  13. MacBook Pro 17" Models A1151 A1212 A1229 and A1261 Left I/O Board Replacement: stap 13, afbeelding 1 van 1
    • Lift the AirPort Extreme card up and slide it out of its connector.

    Vraag FixBot

    Voeg opmerking toe

  14. MacBook Pro 17" Models A1151 A1212 A1229 and A1261 Left I/O Board Replacement: stap 14, afbeelding 1 van 1
    • Remove the two silver T6 Torx screws from the top left 8 mm and bottom right 10 mm corners of the left speaker assembly.

    • The magnet in the MagSafe connector may pull the upper screw towards it after the screw has been freed.

    Vraag FixBot

    Voeg opmerking toe

  15. MacBook Pro 17" Models A1151 A1212 A1229 and A1261 Left I/O Board Replacement: stap 15, afbeelding 1 van 1
    • Lift up on the left speaker assembly and rotate it slightly. It is not possible to entirely remove the speaker yet, as it is still connected to the left I/O board beneath.

    Vraag FixBot

    Voeg opmerking toe

  16. MacBook Pro 17" Models A1151 A1212 A1229 and A1261 Left I/O Board Replacement: stap 16, afbeelding 1 van 1
    • Disconnect the two cables securing the left speaker to the I/O board.

    • Lift the left speaker out of the upper case.

    Vraag FixBot

    Voeg opmerking toe

  17. MacBook Pro 17" Models A1151 A1212 A1229 and A1261 Left I/O Board Replacement, Left I/O Board: stap 17, afbeelding 1 van 1
    • Disconnect the hard drive ribbon cable and the left I/O board ribbon cable from the logic board.

    • Disconnect the right speaker connector from the left I/O board.

    Vraag FixBot

    Voeg opmerking toe

  18. MacBook Pro 17" Models A1151 A1212 A1229 and A1261 Left I/O Board Replacement: stap 18, afbeelding 1 van 1
    • Remove the two silver T6 Torx screws securing the gray metal retaining bracket to the right side of the hard drive. 8 mm upper and 10 mm lower.

    • Lift the gray metal retaining bracket out of the computer.

    Vraag FixBot

    Voeg opmerking toe

  19. MacBook Pro 17" Models A1151 A1212 A1229 and A1261 Left I/O Board Replacement: stap 19, afbeelding 1 van 1
    • Remove the four 4.2 mm black or silver T6 Torx screws securing the left I/O board to the lower case.

    • Disconnect the large power connector from the left I/O board.

    Vraag FixBot

    Voeg opmerking toe

  20. MacBook Pro 17" Models A1151 A1212 A1229 and A1261 Left I/O Board Replacement: stap 20, afbeelding 1 van 1
    • Move the orange hard drive ribbon out of the way with one hand. Use your other hand to lift up the right side of the left I/O board and slide it out of the computer.

    Vraag FixBot

    Voeg opmerking toe

  21. MacBook Pro 17" Models A1151 A1212 A1229 and A1261 Left I/O Board Replacement: stap 21, afbeelding 1 van 1
    • Turn the left I/O board over.

    • Use a spudger to disconnect the short orange cable from the left I/O board.

    Vraag FixBot

    Voeg opmerking toe

  22. MacBook Pro 17" Models A1151 A1212 A1229 and A1261 Left I/O Board Replacement: stap 22, afbeelding 1 van 1
    • If you have a MacBook Pro 17" Model A1229, this step is not necessary.

    • Peel up the L-shaped piece of black tape on the I/O board to reveal the two silver Phillips screws beneath.

    Vraag FixBot

    Voeg opmerking toe

  23. MacBook Pro 17" Models A1151 A1212 A1229 and A1261 Left I/O Board Replacement: stap 23, afbeelding 1 van 2 MacBook Pro 17" Models A1151 A1212 A1229 and A1261 Left I/O Board Replacement: stap 23, afbeelding 2 van 2
    • Remove the following four screws:

    • One 3.2 mm black Phillips screw with a small head.

    • Three 1.3 mm silver Phillips screws with large heads.

    • If you have a MacBook Pro 17" Model A1229, remove the four 1.3 mm silver Phillips screws with large heads.

    • The I/O board is now free from the ExpressCard cage.

    Vraag FixBot

    Voeg opmerking toe

Conclusie

To reassemble your device, follow these instructions in reverse order.

Annuleren: ik heb deze handleiding niet afgemaakt.

26 andere personen hebben deze handleiding voltooid.

iRobot

Lid sinds: 09/24/09

1 Reputatie

636 handleidingen geschreven

2Gids Commentaar

Great guide! Thanks!

Now to change the hinges and LCD screen! Already upgraded RAM (6GB), SSHD (1TB), and a new keyboard.

IT'S ALIIIIIVVVVEEEEE!!! LOL

Jason - Antwoord Deel

Are the A1229 Macbook I O Board Magsafe interchangeable with A1151 Macbook 17" ? Thanks

leticiaartist - Antwoord Deel

Voeg opmerking toe

Weergavestatistieken:

Afgelopen 24 uren: 2

Afgelopen 7 dagen: 15

Afgelopen 30 dagen: 80

Altijd: 22,118