Deze versie kan foutieve bewerkingen bevatten. Schakel over naar de recentste gecontroleerde momentopname.
Wat je nodig hebt
-
-
Verwijder de volgende tien schroeven die de onderste behuizing aan de bovenste behuizing bevestigen:
-
Drie 13.5 mm (14.1 mm) lange Phillips schroeven.
-
Zeven 3 mm lange Phillips schroeven.
-
-
-
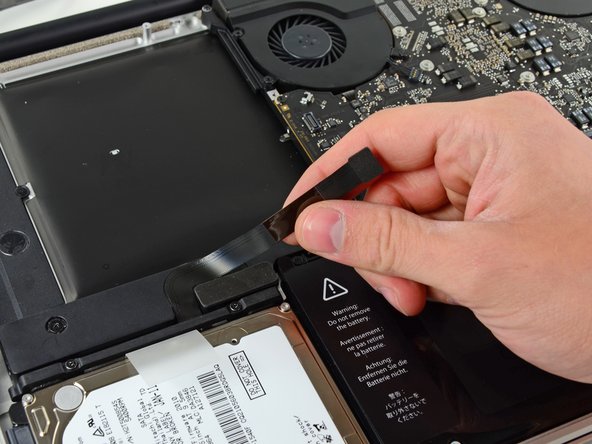
Gebruik de platte kant van een spudger om de batterijaansluiting uit het contact op het logic board omhoog te duwen.
-
-
Deze stap is niet vertaald. Help het te vertalen
-
Disconnect the camera cable connector from its socket on the logic board.
-
-
-
Deze stap is niet vertaald. Help het te vertalen
-
Use the flat end of a spudger to pry the AirPort/Bluetooth connector up from its socket on the logic board.
-
-
Deze stap is niet vertaald. Help het te vertalen
-
Use the flat end of a spudger to pry the optical drive connector up from its socket on the logic board.
-
-
Deze stap is niet vertaald. Help het te vertalen
-
Remove following two screws:
-
One 8.6 mm Phillips screw
-
One 3.9 mm Phillips screw
-
Carefully rotate the AirPort/Bluetooth board housing (with AirPort/Antenna cables still attached) out of the lower case.
-
-
Deze stap is niet vertaald. Help het te vertalen
-
Remove the three 3.5 mm T6 Torx screws securing the optical drive to the upper case.
-
-
Deze stap is niet vertaald. Help het te vertalen
-
Lift the optical drive near its connector and pull it away from the upper case to remove it from the computer.
-
-
Deze stap is niet vertaald. Help het te vertalen
-
Use the flat end of a spudger to pry the hard drive/IR sensor cable connector up off the logic board.
-
Peel the hard drive cable up from the channel within the subwoofer and right speaker.
-
-
Deze stap is niet vertaald. Help het te vertalen
-
Using the flat end of a spudger, pry the subwoofer connector straight up off the logic board.
-
-
Deze stap is niet vertaald. Help het te vertalen
-
Remove the following six screws securing the subwoofer and right speaker to the upper case:
-
Two 3.2 mm Phillips screws.
-
Two 12.3 mm Phillips screws.
-
One 2.5 mm Phillips screw.
-
One 8.3 mm Phillips screw.
-
-
Deze stap is niet vertaald. Help het te vertalen
-
Use the flat end of a spudger to dislodge the right speaker from its recess in the upper case.
-
Lift the subwoofer and right speaker assembly out of the upper case.
-


Annuleren: ik heb deze handleiding niet afgemaakt.
13 andere personen hebben deze handleiding voltooid.

Één opmerking
Hi, since a few day my right speaker crackles (in the bass), do you think it should be changed ? what could be the cause of the damage ? If so, is this type of piece ok ? (macbook pro Unibody 15" Mid-2102) THX