Deze versie kan foutieve bewerkingen bevatten. Schakel over naar de recentste gecontroleerde momentopname.
Wat je nodig hebt
-
-
Verwijder de volgende P5-pentalobe schroeven die de onderste behuizing aan de MacBook Pro bevestigen:
-
Acht 3.1 mm lange schroeven
-
Twee 2.3 mm lange schroeven
-
-
-
Trek de sticker die over de batterijaansluiting is heen geplakt los.
-
-
-
Til beide kanten van de batterijaansluiting voorzichtig omhoog om de aansluiting uit het contact op het logic board te duwen.
-
Buig de aansluiting naar achteren richting de batterij om zo te zorgen dat de aansluiting tijdens de reparatie geen contact maakt met het logic board en je laptop inschakelt.
-
-
-
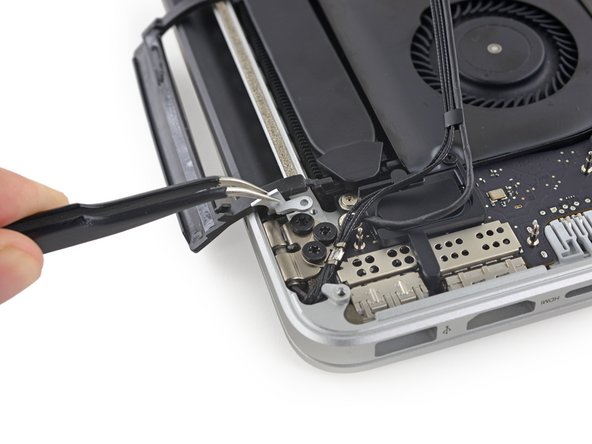
Gebruik een spudger of een pincet om de drie AirPort-antennekabels in een rechte beweging uit hun contacten op het AirPort-bord omhoog te duwen. Buig ze vervolgens omhoog en uit de weg.
-
-
-
Deze stap is niet vertaald. Help het te vertalen
-
Use the tip of a spudger to flip up the display data cable lock and rotate it toward the MagSafe 2 power port side of the computer.
-
Pull the display data cable straight out of its socket on the logic board.
-
-
Deze stap is niet vertaald. Help het te vertalen
-
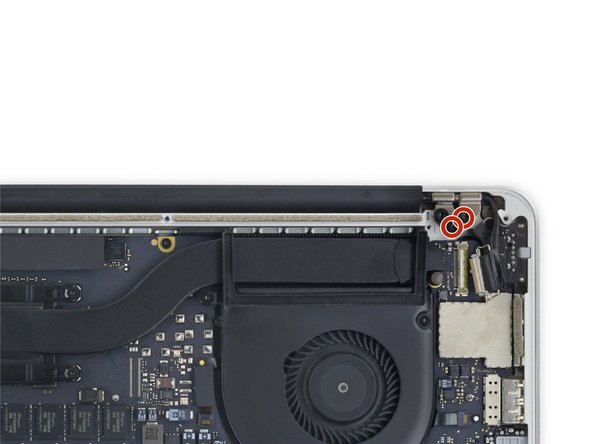
Remove the two 3.2 mm T5 Torx screws securing the aluminum hinge covers to the upper case.
-
-
Deze stap is niet vertaald. Help het te vertalen
-
Remove the two aluminum hinge covers from the MacBook Pro.
-
-
Deze stap is niet vertaald. Help het te vertalen
-
Remove four out of the six 5.3 mm T8 Torx screws securing the display to the upper case.
-
Leave the innermost screws (one from each hinge) in place.
-
-
Deze stap is niet vertaald. Help het te vertalen
-
Open the MacBook Pro approximately 110 degrees, and place it sideways on the table, as shown.
-
-
Deze stap is niet vertaald. Help het te vertalen
-
While holding the display and upper case together with your left hand, remove the remaining T8 Torx screw from the lower (closer to the table) display bracket.
-
-
Deze stap is niet vertaald. Help het te vertalen
-
While holding the display and upper case together with your left hand, remove the remaining T8 Torx screw from the upper display bracket.
-
-
Deze stap is niet vertaald. Help het te vertalen
-
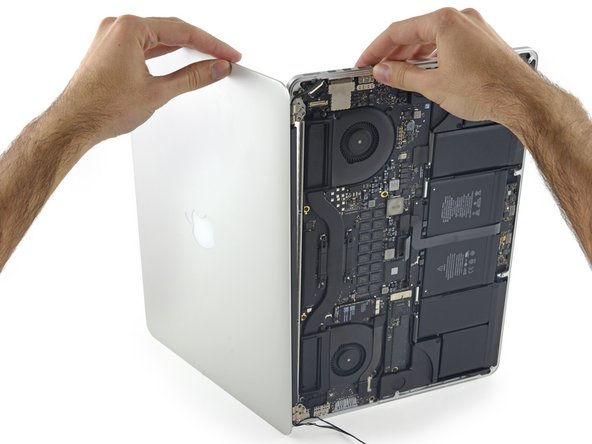
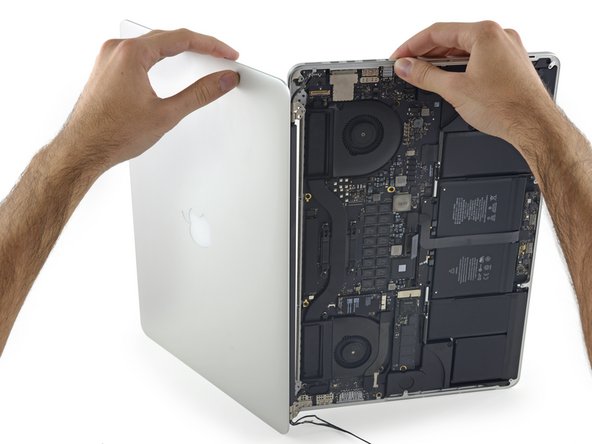
Grip both halves of the device, one in each hand.
-
Gently push forward on the bottom half of the device to detach it from the display assembly.
-
Carefully set each component aside, making sure to set down the bottom half keyboard-side down to avoid damaging internal components.
-


Annuleren: ik heb deze handleiding niet afgemaakt.
150 andere personen hebben deze handleiding voltooid.

52 opmerkingen
Can the clutch be replaced in the 2015 15" Retina MacBook Pro?
Successfully replaced screen and everything is working great. One mechanical exception - the black clutch cover is loose on one side (the left side looking at the keyboard). i can "lift it" towards myself. it wasn't obvious while i was in there that there was a step to "hook it" into anything. what has it let go from and how do i go about ensuring that it's secure when it's flipped? Anyone know?
Thnaks!
Thank you! These instructions couldn't be better.
Do you have any intention of releasing a guide for the new A1707 2016 pro retina model with touch bar? Thanks for your help.