Inleiding
Things heating up inside your MacBook Pro with Retina Display? Could be trouble with the heat sink. Use this guide to remove the heat sink in the Late 2013 MacBook Pro 15" with Retina display.
Don't forget to clean and re-apply thermal paste if you remove the heat sink. Follow this guide to learn how.
Wat je nodig hebt
-
-
Remove the following P5 pentalobe screws securing the lower case to the MacBook Pro:
-
Eight 3.0 mm
-
Two 2.3 mm
-
-
-
-
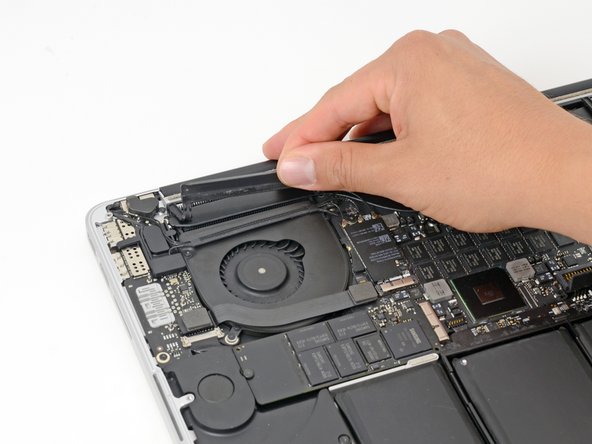
Insert the flat end of a spudger underneath the rubber heat sink cover on the right fan.
-
Slide the spudger underneath the length of the cover, releasing the adhesive.
-
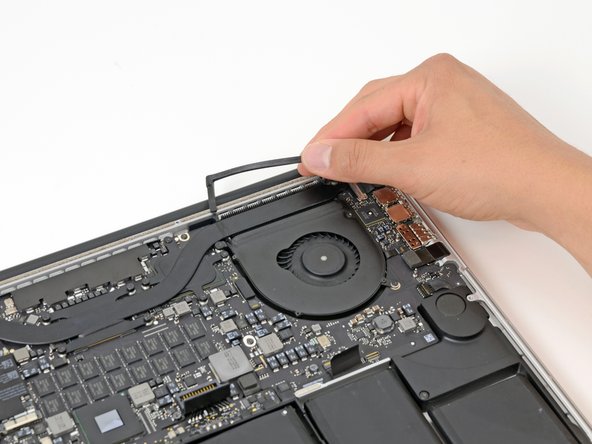
Lift the cover and rotate it off of the heat sink.
-


To reassemble your device, follow these instructions in reverse order.
To reassemble your device, follow these instructions in reverse order.
Annuleren: ik heb deze handleiding niet afgemaakt.
31 andere personen hebben deze handleiding voltooid.

12 opmerkingen
Performed today on 3 yrs old Retina 15" with integrated Iris Pro 5200. Temperatures dropped considerably, both during idle and load periods, but BE AWARE, if you pass control to the fans via i.e.: smsFanControl, during testing laptop reaches abnoxious temperatures (98C) - what it seems is that when smcFanControl is taking over, also throttling is turned off, therefore, when temperature rised you need to rise fan rpm (during Geekbench 3 I set it at the end to the 3800rpm from 2500rpm it was and this dropped immediately from 98C to 70C). When SmcFanControl is set to Default, MAC UEFI controls fans and - what is funny - when load exceeded reasonable thresholds, (one core reached 92C) it throttled (probably) because without much rpm raise - this dropped temps to 75C (Default setting did at critical point two things: a) from 2160 rpm to 2890rpm and b) throttle ... what ended in immediate drop to 75C). Keep that in mind.
In this aspect I consider this as a smarter management.
One of the screw thread used to tighten the spring-clamp holding the cpu in place has detached from the motherboard. Is it possible to repair this, and if not, is it fine to hold the cpu with only one spring clamp ? Thanks a lot !
Hopefully you are still around the forums these days.
You usually can fix something like that if it was soldered to the board, with simple solder and something to hold it in place. However if it was riveted to the board you may have another problem, of which I do not know how to solve. You happen to have a picture?
The image in Step 7, and the offered replacement part are wrong! In all images except step 7 you are showing the correct hardware, whitha heat pipe including cpu and discrete graphics plates. But in step 7, and in the replacement part offering you show a heat pipe containing only one plate! Please correct this? Where do I get a replacement heat pipe for my macbook containing adiscrete graphics chip? Thank you very much!
I want to know this as well. That said, I don’t really see the need to replace the heat sink. What’s the problem is that the thermal paste has dried up and no longer conducts as it used to. So simply removing the old heat sink, scraping off the paste and re-applying new paste should do the job just fine. I don’t see in what way the heatsink itself should go ‘bad’.