Ga door naar hoofdinhoud

Deze versie kan foutieve bewerkingen bevatten. Schakel over naar de recentste gecontroleerde momentopname.

Alleen vereisten
Deze handleiding is alleen bedoeld als vereiste voor andere handleidingen. Het staat niet op zichzelf.

Wat je nodig hebt

  1. Deze stap is niet vertaald. Help het te vertalen

    : stap 1, afbeelding 1 van 2 : stap 1, afbeelding 2 van 2
    • Remove the plastic spacer from the optical bay hard drive enclosure by pressing in on one of the clips on either side and lifting it up and out of the enclosure.

  2. Deze stap is niet vertaald. Help het te vertalen

    : stap 2, afbeelding 1 van 3 : stap 2, afbeelding 2 van 3 : stap 2, afbeelding 3 van 3
    • Make sure that the hard drive connectors are facing down before placing it into the enclosure.

    • Gently place the hard drive into the enclosure's hard drive slot.

  3. Deze stap is niet vertaald. Help het te vertalen

    : stap 3, afbeelding 1 van 2 : stap 3, afbeelding 2 van 2
    • Once the hard drive is snug, reinsert the plastic spacer while holding the hard drive against the bottom of the enclosure.

  4. Deze stap is niet vertaald. Help het te vertalen

    : stap 4, afbeelding 1 van 2 : stap 4, afbeelding 2 van 2
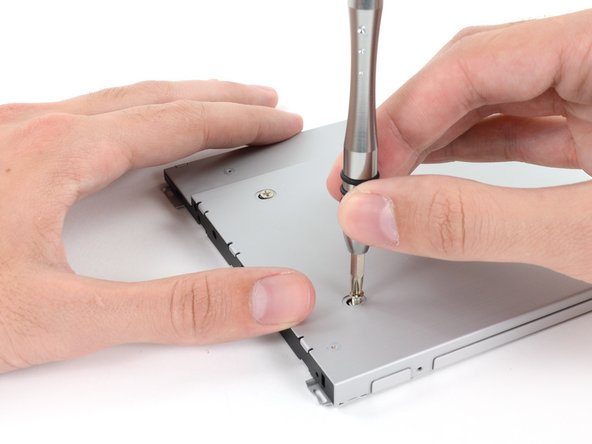
    • Use two Phillips #1 screws to secure the drive to its enclosure.

    • Transfer all brackets and the optical cables from the drive you're removing onto the new enclosure, and reverse the procedure to install the enclosure in your MacBook Pro.

Eindstreep

Andrew Optimus Goldheart

Lid sinds: 10/17/09

502.755 Reputatie

407 handleidingen geschreven

Team

iFixit Lid van iFixit

Staff

135 Leden

16.732 handleidingen geschreven

0 opmerkingen

Voeg opmerking toe

Weergavestatistieken:

Afgelopen 24 uren: 0

Afgelopen 7 dagen: 0

Afgelopen 30 dagen: 0

Altijd: 76