Ga door naar hoofdinhoud

Deze handleiding heeft recentere wijzigingen. Schakel over naar de nieuwste niet-geverifieerde versie.

MacBook Pro 13" Retina Display Late 2012 I/O Board Replacement

Alleen vereisten
Deze handleiding is alleen bedoeld als vereiste voor andere handleidingen. Het staat niet op zichzelf.

Wat je nodig hebt

  1. MacBook Pro 13" Retina Display Late 2012 I/O Board Replacement, I/O Board: stap 1, afbeelding 1 van 3 MacBook Pro 13" Retina Display Late 2012 I/O Board Replacement, I/O Board: stap 1, afbeelding 2 van 3 MacBook Pro 13" Retina Display Late 2012 I/O Board Replacement, I/O Board: stap 1, afbeelding 3 van 3
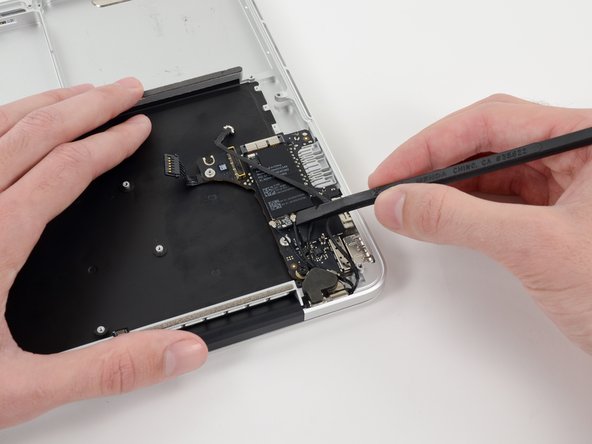
    • Use the flat end of a spudger to pry and disconnect the three antenna cable connectors from the AirPort board.

    • The three cables are coded with black sleeves of different lengths. During reassembly:

    • Connect the long-sleeved cable to the center socket.

    • The short-sleeved cable connects next to the screw.

    • The remaining cable has no sleeve, and connects in the last empty socket, next to the fan.

  2. MacBook Pro 13" Retina Display Late 2012 I/O Board Replacement: stap 2, afbeelding 1 van 1
    • Remove the following two screws securing the I/O board to the upper case:

    • One 3.53 mm T5 Torx screw

    • One 4.89 mm T8 Torx standoff screw

  3. MacBook Pro 13" Retina Display Late 2012 I/O Board Replacement: stap 3, afbeelding 1 van 2 MacBook Pro 13" Retina Display Late 2012 I/O Board Replacement: stap 3, afbeelding 2 van 2
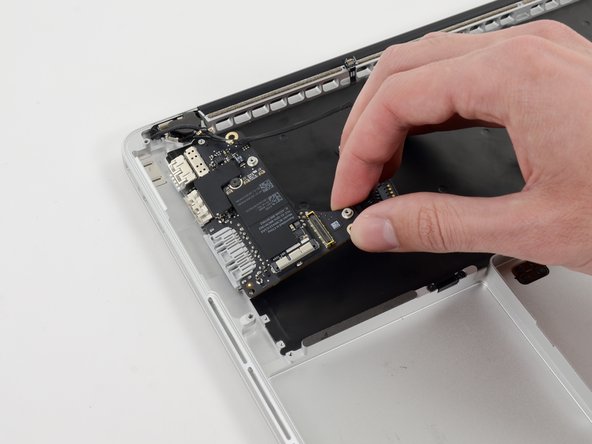
    • Carefully pull and remove the I/O board away from its recess in the upper case.

Conclusie

To reassemble your device, follow these instructions in reverse order.

0 opmerkingen

Voeg opmerking toe

Weergavestatistieken:

Afgelopen 24 uren: 0

Afgelopen 7 dagen: 0

Afgelopen 30 dagen: 0

Altijd: 41