Ga door naar hoofdinhoud

Lorex LW2742 Back Panel Replacement

Alleen vereisten
Deze handleiding is alleen bedoeld als vereiste voor andere handleidingen. Het staat niet op zichzelf.

Wat je nodig hebt

  1. Lorex LW2742 Back Panel Replacement, Back Panel: stap 1, afbeelding 1 van 3 Lorex LW2742 Back Panel Replacement, Back Panel: stap 1, afbeelding 2 van 3 Lorex LW2742 Back Panel Replacement, Back Panel: stap 1, afbeelding 3 van 3
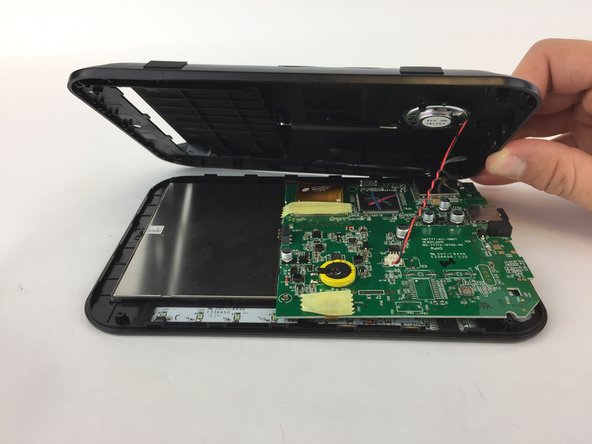
    • Remove the battery cover on the back of the LCD monitor by unscrewing one 5mm Phillips #1 screw.

    • Slide the battery out of the housing. Lightly tap the opposite end of the monitor if the battery does not come right out.

  2. Lorex LW2742 Back Panel Replacement: stap 2, afbeelding 1 van 1
    • Remove the four 6mm Phillips #1 screws on the back of the LCD monitor.

  3. Lorex LW2742 Back Panel Replacement: stap 3, afbeelding 1 van 2 Lorex LW2742 Back Panel Replacement: stap 3, afbeelding 2 van 2
    • Using a plastic opening tool, gently separate the back panel from the front panel, working the tool around the panel to disconnect it.

    • Carefully remove the back panel

    • The speaker wire is connected to the motherboard so DO NOT rip back panel away from the monitor.

Conclusie

To reassemble your device, follow these instructions in reverse order.

Alex Kusmierz

Lid sinds: 09/26/16

601 Reputatie

5 handleidingen geschreven

Team

USF Tampa, Team 16-1, Eyestone Fall 2016 Lid van USF Tampa, Team 16-1, Eyestone Fall 2016

USFT-EYESTONE-F16S16G1

4 Leden

12 handleidingen geschreven

0 opmerkingen

Voeg opmerking toe

Weergavestatistieken:

Afgelopen 24 uren: 0

Afgelopen 7 dagen: 0

Afgelopen 30 dagen: 0

Altijd: 50