Ga door naar hoofdinhoud

Logitech UE MegaBoom Battery Replacement

Wat je nodig hebt

  1. Logitech UE MegaBoom Battery Replacement, Outer Mesh: stap 1, afbeelding 1 van 3 Logitech UE MegaBoom Battery Replacement, Outer Mesh: stap 1, afbeelding 2 van 3 Logitech UE MegaBoom Battery Replacement, Outer Mesh: stap 1, afbeelding 3 van 3
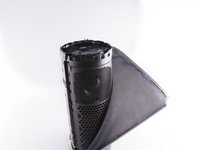
    • Locate the ends of the speaker.

    • Put a plastic opening tool in-between the rubber end and the mesh.

    • Apply a upward force in order to pry open the end.

    • Apply this procedure to the other side as well.

    • Will take force.

    • Using metal tools may permanently mar your device.

  2. Logitech UE MegaBoom Battery Replacement: stap 2, afbeelding 1 van 3 Logitech UE MegaBoom Battery Replacement: stap 2, afbeelding 2 van 3 Logitech UE MegaBoom Battery Replacement: stap 2, afbeelding 3 van 3
    • Take the Jimmy and pry up the rubber strip that has the volume buttons on it.

    • You will hear clicks as it pries up, don't worry.

    • Remove all the rubber you pried off.

  3. Logitech UE MegaBoom Battery Replacement: stap 3, afbeelding 1 van 2 Logitech UE MegaBoom Battery Replacement: stap 3, afbeelding 2 van 2
    • Use tweezers to lift end of plastic retainer on edge of mesh out of its channel.

    • Work the plastic retainer out of the channel all the way around the speaker.

    • Be gentle, it is easy to damage the fabric.

    • Repeat for other side.

  4. Logitech UE MegaBoom Battery Replacement, Battery: stap 4, afbeelding 1 van 1
    • Pull on white strip to remove battery.

    • Remove inner plastic gasket on circuit board.

    • Remove 2nd plastic gasket around outer circuit board edge, under rubber gasket.

    • Gently pry circuit board up out of recess.

Conclusie

To reassemble your device, follow these instructions in reverse order.

14 andere personen hebben deze handleiding voltooid.

Oscar Ambriz

Lid sinds: 09/27/17

958 Reputatie

6 handleidingen geschreven

Team

Cal Poly, Team S9-G2, Banghart Fall 2017 Lid van Cal Poly, Team S9-G2, Banghart Fall 2017

CPSU-BANGHART-F17S9G2

4 Leden

14 handleidingen geschreven

23 opmerkingen

There is a way to take it apart without all these steps and a complete tear down.

Brian Longhurst - Antwoord

How to ensure it’s waterproof upon reassembly?

mdeblasi - Antwoord

This is huge overkill. Only the bottom cap and circuit board need to be removed for a battery replacement.

coryjohnson011 - Antwoord

I agree. The battery is located on the bottom end only.

Jamin Hu -

^ the person who says that you only need to remove the one end-cap to replace the battery is correct. The process outlined in this article is more likely to damage all the fabric and other end-cap than just opening one end and gently prying it back until you can slide out the battery. FYI, the pull tab on my battery broke right off, and I had to pull it out with pliers.

sizz0p - Antwoord

Voeg opmerking toe

Weergavestatistieken:

Afgelopen 24 uren: 31

Afgelopen 7 dagen: 193

Afgelopen 30 dagen: 818

Altijd: 47,548