Wat je nodig hebt
-
-
Be mindful of keeping the lens glass away from abrasives when disassembling. Turn the camera over and use your plastic spudger (pry tool) to pop out the plastic ring obscuring two small screws.
-
-
-
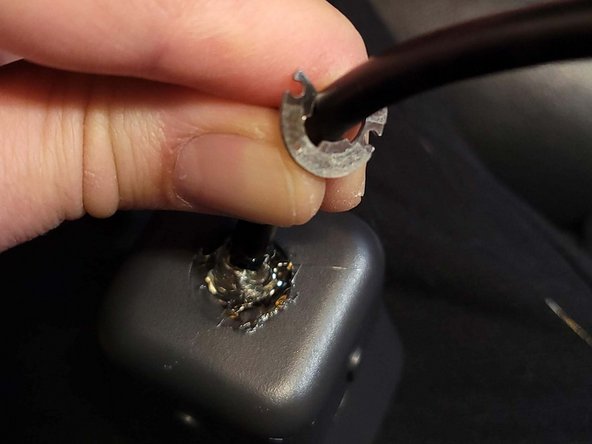
Once the screws are removed, the retention ring easily separates from the cable moulding with firm prying or pulling pressure. It's a C-clip with some light adhesive facing outward.
-
After the retention clip is out, peering into the housing will reveal two identical 000 screws that hold the camera subframe to the outer shell. Remove these (they'll easily shake out if not pulled out with your screwdriver's tip).
-
-
-
-
With the retention ring off, you can advance the cable moulding into the housing, and the entire camera subframe assembly should freely disengage from the outer shell.
-
The entire cable may then be pulled outward, through the outer housing/shell port where the cable retention clip was fastened. (The white plug can be slightly manipulated to fit through.)
-
Fixers replacing the entire cable may choose to solder a new JST GH connector to their new cable before disassembly, reducing the time the camera sits in pieces. (Reuse the original ground wire for the cable sheath/shielding.)
-
-
-
20240310: swapping 10 with 9, and 7 with 6 (polarity reversals) has given me 1080 60fps on Win 10 with Logitech Capture, but now my Linux PC doesn't recognize the camera.
-
In this guide, a 6-foot USB-3.0 extension cable (female and male type-A plugs) was the donor part. The female plug was cut off with several inches of cable, so that it could be repurposed; the male end and cable is used in this repair.
-
If the distal USB-C plug of the original cable is the only defect, you may alternatively or preferentially choose to replace it with a USB 3.0 type-C or type-A plug -- rather than replacing the entire cable. You can then retain the sturdy original retention collar and greatly simplify the soldering work.
-
-
-
Three screws hold the inner block. Removing this eases the task of threading through the board connector and insulated soldering work.
-
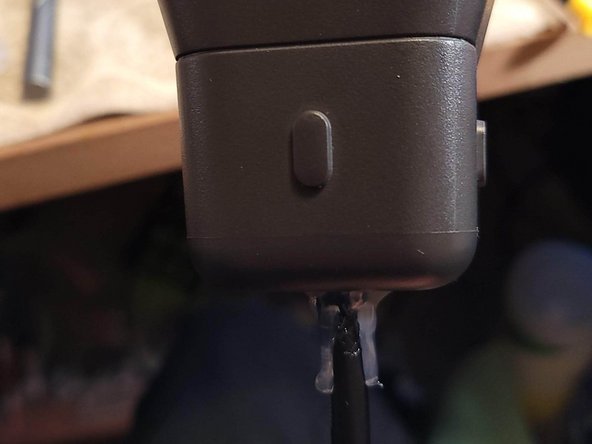
Cable retention and strain relief is created with hot glue as pictured. Sugru is recommended as a clean, strong, and aesthetically pleasing alternative.
-
The hot glue was applied two-fold: within the housing (through the rear cutout), then at the C-clip flange. The C-clip was screwed down atop the second glue application while it was still cooling.
-
To reassemble your device, follow the initial instructions in reverse order. Pat yourself on the back for keeping this camera out of the waste stream!
To reassemble your device, follow the initial instructions in reverse order. Pat yourself on the back for keeping this camera out of the waste stream!
Annuleren: ik heb deze handleiding niet afgemaakt.
11 andere personen hebben deze handleiding voltooid.
32 opmerkingen
Hi Brian, thanks very much for this guide. Do you know where I can get a replacement cable for the cam? I haven’t been able to find any online? Thanks again.
Z
You’re welcome, Zaskif. I made a comment attached to the guide, but it looks like it’s hidden… I reached out to Logitech support, and they confirmed that they don’t sell a replacement cable for the StreamCam. It’s a crazy bad look for Logitech, since it appears damage to the distal USB-C connection is a relatively common issue (that’s why I made the guide in the first place). “Support” said the only recourse is to replace the whole camera.
I’m in the middle of using a continuity tester to determine the pinout of the header, as it corresponds to the USB-C pins. Then I’ll wire the header plug to a DIY breakout female USB-C port, so I can use a USB C-to-C male-to-male cable I got for less than $10 online. Until I can succeed, I think the only other way for an accessible repair is to get a “for parts” camera that’s damaged in a different way, so that you can harvest its intact cable.
Brian -
I see, I’ve just seen your comment. Logitech has obviously thought this through! Such a shame they don’t even sell replacement parts for the cam on their website, knowing very well this is a common issue. I will probably end up selling it as “damaged”. Thanks very much for your response.
Hi Brian, any luck with the cable pinout? I’d be interested as i have a USB C Female part I could use as you described.
No, Manuel, not really. I think I traced the board connector pins to the male USB-C end pins, but I don’t know enough about electronics engineering to know whether the Logitech cable has special resistors or other circuitry embedded in the distal plug. I’m anxious that assuming otherwise will fry the camera or a computer’s USB port. So, I’m on the lookout for a camera for sale that’s damaged in a different way, so I can harvest the intact cable, do further testing, repair and give an update here.
Brian -


