Inleiding
The spring in the Logitech MBJ58 Mouse may wear down over time making it hard to scroll smoothly with consistent notches. This may require an easy replacement of the spring to return the mouse to normal functionality. This guide will help you learn how to remove and install the resistance spring of your mouse.
Wat je nodig hebt
-
-
Hold the mouse so that the bottom is facing up.
-
Remove the single Phillips #1 screw from the bottom half of the mouse.
-
-
-
Place the mouse so that the bottom is resting against a hard surface.
-
Lift the top cover of the mouse gently, and remove it.
The cover doesn’t lift straight up on my model - once you raise the back slightly as shown, gently pull it backward (parallel to the table top, away from the cord) to disengage two plastic clips that connect the bottom to the top.
-
-
-
Locate the scroll wheel on the mouse.
-
Grab the scroll wheel with your thumb and index finger.
-
Gently lift up, to remove the scroll wheel from the mouse.
Good information!
My mouse is like new again.
Many thanks
-
-
-
-
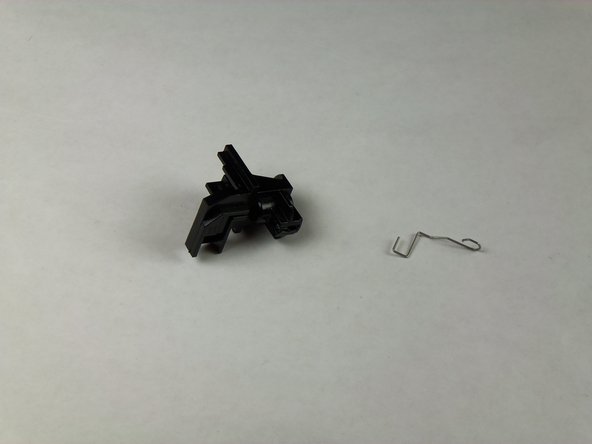
Locate the spring on the scroll wheel, and carefully remove the spring.
-
-
-
Place the replacement spring on the correct side of the wheel (shown in the images) with the prongs pointing down.
-
-
-
Use the images to locate where the resistance spring is.
-
Grab the scroll wheel and its mount and gently pull them apart.
-
-
-
Grasp the top of the resistance spring and pull it towards yourself, letting the hook slide out of its hole.
-
-
-
Insert the hooked section of the replacement spring into the corresponding hole on the mount.
Thank you, thank you, THANK YOU! Worked for Click! Cordless Optical too. I had taken the mouse cover off for cleaning. It was a mess inside. Lifting the wheel out, those two springs fell off. I had no clear idea how to re-assemble them... until you. How much do I owe you? I'd gladly pay.
Lawrence
-


To reassemble your device, follow these instructions in reverse order.
To reassemble your device, follow these instructions in reverse order.
Annuleren: ik heb deze handleiding niet afgemaakt.
14 andere personen hebben deze handleiding voltooid.
Team

Cal Poly, Team 5-14, Forte Winter 2013 Lid van Cal Poly, Team 5-14, Forte Winter 2013
CPSU-FORTE-W13S5G14
5 Leden
21 handleidingen geschreven
10 opmerkingen
This mouse was also available from Dell as an OEM device under the model name "M-UVDEL1". Hopefully the Google juice will help folks repair their devices. I know I would have spent far more time than I did if it weren't for the photos on how to put the spring back. Thanks Maximilian!
thank you! could not have done it without your help.
Brilliant. Thanks. Easy once you know how. The springs were the hard part.
Thank you so much!! You made it very easy and quick!
Used this to figure out how to return the support spring to the correct position for a model M-BJ67B.
THANKS!!
Do you have a part number for the resistance spring? I dropped mine and can’t find a new one on the Internet anywhere.
Also works for Lenovo M-UAE119
Where can you buy a replacement spring for the click part? My boyfriend dropped it on the ground while trying to examine it and it's so tiny it disappeared, he really likes this mouse so he doesn't want to just buy a new one. Does anyone sell the individual tiny springs under the click part of the mouse?
باز کردن پیچ زیر موس
h sh - Antwoord
There may be a sticker covering the screw hole.
Eric Jensen - Antwoord