Inleiding
The Harmony Hub acts as a middle-man between devices and the remote. It has very few parts, making it a simple fix. The most difficult part of this guide is revealing the hub after removing the screws on the exterior. Once the hub is open, removing the motherboard requires just a few more screws to be removed and the release of a small tab that keeps the motherboard in place.
Wat je nodig hebt
-
-
Peel off the rubber pads.
-
Remove the four 6mm Phillips #0 screws from the bottom of the hub.
-
-
-
-
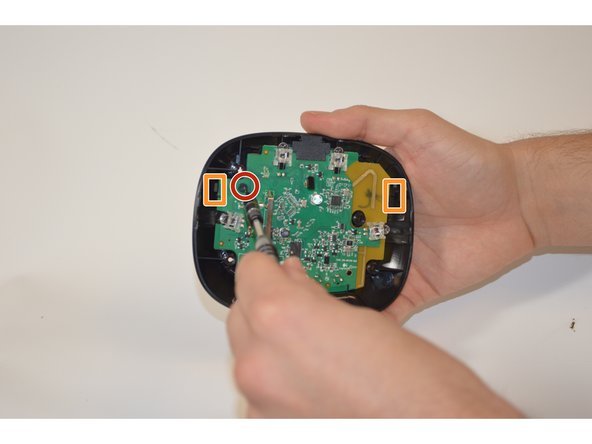
Remove the single 6 mm Phillips #0 screw from the motherboard.
-
Pull the black tabs back and lift the motherboard.
-


To reassemble your device, follow these instructions in reverse order.
To reassemble your device, follow these instructions in reverse order.

Team

USF Tampa, Team 8-1, Eyestone Fall 2015 Lid van USF Tampa, Team 8-1, Eyestone Fall 2015
USFT-EYESTONE-F15S8G1
5 Leden
8 handleidingen geschreven