Ga door naar hoofdinhoud

Logitech Harmony Companion Button Pad Replacement

Wat je nodig hebt

  1. Logitech Harmony Companion Button Pad Replacement, Remote Battery: stap 1, afbeelding 1 van 1
    • Hold the remote with the Logitech label toward you.

  2. Logitech Harmony Companion Button Pad Replacement: stap 2, afbeelding 1 van 1
    • Push the battery cover upward.

  3. Logitech Harmony Companion Button Pad Replacement: stap 3, afbeelding 1 van 3 Logitech Harmony Companion Button Pad Replacement: stap 3, afbeelding 2 van 3 Logitech Harmony Companion Button Pad Replacement: stap 3, afbeelding 3 van 3
    • Use your finger to lift the battery out of the compartment.

    • When the battery has lifted, push it up to remove it.

  4. Logitech Harmony Companion Button Pad Replacement, Remote Motherboard: stap 4, afbeelding 1 van 2 Logitech Harmony Companion Button Pad Replacement, Remote Motherboard: stap 4, afbeelding 2 van 2
    • Remove the two 5.0 mm Phillips #0 screws.

  5. Logitech Harmony Companion Button Pad Replacement: stap 5, afbeelding 1 van 2 Logitech Harmony Companion Button Pad Replacement: stap 5, afbeelding 2 van 2
    • Use the plastic opening tool to pry open the back cover of the remote.

    • It is recommended to have the point of the opening tool facing the back of the remote.

    • Insert the opening tool on each side of the bottom of the remote, and pull up until you hear the cover click open.

    • Pry the back cover off by sliding the plastic opening tool down each side.

  6. Logitech Harmony Companion Button Pad Replacement: stap 6, afbeelding 1 van 2 Logitech Harmony Companion Button Pad Replacement: stap 6, afbeelding 2 van 2
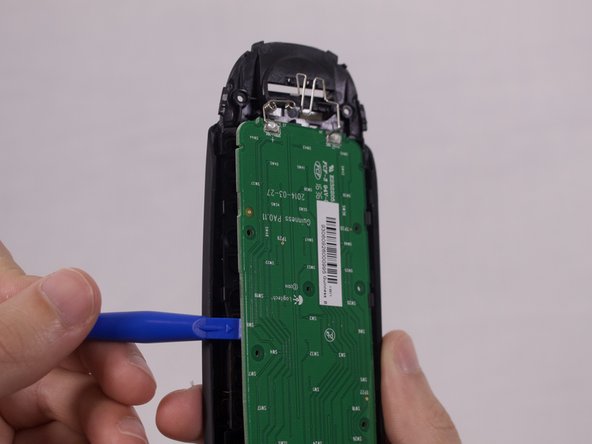
    • Use the plastic opening tool to remove the motherboard.

  7. Logitech Harmony Companion Button Pad Replacement, Button Pad: stap 7, afbeelding 1 van 3 Logitech Harmony Companion Button Pad Replacement, Button Pad: stap 7, afbeelding 2 van 3 Logitech Harmony Companion Button Pad Replacement, Button Pad: stap 7, afbeelding 3 van 3
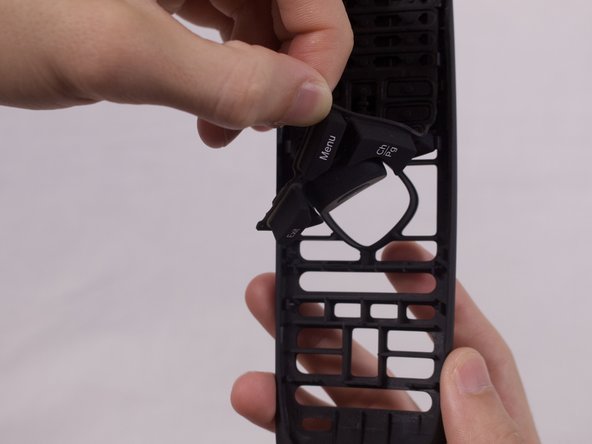
    • Lift the button pad up to remove it from the remote.

Conclusie

To reassemble your device, follow these instructions in reverse order.

3 andere personen hebben deze handleiding voltooid.

Cassidy Wardlow

Lid sinds: 09/28/17

662 Reputatie

4 handleidingen geschreven

Team

USF Tampa, Team S1-G3, Nance Fall 2017 Lid van USF Tampa, Team S1-G3, Nance Fall 2017

USFT-NANCE-F17S1G3

3 Leden

4 handleidingen geschreven

4 opmerkingen

Ou pouvons nous commander «  Logitech Harmony Companion Button Pad Replacement »

Roger Tardif - Antwoord

Where can I purchase the button pad?

elijah - Antwoord

Also looking to find where to purchase. I called Logitech and they were clueless. My 4 year old was better equipped to respond.

Joshua Fuller - Antwoord

Thanks for posting these helpful steps. My harmony Companion was frustrating us because we had to press buttons really hard.

Cy Beaux - Antwoord

Voeg opmerking toe

Weergavestatistieken:

Afgelopen 24 uren: 0

Afgelopen 7 dagen: 5

Afgelopen 30 dagen: 38

Altijd: 2,974