Ga door naar hoofdinhoud

Logitech Harmony 950 Motherboard Replacement

Wat je nodig hebt

  1. Logitech Harmony 950 Motherboard Replacement, Battery: stap 1, afbeelding 1 van 2 Logitech Harmony 950 Motherboard Replacement, Battery: stap 1, afbeelding 2 van 2
    • Make sure the remote control is powered off before starting.

    • Use the Opening Tool to open the port cover at the bottom of the remote control.

    • Bend the cover back to gain easy access to the screws.

  2. Logitech Harmony 950 Motherboard Replacement: stap 2, afbeelding 1 van 3 Logitech Harmony 950 Motherboard Replacement: stap 2, afbeelding 2 van 3 Logitech Harmony 950 Motherboard Replacement: stap 2, afbeelding 3 van 3
    • Use the Phillips #0 Screwdriver to remove the (2) two 6mm screws.

    • Pull the bottom cover off of the remote control.

  3. Logitech Harmony 950 Motherboard Replacement: stap 3, afbeelding 1 van 3 Logitech Harmony 950 Motherboard Replacement: stap 3, afbeelding 2 van 3 Logitech Harmony 950 Motherboard Replacement: stap 3, afbeelding 3 van 3
    • Use the Phillips #1 Screwdriver to remove the (2) two 6mm screws.

    • There should be a gap on each side to fit the Opening Tool. Use the Opening Tool to open the back cover (Soft Touch cover) using the gap.

  4. Logitech Harmony 950 Motherboard Replacement: stap 4, afbeelding 1 van 3 Logitech Harmony 950 Motherboard Replacement: stap 4, afbeelding 2 van 3 Logitech Harmony 950 Motherboard Replacement: stap 4, afbeelding 3 van 3
    • Use the Opening Tool to lift the battery out of the case.

    • Gently pull the cable out of the socket to unplug the battery.

    • Be careful not to damage any part of the remote when pulling the cable out.

  5. Logitech Harmony 950 Motherboard Replacement, Motherboard: stap 5, afbeelding 1 van 3 Logitech Harmony 950 Motherboard Replacement, Motherboard: stap 5, afbeelding 2 van 3 Logitech Harmony 950 Motherboard Replacement, Motherboard: stap 5, afbeelding 3 van 3
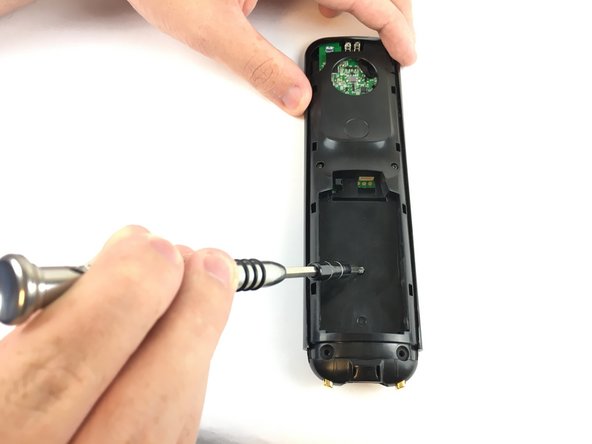
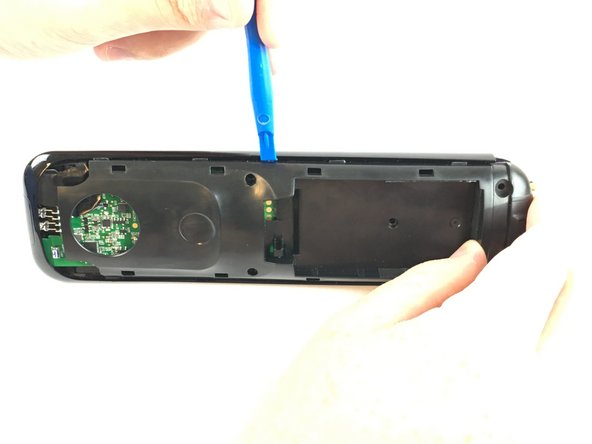
    • Use the Phillips #0 screwdriver to remove the (3) three 6mm screws.

    • Push the opening tool into the gap along the side of the remote, then slide it across until you hear clicking sounds.

    • You need to repeat this process for both sides of the remote.

  6. Logitech Harmony 950 Motherboard Replacement: stap 6, afbeelding 1 van 3 Logitech Harmony 950 Motherboard Replacement: stap 6, afbeelding 2 van 3 Logitech Harmony 950 Motherboard Replacement: stap 6, afbeelding 3 van 3
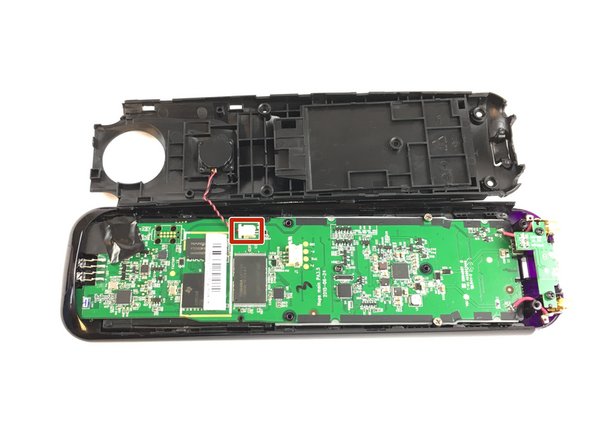
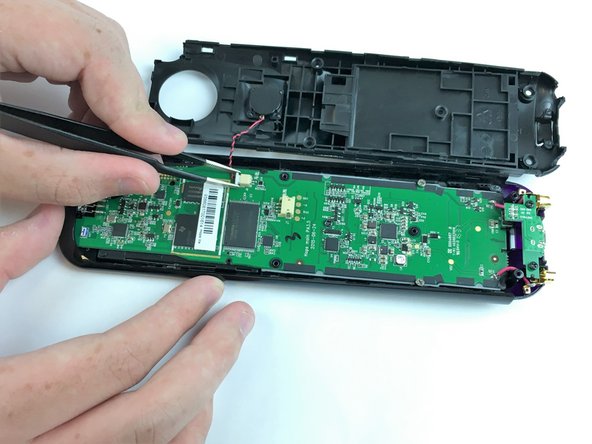
    • Carefully remove the back cover and place it next to the remote. Be careful not to detach the wire during this process.

    • Use the Angled Tweezers to carefully pull the white cable end off of the remote and disconnect it.

  7. Logitech Harmony 950 Motherboard Replacement: stap 7, afbeelding 1 van 3 Logitech Harmony 950 Motherboard Replacement: stap 7, afbeelding 2 van 3 Logitech Harmony 950 Motherboard Replacement: stap 7, afbeelding 3 van 3
    • Use the Phillips #0 screwdriver to remove the (5) five 6mm screws.

    • Be careful not to detach the pink wires when removing the gold charging conductors.

  8. Logitech Harmony 950 Motherboard Replacement: stap 8, afbeelding 1 van 3 Logitech Harmony 950 Motherboard Replacement: stap 8, afbeelding 2 van 3 Logitech Harmony 950 Motherboard Replacement: stap 8, afbeelding 3 van 3
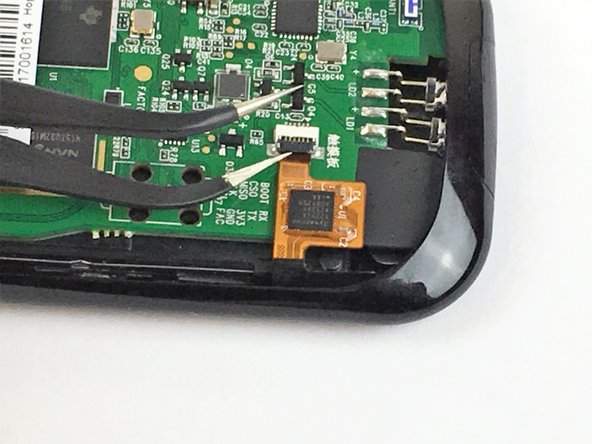
    • Remove the black tape to access the cable underneath.

    • Use the Angled Tweezers to lift the black lock.

    • Slide the yellow cable to disconnect it from the circuit board.

  9. Logitech Harmony 950 Motherboard Replacement: stap 9, afbeelding 1 van 2 Logitech Harmony 950 Motherboard Replacement: stap 9, afbeelding 2 van 2
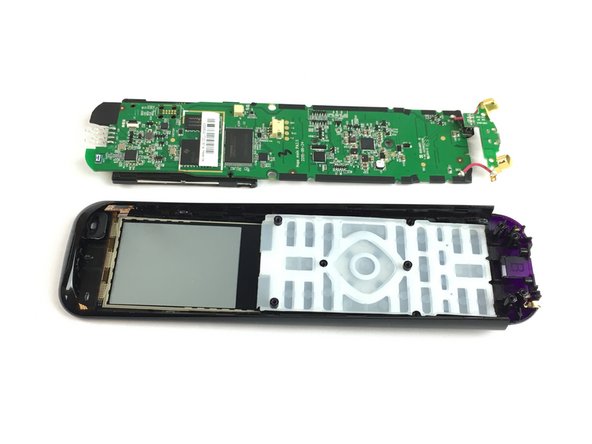
    • Pull the circuit board off of the remote from the bottom, and lift up to detach it from the cover.

Conclusie

To reassemble your device, follow these instructions in reverse order.

Één andere persoon heeft deze handleiding voltooid.

Blake Sanborn

Lid sinds: 09/26/17

534 Reputatie

3 handleidingen geschreven

Team

USF Tampa, Team S2-G2, Passmore Fall 2017 Lid van USF Tampa, Team S2-G2, Passmore Fall 2017

USFT-PASSMORE-F17S2G2

4 Leden

4 handleidingen geschreven

3 opmerkingen

How replace A Mitsubishi Remote Control

عبدالعزيز المناعي - Antwoord

How replace A Mitsubishi Remote Control ?

Thanks

عبدالعزيز المناعي - Antwoord

Voeg opmerking toe

Weergavestatistieken:

Afgelopen 24 uren: 0

Afgelopen 7 dagen: 4

Afgelopen 30 dagen: 31

Altijd: 2,446