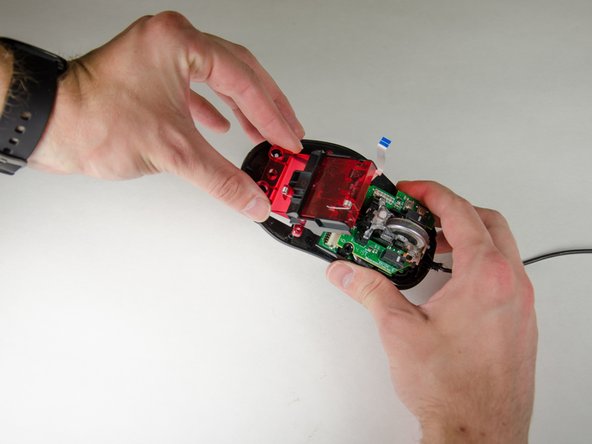
Ga door naar hoofdinhoud

Logitech G500 Cord Replacement

Wat je nodig hebt

  1. Logitech G500 Cord Replacement, Cord: stap 1, afbeelding 1 van 1
    • It's very common for this cord to fray with continued use. Let's open up this mouse and replace the cord!

  2. Logitech G500 Cord Replacement: stap 2, afbeelding 1 van 3 Logitech G500 Cord Replacement: stap 2, afbeelding 2 van 3 Logitech G500 Cord Replacement: stap 2, afbeelding 3 van 3
    • Pry off the three feet to reveal screws.

    • It is easy to split the pads in half so make sure your spudger gets underneath both layers.

  3. Logitech G500 Cord Replacement: stap 3, afbeelding 1 van 2 Logitech G500 Cord Replacement: stap 3, afbeelding 2 van 2
    • Locate the hidden screw hole behind the Logitech sticker.

    • Puncture the sticker to access the screw.

    • Sometimes the screw head will not be removable because the sticker may get in the way. This is fine; just make sure the screw stays inside and you don't lose it.

    • Remove all five Phillips screws.

  4. Logitech G500 Cord Replacement: stap 4, afbeelding 1 van 1
    • Now, or at any time, you may wish to remove the weighted cartridge inside of the mouse. It is best if you do it at or before this step, but it is not necessary.

  5. Logitech G500 Cord Replacement: stap 5, afbeelding 1 van 1
    • With all screws removed, carefully pry the top of the mouse away from the body.

    • There is a cable securing the top of the mouse to the body. Do not remove the case too far or this may break.

  6. Logitech G500 Cord Replacement: stap 6, afbeelding 1 van 2 Logitech G500 Cord Replacement: stap 6, afbeelding 2 van 2
    • Using a spudger, lift the ZIF cable guard.

    • Remove the cable from the upper housing. The upper housing can now be set aside.

    • On the bottom right of the top circuit board is a revision number. The rev. 3 mouse has a soldered red wire between this board and the top half of the mouse. For rev. 3 mice, leave the ZIF cable in place and proceed.

  7. Logitech G500 Cord Replacement: stap 7, afbeelding 1 van 2 Logitech G500 Cord Replacement: stap 7, afbeelding 2 van 2
    • Remove the three Phillips screws to free the weight cartridge holder.

    • Lift the weight cartridge holder from the body.

  8. Logitech G500 Cord Replacement: stap 8, afbeelding 1 van 2 Logitech G500 Cord Replacement: stap 8, afbeelding 2 van 2
    • Pry the pin securing the mouse wheel and housing to the left.

    • Remove the mouse wheel and housing.

    • Save the two tiny springs under the wheel in a safe place until reassembly. Not reinstalling these springs will cause the mouse to malfunction.

  9. Logitech G500 Cord Replacement: stap 9, afbeelding 1 van 1
    • Remove the two parallel screws holding a black piece of plastic to the mouse body.

  10. Logitech G500 Cord Replacement: stap 10, afbeelding 1 van 2 Logitech G500 Cord Replacement: stap 10, afbeelding 2 van 2
    • Remove two screws securing the bottom circuit board to the bottom plate of the mouse.

  11. Logitech G500 Cord Replacement: stap 11, afbeelding 1 van 2 Logitech G500 Cord Replacement: stap 11, afbeelding 2 van 2
    • Remove the final two Phillips screws near the top of the mouse holding the circuit boards to the plate.

    • There is a transparent plastic part between the two boards. Remember to reinstall this during reassembly.

  12. Logitech G500 Cord Replacement: stap 12, afbeelding 1 van 3 Logitech G500 Cord Replacement: stap 12, afbeelding 2 van 3 Logitech G500 Cord Replacement: stap 12, afbeelding 3 van 3
    • Pull the circuit boards loose from the bottom plate.

    • You may need to use a spudger to pry the circuit free.

    • The mouse cable is glued to the bottom plate, so do not quickly yank the circuit boards away.

    • The circuit boards are not very strongly attached to each other; do not pull hard on the top board or they may separate, damaging the device.

  13. Logitech G500 Cord Replacement: stap 13, afbeelding 1 van 1
    • Carefully pry on each side of the mouse connector until the cable comes free.

    • Since you don't care about the condition of the cable after you're done, an occasional light tug on the cable will help you determine if it is loose enough to be freed.

Conclusie

To reassemble your device, follow these instructions in reverse order.

29 andere personen hebben deze handleiding voltooid.

Adam Hintz

Lid sinds: 04/12/10

2.547 Reputatie

1 Handleiding geschreven

14 opmerkingen

Very helpful guide, thanks.

heretik - Antwoord

thanks for the explanations.

pcinpact - Antwoord

Thanks for the guide! Despite being super careful with the springs they managed to flick out when I was screwing the circuit board back in, one was never to be seen again. Thankfully the middle mouse button seems to work fine with just one!

Davios Sparr - Antwoord

No way would have been able to successfully replace the cable without this guide. Thanks for the very detailed steps, and clear pictures!

Al Y - Antwoord

I concur… Really helpful and easy to follow. And you saved me about $50 on a new mouse

John B - Antwoord

Voeg opmerking toe

Weergavestatistieken:

Afgelopen 24 uren: 2

Afgelopen 7 dagen: 21

Afgelopen 30 dagen: 82

Altijd: 25,370