Deze versie kan foutieve bewerkingen bevatten. Schakel over naar de recentste gecontroleerde momentopname.
Wat je nodig hebt
-
Deze stap is niet vertaald. Help het te vertalen
-
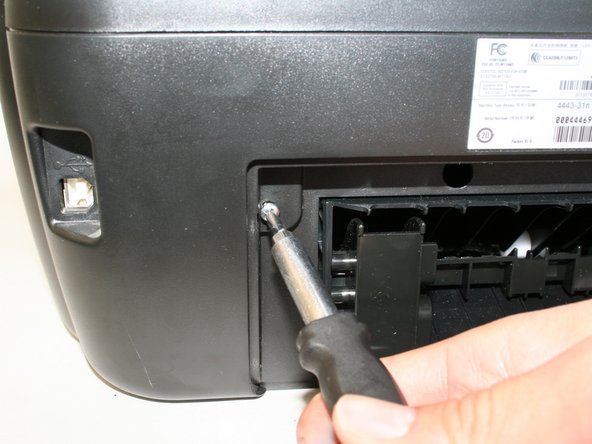
Hold the button down with the flat end away from the printer. When you hear a click, the duplex unit can be removed from the printer.
-
-
Deze stap is niet vertaald. Help het te vertalen
-
Remove the duplex unit from the back of the printer with the duplex unit facing up.
-
-
Deze stap is niet vertaald. Help het te vertalen
-
Locate the two screw holes that connect the two cylindrical extensions from the top portion of the scanner unit to the printer.
-
-
Deze stap is niet vertaald. Help het te vertalen
-
Unscrew the two size#6 (5-mm head) Phillips 1-mm screws connecting the scanner unit to the printer.
-
-
Deze stap is niet vertaald. Help het te vertalen
-
Raise and close the scanner unit to observe that the hinges lock in place when lifted.
-
-
-
Deze stap is niet vertaald. Help het te vertalen
-
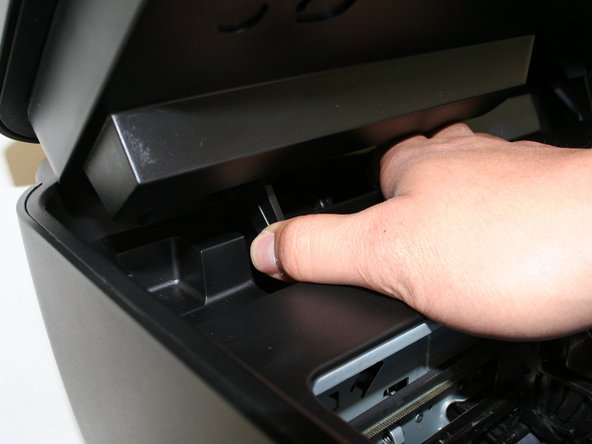
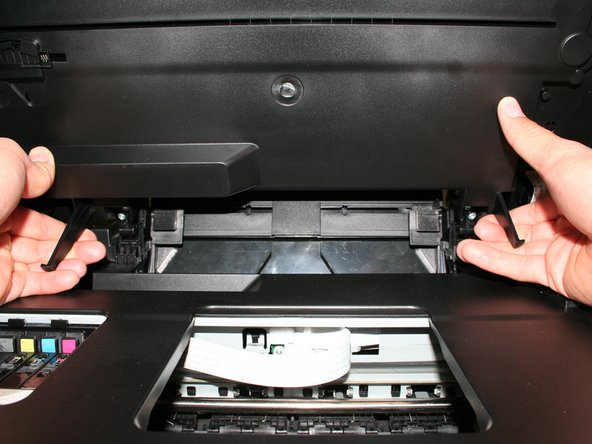
Firmly press the hinges inward toward the middle of the printer on both sides at the same time. The hinges should be easily lifted up and removed.
-
-
Deze stap is niet vertaald. Help het te vertalen
-
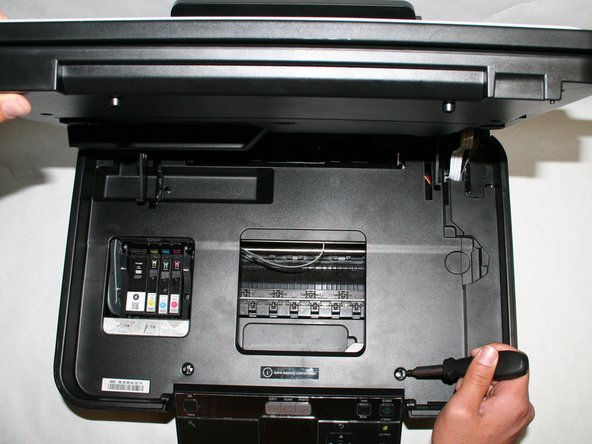
Locate the three screws connecting the plastic tray to the printer.
-
-
Deze stap is niet vertaald. Help het te vertalen
-
Remove the three size#6 (5-mm head) Phillips 1-mm screws connecting the scanner unit to the printer.
-
-
Deze stap is niet vertaald. Help het te vertalen
-
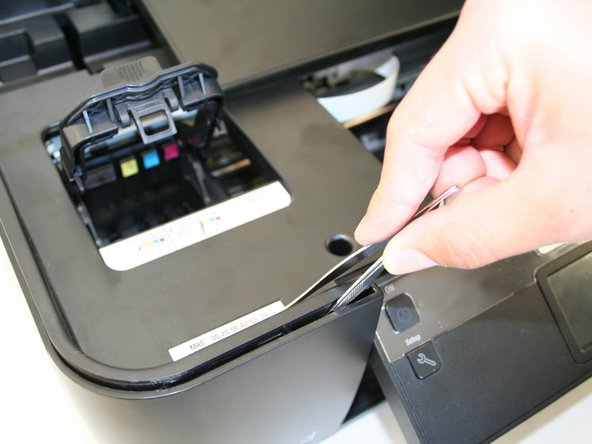
Remove the plastic cover by unlocking the plastic hinges at the inside edges of the printer. Use a plastic opening tool or a tweezer to slowly move in between the crease around the printer to unlock it.
-
-
Deze stap is niet vertaald. Help het te vertalen
-
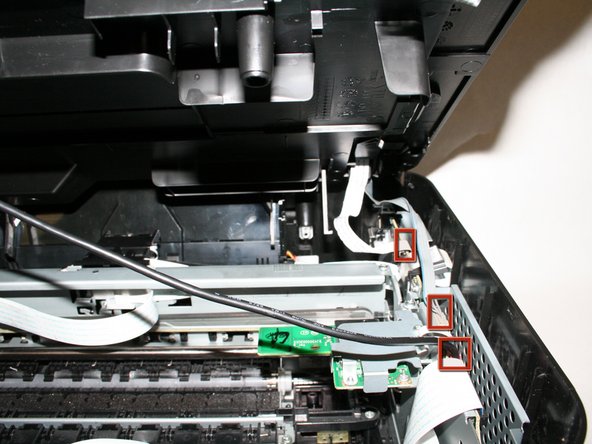
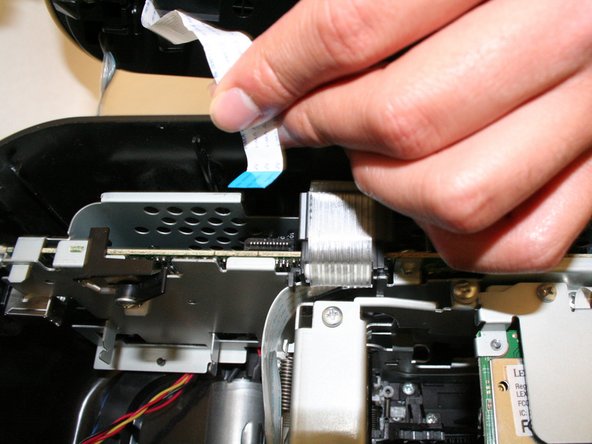
Slowly raise, but do not remove the plastic cover with the scanner unit so that it exposes the three cables connecting the scanner unit to the printer.
-
-
Deze stap is niet vertaald. Help het te vertalen
-
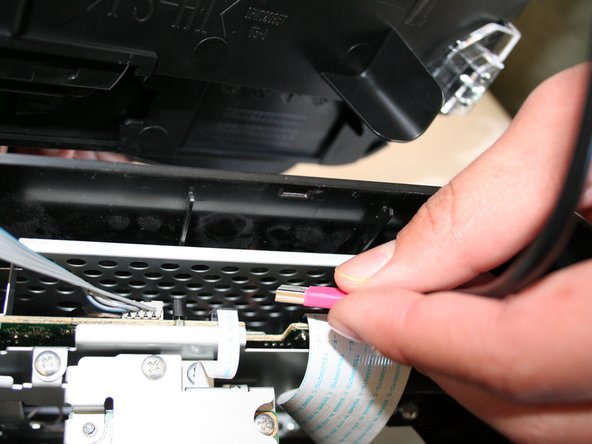
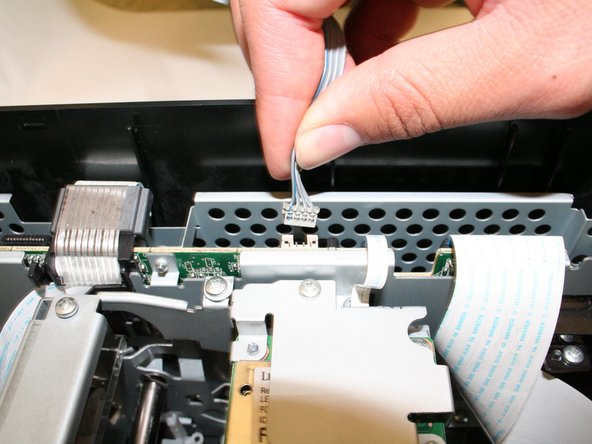
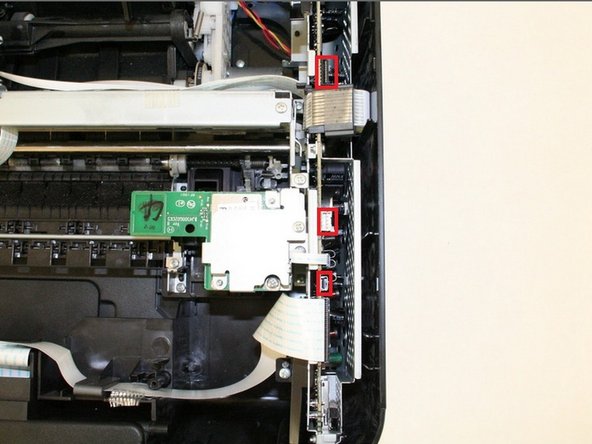
Locate the three ports for the cables from the scanner unit and make sure they are unplugged.
-
-
Deze stap is niet vertaald. Help het te vertalen
-
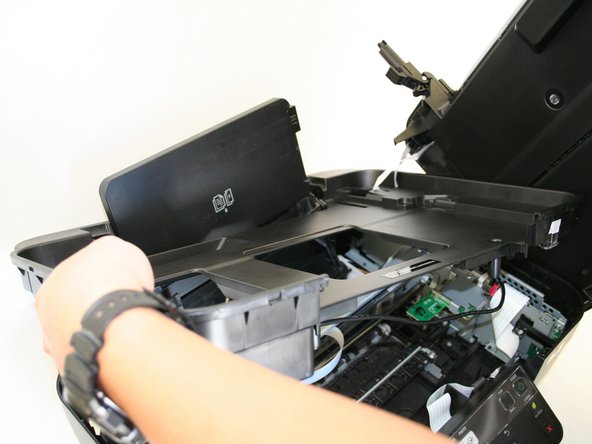
Remove the scanner unit with the plastic cover by lifting it up from the bottom portion of the printer.
-


Annuleren: ik heb deze handleiding niet afgemaakt.
2 andere personen hebben deze handleiding voltooid.
Team

Cal Poly, Team 18-38, Regan Winter 2013 Lid van Cal Poly, Team 18-38, Regan Winter 2013
CPSU-REGAN-W13S18G38
4 Leden
8 handleidingen geschreven