Ga door naar hoofdinhoud

Lenovo Z70-80 Motherboard Replacement

Wat je nodig hebt

  1. Lenovo Z70-80 Motherboard Replacement, Battery: stap 1, afbeelding 1 van 2 Lenovo Z70-80 Motherboard Replacement, Battery: stap 1, afbeelding 2 van 2
    • Use your fingers two push both latches away from each other to release the battery.

    • Pull the battery out.

  2. Lenovo Z70-80 Motherboard Replacement, Back Panel: stap 2, afbeelding 1 van 3 Lenovo Z70-80 Motherboard Replacement, Back Panel: stap 2, afbeelding 2 van 3 Lenovo Z70-80 Motherboard Replacement, Back Panel: stap 2, afbeelding 3 van 3
    • Remove the two Phillips #0 screws from the bottom panel.

    • Slide the panel down slightly, and then lift to pull it off.

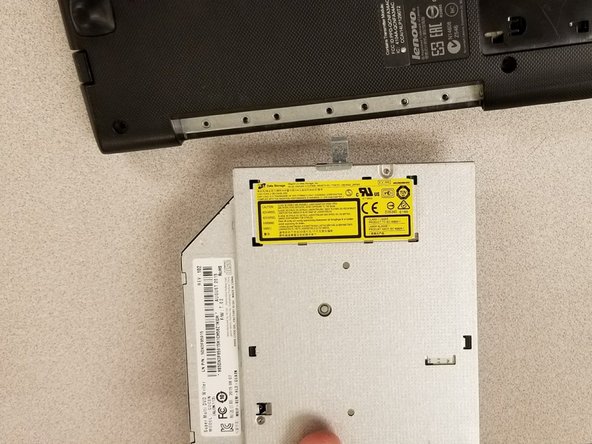
  3. Lenovo Z70-80 Motherboard Replacement, Optical Drive: stap 3, afbeelding 1 van 3 Lenovo Z70-80 Motherboard Replacement, Optical Drive: stap 3, afbeelding 2 van 3 Lenovo Z70-80 Motherboard Replacement, Optical Drive: stap 3, afbeelding 3 van 3
    • Remove the single 3mm Phillips #0 screw from the optical drive.

    • Pull the optical drive out of the side.

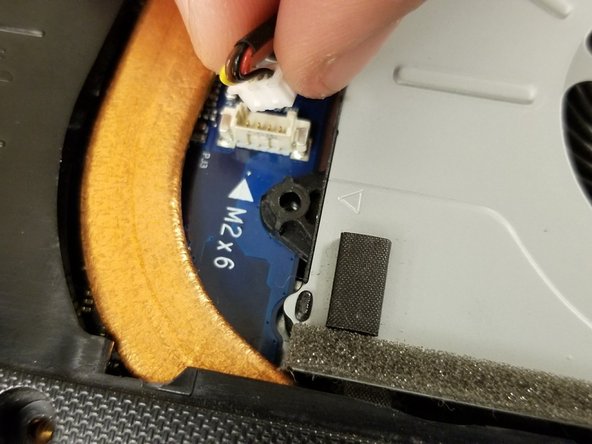
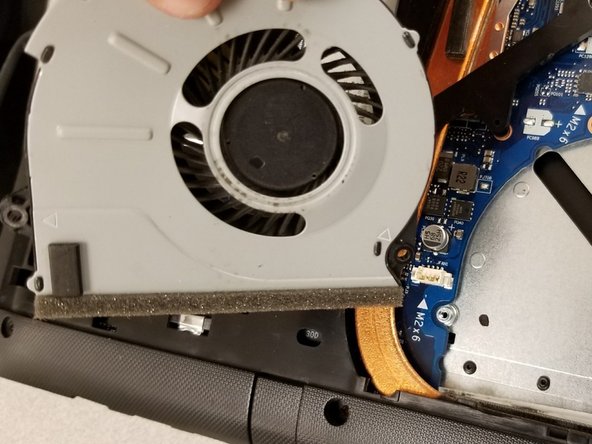
  4. Lenovo Z70-80 Motherboard Replacement, Electric Fan: stap 4, afbeelding 1 van 3 Lenovo Z70-80 Motherboard Replacement, Electric Fan: stap 4, afbeelding 2 van 3 Lenovo Z70-80 Motherboard Replacement, Electric Fan: stap 4, afbeelding 3 van 3
    • Remove the three 6mm Phillips #0 screws from the fan.

    • Disconnect the fan from the motherboard by pulling up on the plug.

  5. Lenovo Z70-80 Motherboard Replacement, Motherboard: stap 5, afbeelding 1 van 1
    • Remove all the 17 7mm Phillips #0 screws.

    • A sticker covers this screw. Remove this sticker to remove the screw.

    • Remove the back cover.

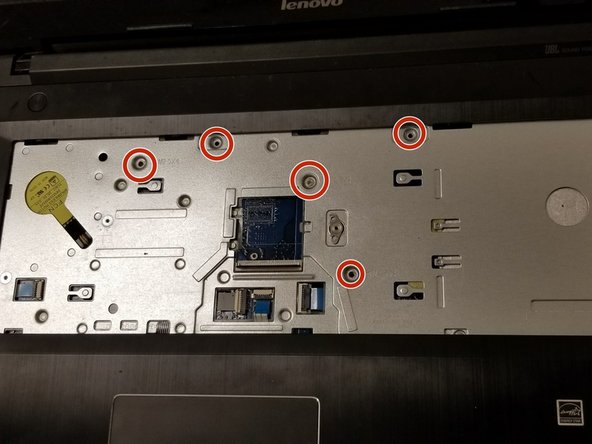
  6. Lenovo Z70-80 Motherboard Replacement: stap 6, afbeelding 1 van 3 Lenovo Z70-80 Motherboard Replacement: stap 6, afbeelding 2 van 3 Lenovo Z70-80 Motherboard Replacement: stap 6, afbeelding 3 van 3
    • Pry the edges of the keyboard upwards using a spudger.

    • A cable with a ZIF connector is attached to the bottom of the keyboard. Flip the small black tab on the connector for safe removal.

    • Remove the five 3mm Phillips #0 screws.

  7. Lenovo Z70-80 Motherboard Replacement: stap 7, afbeelding 1 van 3 Lenovo Z70-80 Motherboard Replacement: stap 7, afbeelding 2 van 3 Lenovo Z70-80 Motherboard Replacement: stap 7, afbeelding 3 van 3
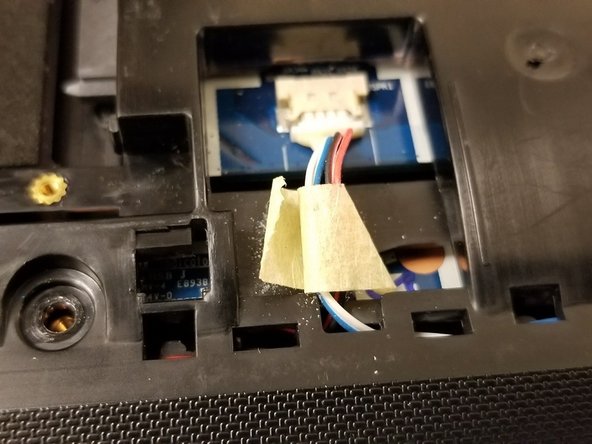
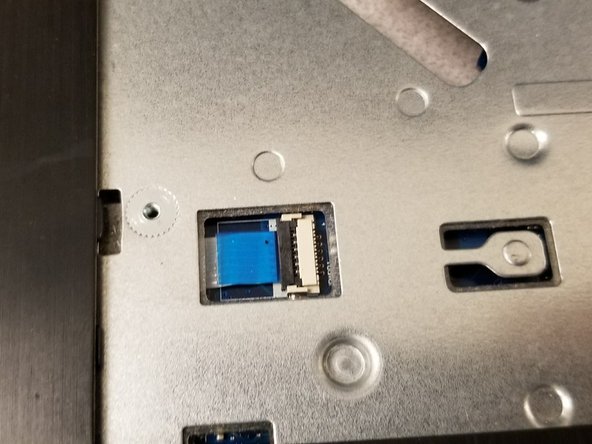
    • Remove all the ribbon cables and connectors from the front and back of the laptop.

    • Remember to flip the small black tabs on ZIF connectors for safe removal.

  8. Lenovo Z70-80 Motherboard Replacement: stap 8, afbeelding 1 van 2 Lenovo Z70-80 Motherboard Replacement: stap 8, afbeelding 2 van 2
    • Remove the 3mm screw and carefully pull out the cables from the hooks holding them in place.

  9. Lenovo Z70-80 Motherboard Replacement: stap 9, afbeelding 1 van 2 Lenovo Z70-80 Motherboard Replacement: stap 9, afbeelding 2 van 2
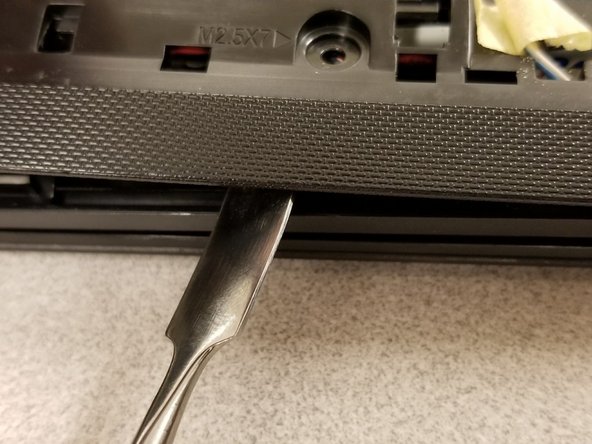
    • Use a spudger at the edges of the laptop cover to carefully pry upwards, removing the cover.

  10. Lenovo Z70-80 Motherboard Replacement: stap 10, afbeelding 1 van 3 Lenovo Z70-80 Motherboard Replacement: stap 10, afbeelding 2 van 3 Lenovo Z70-80 Motherboard Replacement: stap 10, afbeelding 3 van 3
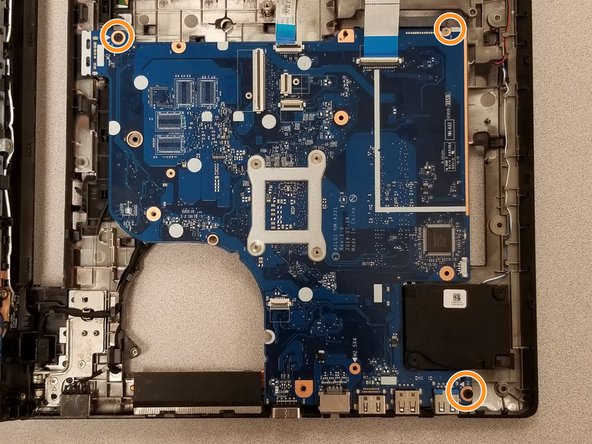
    • Unplug the two black cables from the motherboard.

    • Remove the three 3mm screws from the motherboard.

    • Remove the motherboard.

    • Pick up the motherboard carefully by the edges.

Conclusie

To reassemble your device, follow these instructions in reverse order.

3 andere personen hebben deze handleiding voltooid.

Bijgevoegde documenten

Eduardo Delgado

Lid sinds: 01/24/18

412 Reputatie

4 handleidingen geschreven

Team

Gateway, Team S1-G4, Johnson Spring 2018 Lid van Gateway, Team S1-G4, Johnson Spring 2018

GCC-JOHNSON-S18S1G4

2 Leden

12 handleidingen geschreven

0 opmerkingen

Voeg opmerking toe

Weergavestatistieken:

Afgelopen 24 uren: 3

Afgelopen 7 dagen: 7

Afgelopen 30 dagen: 35

Altijd: 4,009