Inleiding
If you are following this guide, that means your Motherboard is causing you issues on your Lenovo Yoga Tab 3 8. Before starting to work on your device, it is advised to back up any important files just in case something happens. You will want to make sure you have the device powered off to prevent harming yourself or damaging your hardware. To make reassembly easier, be sure to avoid misplacing the small screws by keeping track of them as you go.
Wat je nodig hebt
-
Gereedschap gebruikt in deze stap:Tweezers$4.99
-
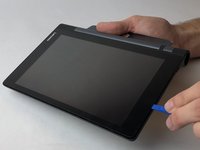
Open the kickstand by pressing the release button in the center.
-
Remove the identification sticker with a pair of tweezers to allow access to the two 2mm screws underneath.
-
-
-
Gereedschap gebruikt in deze stap:Tweezers$4.99
-
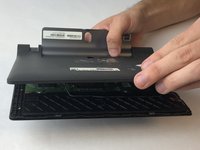
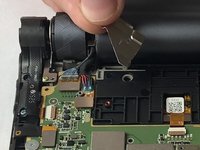
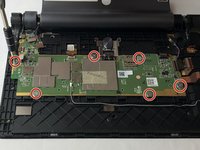
With the device oriented screen side down and hinge opposite of you, locate the silver metal bracket on the top left covering the battery and camera connections. Remove the two 3mm screws with a PH00 screwdriver.
-
Remove the bracket with your fingers to reveal the two silver battery and camera connections underneath.
-
Gently lift the connections off using tweezers.
-
-
-
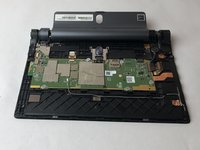
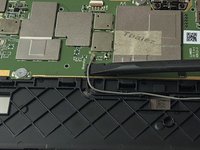
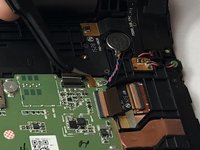
Locate the WiFi module connection on the motherboard by following the grey wire along the bottom. Use a spudger to gently pry it off.
-
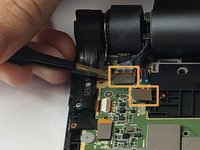
Locate the volume control connector on the left side of the motherboard. Gently lift the silver connector off with a pair of tweezers.
-
Continuing up the left side of the motherboard, locate the white power button connector. Disengage the beige lock on the top of the connector by flipping it up with a pair of tweezers. Gently pull the wire from the connector using the tweezers.
-
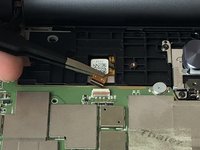
Continuing along the top of the motherboard, disconnect the white LCD connection by disengaging the beige lock and pulling the wire out with tweezers.
-
-
-
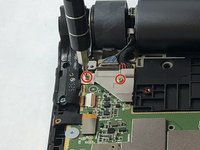
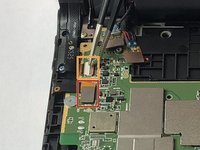
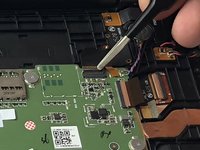
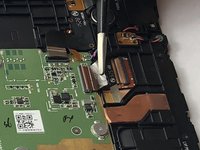
Continuing to the right along the top of the motherboard, the next wire connects to the motherboard in two places. First, gently lift pry off the gold connector on the right with a pair of tweezers, then use the tweezers to disengage the brown lock on the black connector to the left. Use the tweezers to gently pull out the wire.
-
The final black connector is located on the right side of the motherboard. Disengage the brown lock and pull out the wire with tweezers.
-


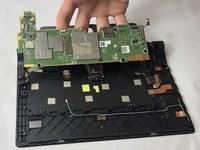
To reassemble your device, follow these instructions in reverse order.
To reassemble your device, follow these instructions in reverse order.
Annuleren: ik heb deze handleiding niet afgemaakt.
2 andere personen hebben deze handleiding voltooid.
Team

USF Tampa, Team S16-G2, Eyestone Fall 2017 Lid van USF Tampa, Team S16-G2, Eyestone Fall 2017
USFT-EYESTONE-F17S16G2
4 Leden
16 handleidingen geschreven
4 opmerkingen
I got it thanks to your instruction. Now I hope to find a new motherboard AND to get it reconnected again. I’m abit worried about the small flat wires to get them located and connected properly again. My motherboard doesn’t work anymore because I was foolish enough to flash a wrong software.
sir,
how to buy
please contact detail .. please
Sir, where I can buy motherboard and how much price for this ?
Hi,
Can you please answer the question in the forum. You can reply here also. I wanted to know the component detail my tabs component is burnt.