Ga door naar hoofdinhoud

Lenovo Yoga 900-13ISK Wi-Fi Card Replacement

Wat je nodig hebt

  1. Lenovo Yoga 900-13ISK Wi-Fi Card Replacement, Back Cover: stap 1, afbeelding 1 van 2 Lenovo Yoga 900-13ISK Wi-Fi Card Replacement, Back Cover: stap 1, afbeelding 2 van 2
    • Using a T5 Torx screwdriver, remove the ten 5.5 mm screws from the back case of the laptop.

  2. Lenovo Yoga 900-13ISK Wi-Fi Card Replacement: stap 2, afbeelding 1 van 3 Lenovo Yoga 900-13ISK Wi-Fi Card Replacement: stap 2, afbeelding 2 van 3 Lenovo Yoga 900-13ISK Wi-Fi Card Replacement: stap 2, afbeelding 3 van 3
    • Use a spudger to pry open the back case at the hinges of the laptop.

    • There are plastic clips around the perimeter of the case holding down the back cover. These will need to be popped off as the cover is removed.

    • Use your fingers to completely pop off the back cover.

  3. Lenovo Yoga 900-13ISK Wi-Fi Card Replacement, Battery: stap 3, afbeelding 1 van 3 Lenovo Yoga 900-13ISK Wi-Fi Card Replacement, Battery: stap 3, afbeelding 2 van 3 Lenovo Yoga 900-13ISK Wi-Fi Card Replacement, Battery: stap 3, afbeelding 3 van 3
    • Remove the five 3.6 mm screws from the battery with a Phillips #00 screwdriver.

  4. Lenovo Yoga 900-13ISK Wi-Fi Card Replacement: stap 4, afbeelding 1 van 3 Lenovo Yoga 900-13ISK Wi-Fi Card Replacement: stap 4, afbeelding 2 van 3 Lenovo Yoga 900-13ISK Wi-Fi Card Replacement: stap 4, afbeelding 3 van 3
    • Grab the bottom corners of the battery and gently pull the battery until the cable disconnects from the connector on the motherboard.

    • While reassembling, use a plastic spudger to push the battery cable into the connector on the underside of the motherboard. This will be easier to do before the screws are replaced.

  5. Lenovo Yoga 900-13ISK Wi-Fi Card Replacement, Wi-Fi Card: stap 5, afbeelding 1 van 3 Lenovo Yoga 900-13ISK Wi-Fi Card Replacement, Wi-Fi Card: stap 5, afbeelding 2 van 3 Lenovo Yoga 900-13ISK Wi-Fi Card Replacement, Wi-Fi Card: stap 5, afbeelding 3 van 3
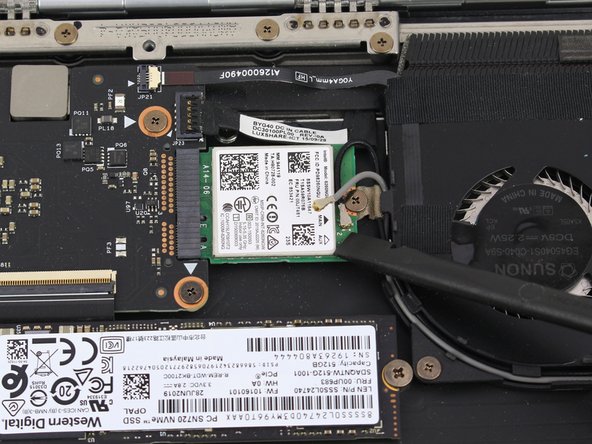
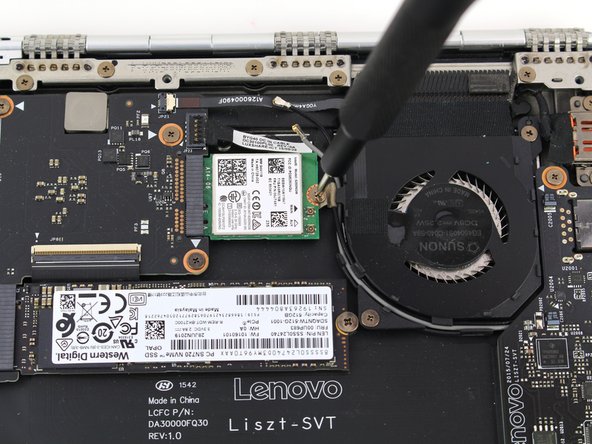
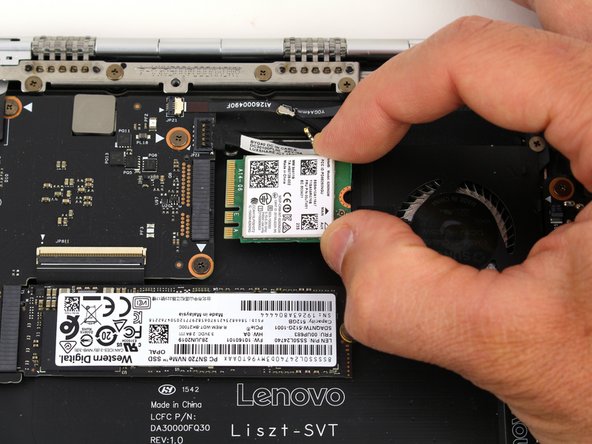
    • Pry up the white and black coaxial cables from the Wi-Fi card using a spudger.

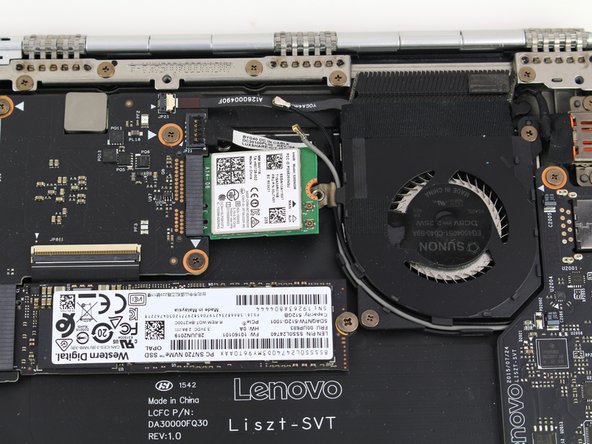
    • Move the cables to the side.

  6. Lenovo Yoga 900-13ISK Wi-Fi Card Replacement: stap 6, afbeelding 1 van 3 Lenovo Yoga 900-13ISK Wi-Fi Card Replacement: stap 6, afbeelding 2 van 3 Lenovo Yoga 900-13ISK Wi-Fi Card Replacement: stap 6, afbeelding 3 van 3
    • Using a Phillips #00 screwdriver, remove the 2.2 mm screw holding down the Wi-Fi card.

    • The Wi-Fi card may pop up to rest at an angle to the motherboard after the screw is removed.

  7. Lenovo Yoga 900-13ISK Wi-Fi Card Replacement: stap 7, afbeelding 1 van 3 Lenovo Yoga 900-13ISK Wi-Fi Card Replacement: stap 7, afbeelding 2 van 3 Lenovo Yoga 900-13ISK Wi-Fi Card Replacement: stap 7, afbeelding 3 van 3
    • Pull the Wi-Fi card out from the connector on the motherboard.

Conclusie

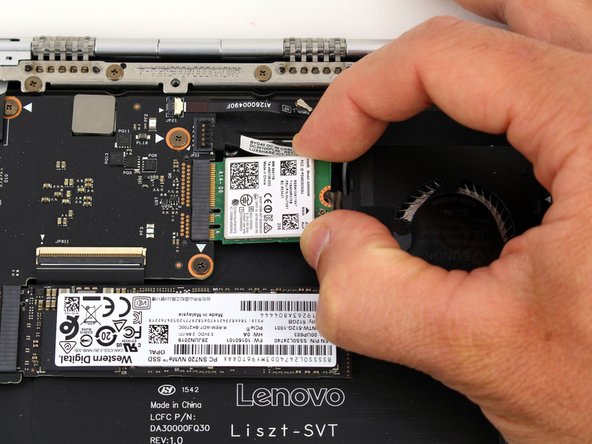
To reassemble your device, follow these instructions in reverse order.

Één andere persoon heeft deze handleiding voltooid.

Austin Blakely

Lid sinds: 03/11/19

19.506 Reputatie

53 handleidingen geschreven

Team

iFixit Lid van iFixit

Staff

135 Leden

16.817 handleidingen geschreven

0 opmerkingen

Voeg opmerking toe

Weergavestatistieken:

Afgelopen 24 uren: 2

Afgelopen 7 dagen: 6

Afgelopen 30 dagen: 27

Altijd: 601