Ga door naar hoofdinhoud

Lenovo Yoga 900-13ISK Webcam Replacement

Wat je nodig hebt

  1. Lenovo Yoga 900-13ISK Webcam Replacement, Back Cover: stap 1, afbeelding 1 van 2 Lenovo Yoga 900-13ISK Webcam Replacement, Back Cover: stap 1, afbeelding 2 van 2
    • Using a T5 Torx screwdriver, remove the ten 5.5 mm screws from the back case of the laptop.

  2. Lenovo Yoga 900-13ISK Webcam Replacement: stap 2, afbeelding 1 van 3 Lenovo Yoga 900-13ISK Webcam Replacement: stap 2, afbeelding 2 van 3 Lenovo Yoga 900-13ISK Webcam Replacement: stap 2, afbeelding 3 van 3
    • Use a spudger to pry open the back case at the hinges of the laptop.

    • There are plastic clips around the perimeter of the case holding down the back cover. These will need to be popped off as the cover is removed.

    • Use your fingers to completely pop off the back cover.

  3. Lenovo Yoga 900-13ISK Webcam Replacement, Battery: stap 3, afbeelding 1 van 3 Lenovo Yoga 900-13ISK Webcam Replacement, Battery: stap 3, afbeelding 2 van 3 Lenovo Yoga 900-13ISK Webcam Replacement, Battery: stap 3, afbeelding 3 van 3
    • Remove the five 3.6 mm screws from the battery with a Phillips #00 screwdriver.

  4. Lenovo Yoga 900-13ISK Webcam Replacement: stap 4, afbeelding 1 van 3 Lenovo Yoga 900-13ISK Webcam Replacement: stap 4, afbeelding 2 van 3 Lenovo Yoga 900-13ISK Webcam Replacement: stap 4, afbeelding 3 van 3
    • Grab the bottom corners of the battery and gently pull the battery until the cable disconnects from the connector on the motherboard.

    • While reassembling, use a plastic spudger to push the battery cable into the connector on the underside of the motherboard. This will be easier to do before the screws are replaced.

  5. Lenovo Yoga 900-13ISK Webcam Replacement, Display Assembly: stap 5, afbeelding 1 van 3 Lenovo Yoga 900-13ISK Webcam Replacement, Display Assembly: stap 5, afbeelding 2 van 3 Lenovo Yoga 900-13ISK Webcam Replacement, Display Assembly: stap 5, afbeelding 3 van 3
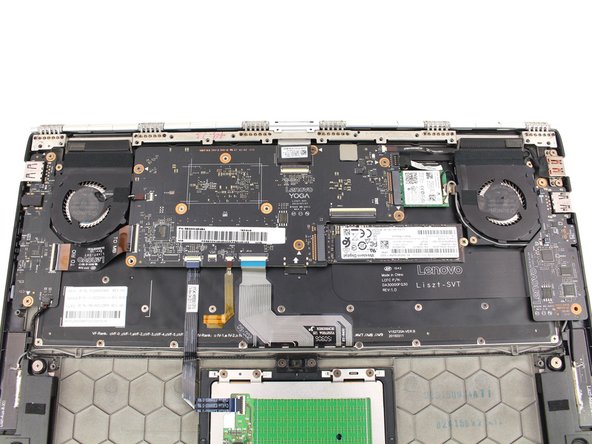
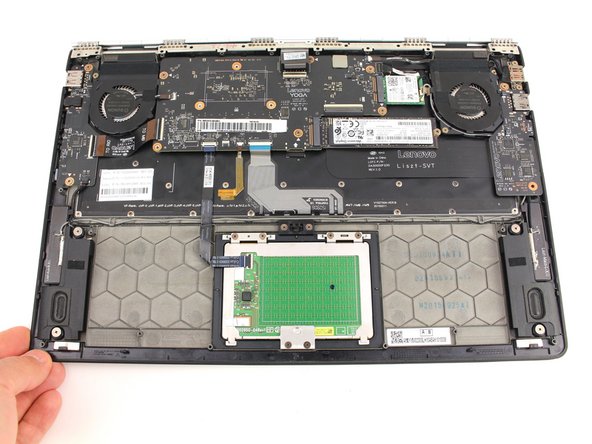
    • Remove the ten 3.6 mm screws from the hinge bracket with a Phillips #00 screwdriver.

  6. Lenovo Yoga 900-13ISK Webcam Replacement: stap 6, afbeelding 1 van 3 Lenovo Yoga 900-13ISK Webcam Replacement: stap 6, afbeelding 2 van 3 Lenovo Yoga 900-13ISK Webcam Replacement: stap 6, afbeelding 3 van 3
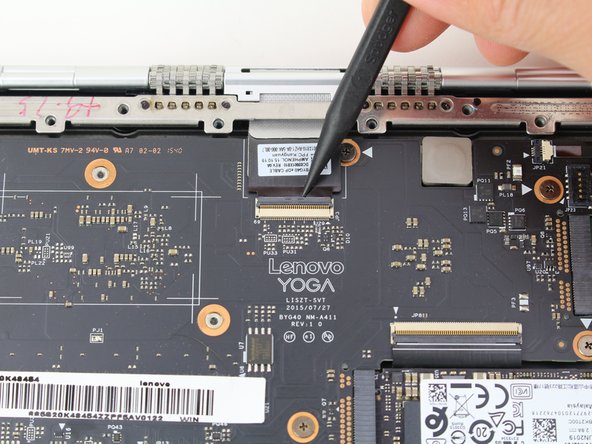
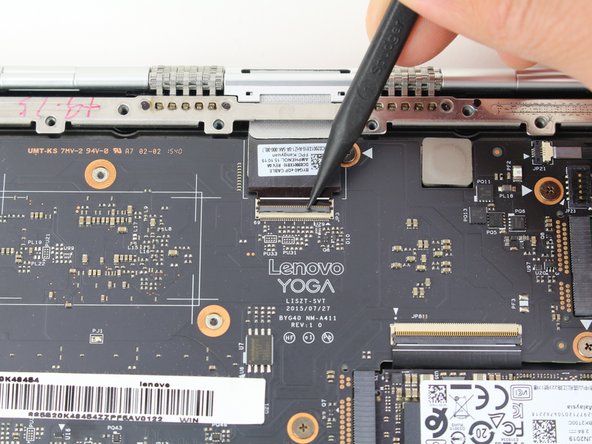
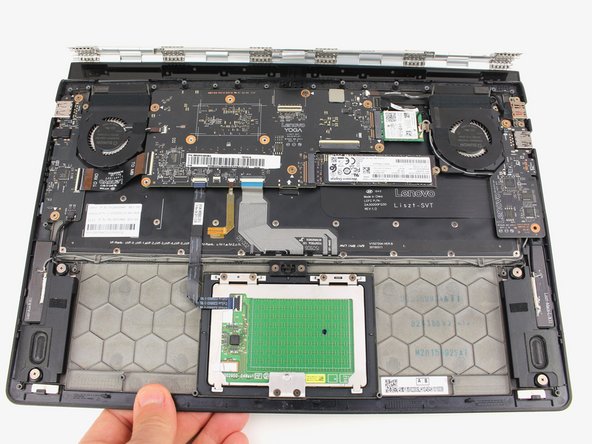
    • Use the pointed end of a spudger to lift the hinged locking flap of the display ZIF connector.
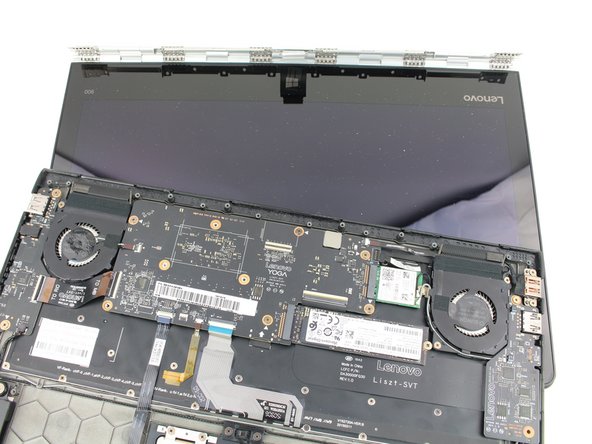
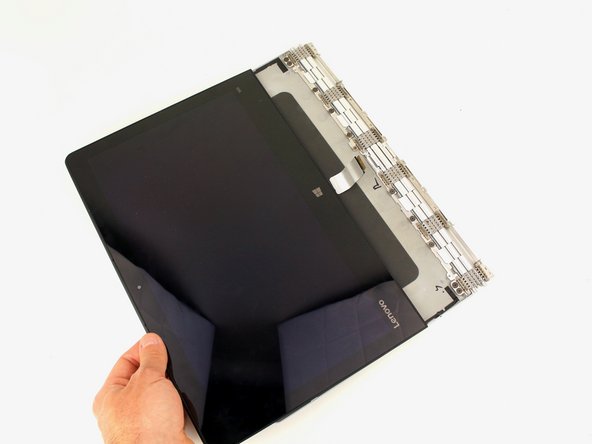
  7. Lenovo Yoga 900-13ISK Webcam Replacement: stap 7, afbeelding 1 van 2 Lenovo Yoga 900-13ISK Webcam Replacement: stap 7, afbeelding 2 van 2
    • Pull out the display cable with a pair of blunt nose tweezers.

  8. Lenovo Yoga 900-13ISK Webcam Replacement: stap 8, afbeelding 1 van 3 Lenovo Yoga 900-13ISK Webcam Replacement: stap 8, afbeelding 2 van 3 Lenovo Yoga 900-13ISK Webcam Replacement: stap 8, afbeelding 3 van 3
    • Open the laptop to a 45° angle, then close the laptop.

    • This raises the hinge, which will stay open as the bottom case is lowered.

  9. Lenovo Yoga 900-13ISK Webcam Replacement: stap 9, afbeelding 1 van 3 Lenovo Yoga 900-13ISK Webcam Replacement: stap 9, afbeelding 2 van 3 Lenovo Yoga 900-13ISK Webcam Replacement: stap 9, afbeelding 3 van 3
    • Slide the bottom case away from the hinge.

    • If the hinge is catching on the case, either go back to the previous step and open the case a bit more, or manually open the hinge with your fingers.

  10. Voorzichtig: stappen 10-16 komen van een handleiding die in bewerking is.

    Lenovo Yoga 900-13ISK Webcam Replacement, Display Opening Prereq: stap 10, afbeelding 1 van 1
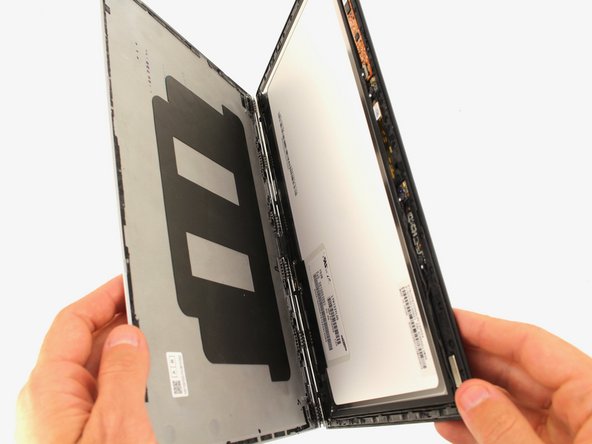
    • Apply heat along the bottom and left edges of the screen, either with a heat gun or iOpener.

    • Check out our iOpener Instructions if you need help!

  11. Lenovo Yoga 900-13ISK Webcam Replacement: stap 11, afbeelding 1 van 2 Lenovo Yoga 900-13ISK Webcam Replacement: stap 11, afbeelding 2 van 2
    • Insert an opening pick into the corner of the screen and slide it around slightly to create an opening.

  12. Lenovo Yoga 900-13ISK Webcam Replacement: stap 12, afbeelding 1 van 3 Lenovo Yoga 900-13ISK Webcam Replacement: stap 12, afbeelding 2 van 3 Lenovo Yoga 900-13ISK Webcam Replacement: stap 12, afbeelding 3 van 3
    • Insert a second opening pick and slide it along the side of the display, cutting away the adhesive.

  13. Lenovo Yoga 900-13ISK Webcam Replacement: stap 13, afbeelding 1 van 1
    • Use a heat gun or iOpener to apply heat to the top and side edge that have not yet been opened.

  14. Lenovo Yoga 900-13ISK Webcam Replacement: stap 14, afbeelding 1 van 3 Lenovo Yoga 900-13ISK Webcam Replacement: stap 14, afbeelding 2 van 3 Lenovo Yoga 900-13ISK Webcam Replacement: stap 14, afbeelding 3 van 3
    • Continue cutting away the adhesive on the top and side edges of the display.

  15. Lenovo Yoga 900-13ISK Webcam Replacement: stap 15, afbeelding 1 van 3 Lenovo Yoga 900-13ISK Webcam Replacement: stap 15, afbeelding 2 van 3 Lenovo Yoga 900-13ISK Webcam Replacement: stap 15, afbeelding 3 van 3
    • Open the display casing along the top edge.

  16. Lenovo Yoga 900-13ISK Webcam Replacement: stap 16, afbeelding 1 van 3 Lenovo Yoga 900-13ISK Webcam Replacement: stap 16, afbeelding 2 van 3 Lenovo Yoga 900-13ISK Webcam Replacement: stap 16, afbeelding 3 van 3
    • Pull the display cable out from the hinge mechanism.

  17. Lenovo Yoga 900-13ISK Webcam Replacement, Webcam: stap 17, afbeelding 1 van 3 Lenovo Yoga 900-13ISK Webcam Replacement, Webcam: stap 17, afbeelding 2 van 3 Lenovo Yoga 900-13ISK Webcam Replacement, Webcam: stap 17, afbeelding 3 van 3
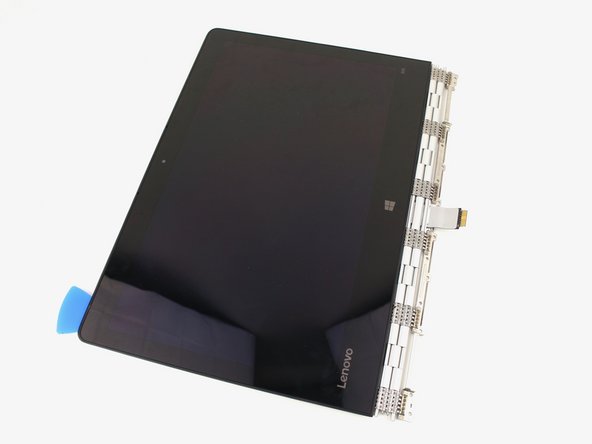
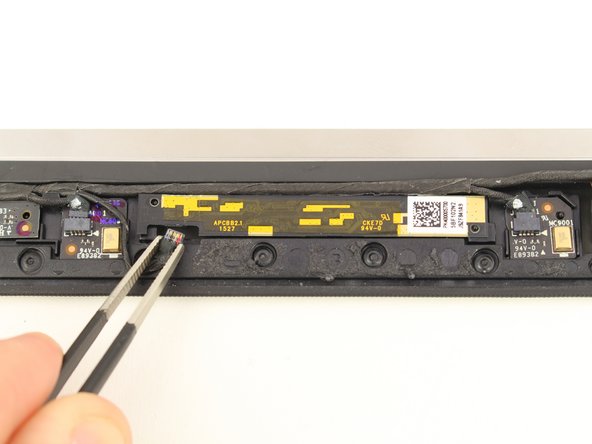
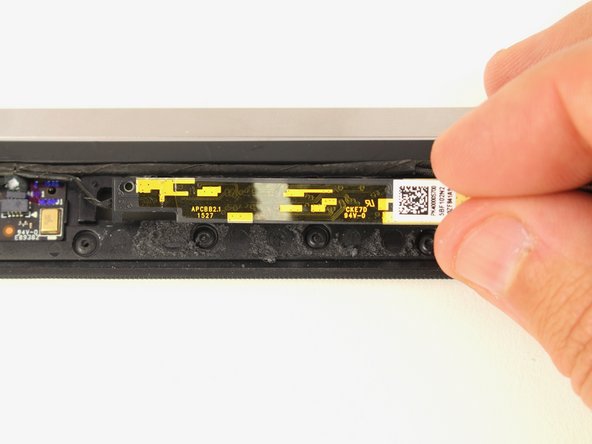
    • Gently remove the cable from the yellow-accented webcam board on the top of the display panel with a pair of blunt nose tweezers.

  18. Lenovo Yoga 900-13ISK Webcam Replacement: stap 18, afbeelding 1 van 3 Lenovo Yoga 900-13ISK Webcam Replacement: stap 18, afbeelding 2 van 3 Lenovo Yoga 900-13ISK Webcam Replacement: stap 18, afbeelding 3 van 3
    • Gently lift up the webcam board with a spudger.

    • There will be strong adhesive holding the board in place, so be careful not to bend or break the delicate board.

Conclusie

To reassemble your device, follow these instructions in reverse order.

Austin Blakely

Lid sinds: 03/11/19

19.479 Reputatie

53 handleidingen geschreven

Team

iFixit Lid van iFixit

Staff

135 Leden

16.732 handleidingen geschreven

0 opmerkingen

Voeg opmerking toe

Weergavestatistieken:

Afgelopen 24 uren: 0

Afgelopen 7 dagen: 7

Afgelopen 30 dagen: 12

Altijd: 211