Deze versie kan foutieve bewerkingen bevatten. Schakel over naar de recentste gecontroleerde momentopname.
Wat je nodig hebt
-
Deze stap is niet vertaald. Help het te vertalen
-
recommend to print out picture of the backside of the laptop and then use it as a template to place the screws on. They are many and different sizes.
-
Remove all bottom screws and place on template printout.
-
-
Deze stap is niet vertaald. Help het te vertalen
-
Remove DVD drive. Toggle the "play triangle" switch so that the tab extends. Pull the tab to remove the DVD drive.
-
Remove hard drive
-
-
Deze stap is niet vertaald. Help het te vertalen
-
unsnap touchpad left and right.
-
lift up touchpad carefully, and disconnect touchpad.
-
-
-
Deze stap is niet vertaald. Help het te vertalen
-
Pull keyboard gently toward yourself. and then lift up untill flex is visible.
-
use spudger to disconnect connector for keyboard.
-
-
Deze stap is niet vertaald. Help het te vertalen
-
The rest of the guide is mosly helpfull pictures...
-
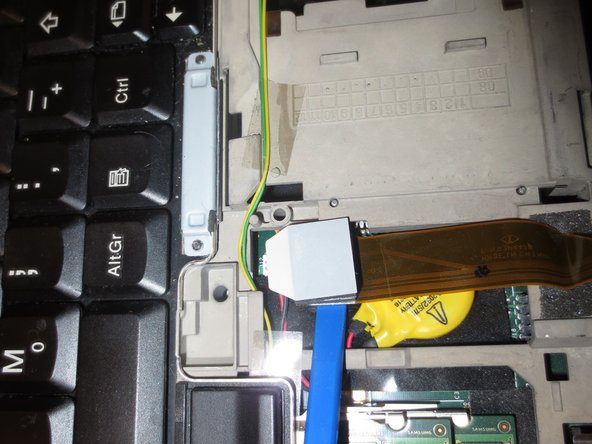
Remove WLAN module by
-
unplug carefully with spudger the two RF connectors to WLAN module.
-
remove the two screws holding wlan module.
-
lift up module 45 degress and pull outwards.
-
-
Deze stap is niet vertaald. Help het te vertalen
-
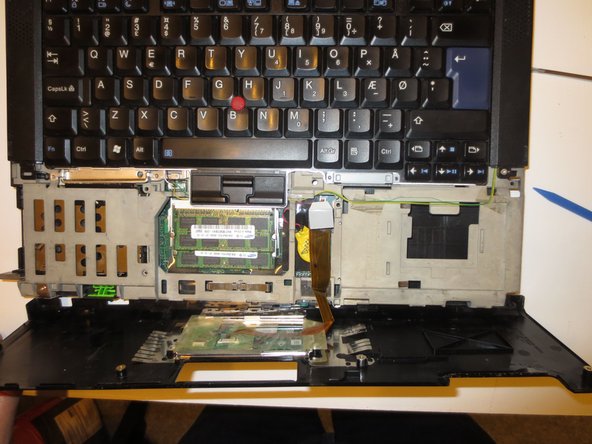
usefull images showing most of main assembly.
-
Removing RAM modules is usefull if the whole logic board needs to be taken out.
-
From here on , unscrew everything - carefully note where screws belong. I used Ifixit magnetic mat and some note making.
-


Annuleren: ik heb deze handleiding niet afgemaakt.
8 andere personen hebben deze handleiding voltooid.
