Ga door naar hoofdinhoud

Lenovo IdeaTab A2109 WIFI/GPS Antenna Replacement

Wat je nodig hebt

  1. Lenovo IdeaTab A2109 WIFI/GPS Antenna Replacement, Battery: stap 1, afbeelding 1 van 1
    • Look at the back of the tablet and locate the speakers on top of the rear cover.

    • There is a smaller indentation in the plastic cover that runs across the top of the device.

    • Wedge the plastic opening tool, under the middle of the cover as shown, then push up and the cover will pop off.

  2. Lenovo IdeaTab A2109 WIFI/GPS Antenna Replacement: stap 2, afbeelding 1 van 2 Lenovo IdeaTab A2109 WIFI/GPS Antenna Replacement: stap 2, afbeelding 2 van 2
    • Remove SD card if present.

    • Remove two black 3mm Phillips #00 screws.

  3. Lenovo IdeaTab A2109 WIFI/GPS Antenna Replacement: stap 3, afbeelding 1 van 2 Lenovo IdeaTab A2109 WIFI/GPS Antenna Replacement: stap 3, afbeelding 2 van 2
    • Disconnect battery power connector by pinching the connector with tweezers, and sliding it out of the housing.

  4. Lenovo IdeaTab A2109 WIFI/GPS Antenna Replacement: stap 4, afbeelding 1 van 2 Lenovo IdeaTab A2109 WIFI/GPS Antenna Replacement: stap 4, afbeelding 2 van 2
    • Remove seven black 3mm Phillips #00 screws.

    • The top right corner screw is underneath a yellow ribbon. Lift the ribbon up without disconnecting it and unscrew the screw.

  5. Lenovo IdeaTab A2109 WIFI/GPS Antenna Replacement: stap 5, afbeelding 1 van 2 Lenovo IdeaTab A2109 WIFI/GPS Antenna Replacement: stap 5, afbeelding 2 van 2
    • Now you can take the battery out in order to either replace it or continue disassembling the device.

  6. Lenovo IdeaTab A2109 WIFI/GPS Antenna Replacement, System Board: stap 6, afbeelding 1 van 3 Lenovo IdeaTab A2109 WIFI/GPS Antenna Replacement, System Board: stap 6, afbeelding 2 van 3 Lenovo IdeaTab A2109 WIFI/GPS Antenna Replacement, System Board: stap 6, afbeelding 3 van 3
    • Remove two black 3mm Phillips #00 screws.

    • Remove three silver 1.8 mm Phillips #00 screws.

  7. Lenovo IdeaTab A2109 WIFI/GPS Antenna Replacement: stap 7, afbeelding 1 van 3 Lenovo IdeaTab A2109 WIFI/GPS Antenna Replacement: stap 7, afbeelding 2 van 3 Lenovo IdeaTab A2109 WIFI/GPS Antenna Replacement: stap 7, afbeelding 3 van 3
    • Use tweezers to flip up the small black plastic locks on all four connections.

    • Carefully remove each of the exposed ribbons.

  8. Lenovo IdeaTab A2109 WIFI/GPS Antenna Replacement: stap 8, afbeelding 1 van 2 Lenovo IdeaTab A2109 WIFI/GPS Antenna Replacement: stap 8, afbeelding 2 van 2
    • Disconnect the two speaker connectors by pinching them with tweezers and sliding them out from the system board housing.

  9. Lenovo IdeaTab A2109 WIFI/GPS Antenna Replacement: stap 9, afbeelding 1 van 2 Lenovo IdeaTab A2109 WIFI/GPS Antenna Replacement: stap 9, afbeelding 2 van 2
    • Use tweezers or your finger nail to disconnect the camera attachment by flipping up the black rectangular connector.

  10. Lenovo IdeaTab A2109 WIFI/GPS Antenna Replacement: stap 10, afbeelding 1 van 3 Lenovo IdeaTab A2109 WIFI/GPS Antenna Replacement: stap 10, afbeelding 2 van 3 Lenovo IdeaTab A2109 WIFI/GPS Antenna Replacement: stap 10, afbeelding 3 van 3
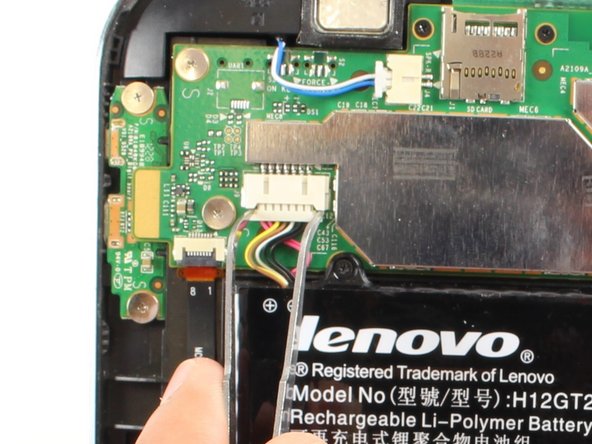
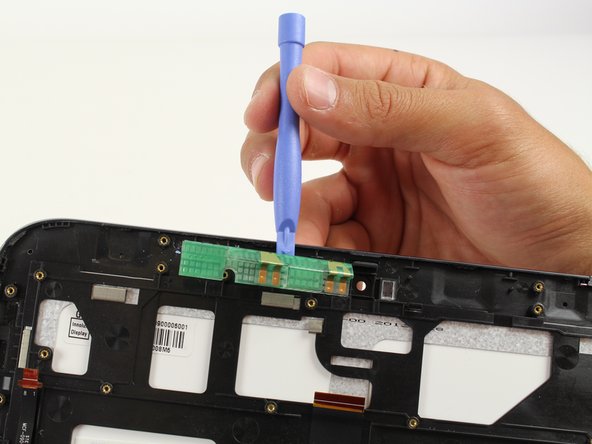
    • Disconnect the HDMI connection with the system board

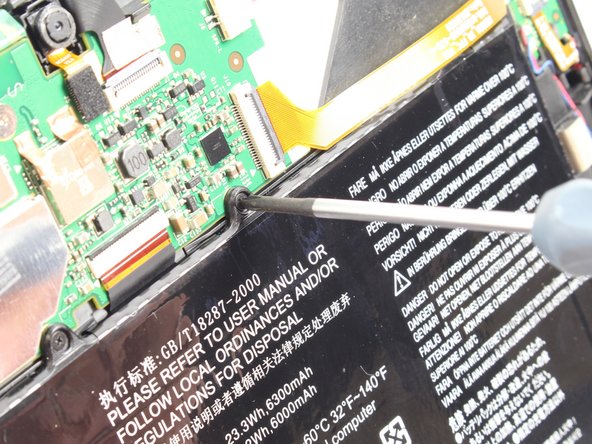
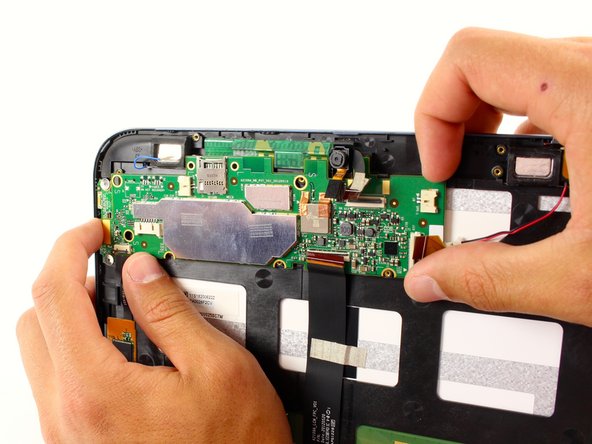
    • Use a plastic opening tool to pry up the system board, and you will hear a pop as it comes free.

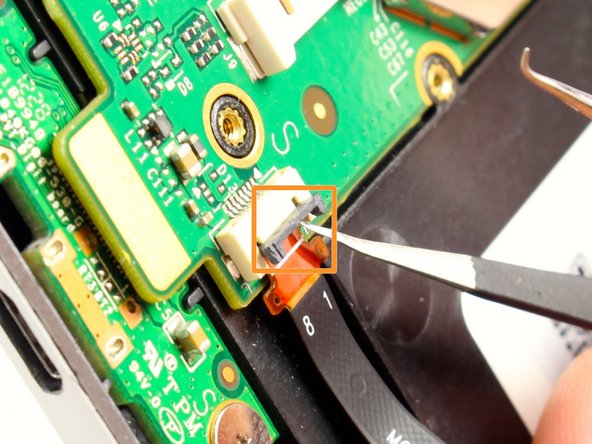
    • Slide out the system board from its housing tab on the upper right corner.

    • Pull the board slowly away from the tab, and it will pop out.

  11. Lenovo IdeaTab A2109 WIFI/GPS Antenna Replacement, WIFI/GPS Antenna: stap 11, afbeelding 1 van 1
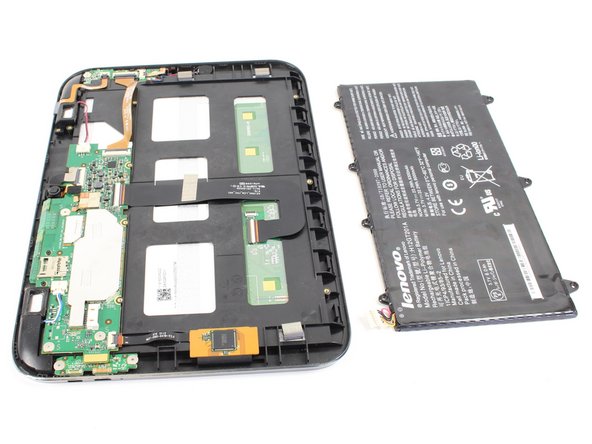
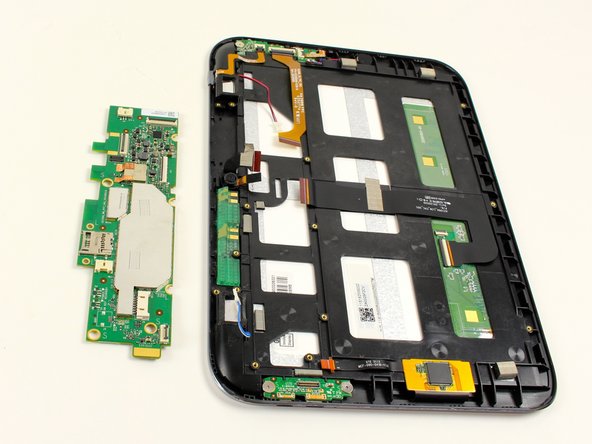
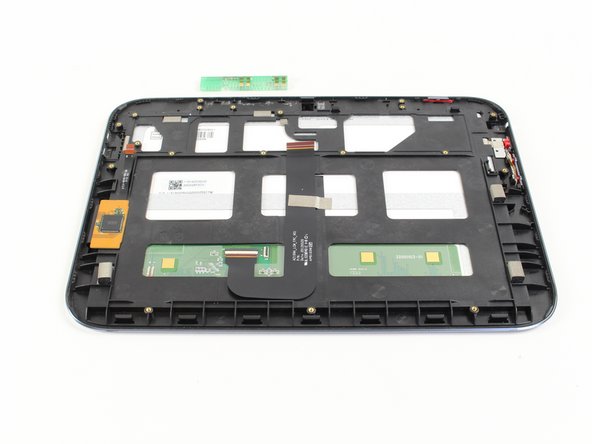
    • Once the system board has been removed, you can access the WIFI/GPS antenna.

  12. Lenovo IdeaTab A2109 WIFI/GPS Antenna Replacement: stap 12, afbeelding 1 van 3 Lenovo IdeaTab A2109 WIFI/GPS Antenna Replacement: stap 12, afbeelding 2 van 3 Lenovo IdeaTab A2109 WIFI/GPS Antenna Replacement: stap 12, afbeelding 3 van 3
    • Insert the blue prying tool at the corner of the antenna. Pry up slowly, and move it across the antenna.

    • There is an adhesive holding the antenna in place, so it may take a little bit of force and movement to take off the antenna.

    • The antenna falls out easily once fully pried out.

Conclusie

To reassemble your device, follow these instructions in reverse order.

2 andere personen hebben deze handleiding voltooid.

Bcohen

Lid sinds: 04/14/14

436 Reputatie

2 handleidingen geschreven

Team

Cal Poly, Team 7-19, Regan Spring 2014 Lid van Cal Poly, Team 7-19, Regan Spring 2014

CPSU-REGAN-S14S7G19

4 Leden

15 handleidingen geschreven

0 opmerkingen

Voeg opmerking toe

Weergavestatistieken:

Afgelopen 24 uren: 0

Afgelopen 7 dagen: 6

Afgelopen 30 dagen: 22

Altijd: 3,328