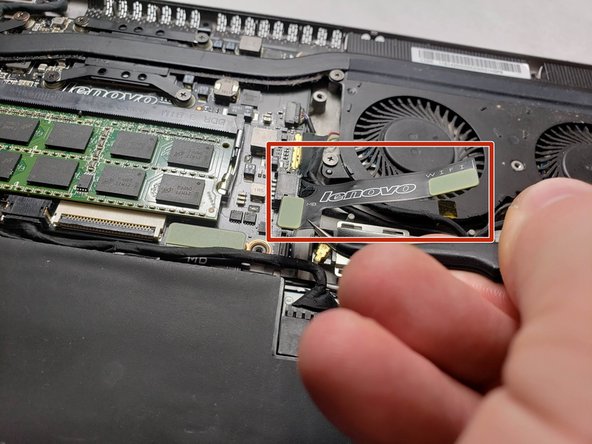
Ga door naar hoofdinhoud

Lenovo IdeaPad Yoga 13 Wi-Fi Card Replacement

Gearchiveerde handleiding
Deze handleiding wordt enkel nog bijgehouden voor historische doeleinden. Gebruik de laatste versie van deze gids om uw reparatie uit te voeren.

Wat je nodig hebt

  1. Lenovo IdeaPad Yoga 13 Wi-Fi Card Replacement, Wi-Fi Card: stap 1, afbeelding 1 van 1
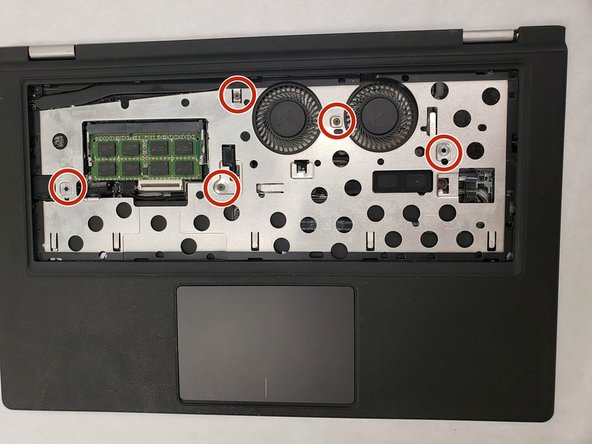
    • Remove the ten screws on the back panel of the laptop using the T4 Torx screwdriver.

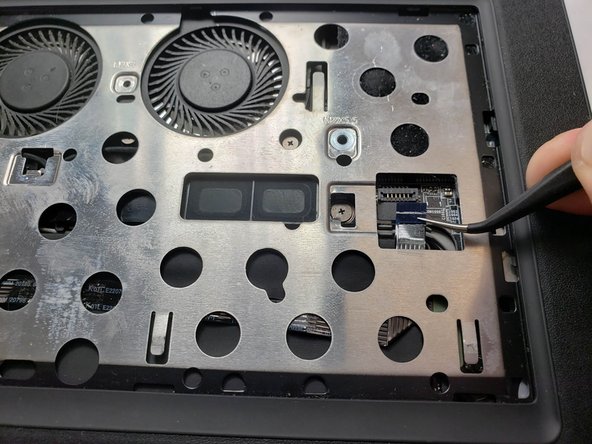
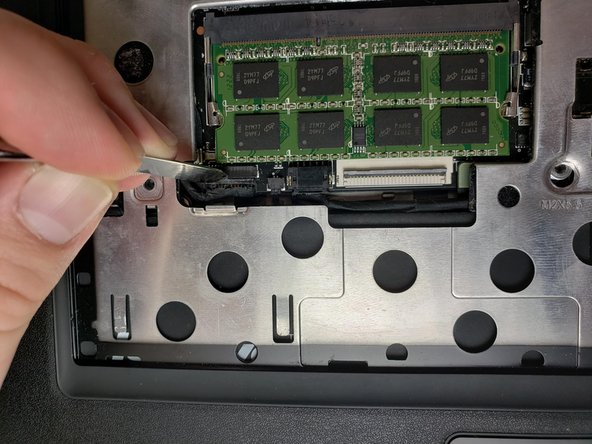
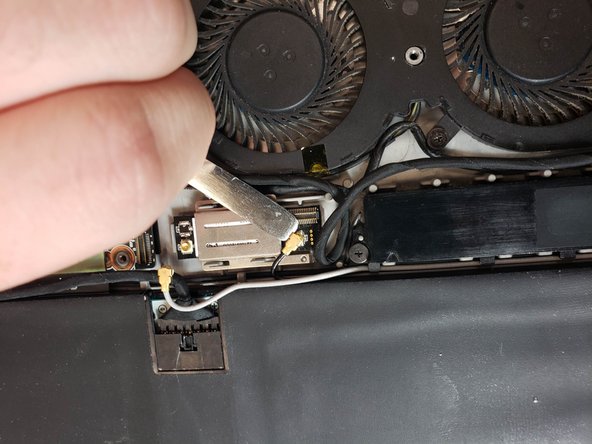
    • Remove the back panel from the device.

  2. Lenovo IdeaPad Yoga 13 Wi-Fi Card Replacement: stap 2, afbeelding 1 van 2 Lenovo IdeaPad Yoga 13 Wi-Fi Card Replacement: stap 2, afbeelding 2 van 2
    • Use blue the opening tool to gently further separate the keyboard bezel.

    • Carefully apply pressure to the keyboard. It should easily pop out.

  3. Lenovo IdeaPad Yoga 13 Wi-Fi Card Replacement: stap 3, afbeelding 1 van 1
    • To remove the keyboard bezel (black cover containing the mouse pad) remove the five screws using the Phillips #0 screwdriver.

  4. Lenovo IdeaPad Yoga 13 Wi-Fi Card Replacement: stap 4, afbeelding 1 van 2 Lenovo IdeaPad Yoga 13 Wi-Fi Card Replacement: stap 4, afbeelding 2 van 2
    • Unplug the connections from motherboard, including the mouse and keyboard connections.

  5. Lenovo IdeaPad Yoga 13 Wi-Fi Card Replacement: stap 5, afbeelding 1 van 1
    • Remove the outer bezel to reveal the entire internal layout of the computer.

  6. Lenovo IdeaPad Yoga 13 Wi-Fi Card Replacement: stap 6, afbeelding 1 van 2 Lenovo IdeaPad Yoga 13 Wi-Fi Card Replacement: stap 6, afbeelding 2 van 2
    • Remove the ribbon cable covering the card by disconnecting the two connection points on either side.

  7. Lenovo IdeaPad Yoga 13 Wi-Fi Card Replacement: stap 7, afbeelding 1 van 3 Lenovo IdeaPad Yoga 13 Wi-Fi Card Replacement: stap 7, afbeelding 2 van 3 Lenovo IdeaPad Yoga 13 Wi-Fi Card Replacement: stap 7, afbeelding 3 van 3
    • Disconnect the white and black antenna cables.

  8. Lenovo IdeaPad Yoga 13 Wi-Fi Card Replacement: stap 8, afbeelding 1 van 1
    • Lift up the bottom right lever on the WiFi card metal bracket.

    • Slide the bracket to the left to disconnect it from the 4 plastic legs holding it down.

  9. Lenovo IdeaPad Yoga 13 Wi-Fi Card Replacement: stap 9, afbeelding 1 van 2 Lenovo IdeaPad Yoga 13 Wi-Fi Card Replacement: stap 9, afbeelding 2 van 2
    • Lift and remove the card.

Conclusie

To reassemble your device, follow these instructions in reverse order.

Hashim Adel Jaber

Lid sinds: 04/01/19

169 Reputatie

1 Handleiding geschreven

Team

IUPUI, Team S1-G2, Harley Spring 2019 Lid van IUPUI, Team S1-G2, Harley Spring 2019

IUPUI-HARLEY-S19S1G2

3 Leden

2 handleidingen geschreven

0 opmerkingen

Voeg opmerking toe

Weergavestatistieken:

Afgelopen 24 uren: 0

Afgelopen 7 dagen: 0

Afgelopen 30 dagen: 0

Altijd: 49