Ga door naar hoofdinhoud

Lenovo IdeaPad Y700-15ACZ Display Replacement

Wat je nodig hebt

  1. Lenovo IdeaPad Y700-15ACZ Display Replacement, Display: stap 1, afbeelding 1 van 2 Lenovo IdeaPad Y700-15ACZ Display Replacement, Display: stap 1, afbeelding 2 van 2
    • Remove the border around the screen using a plastic opening tool.

    • When removing the border be careful, the plastic connectors can sometimes break under little amounts of pressure

  2. Lenovo IdeaPad Y700-15ACZ Display Replacement: stap 2, afbeelding 1 van 3 Lenovo IdeaPad Y700-15ACZ Display Replacement: stap 2, afbeelding 2 van 3 Lenovo IdeaPad Y700-15ACZ Display Replacement: stap 2, afbeelding 3 van 3
    • Use a Phillips #0 screwdriver to remove the four screws that secure the display (one screw at each corner).

  3. Lenovo IdeaPad Y700-15ACZ Display Replacement: stap 3, afbeelding 1 van 2 Lenovo IdeaPad Y700-15ACZ Display Replacement: stap 3, afbeelding 2 van 2
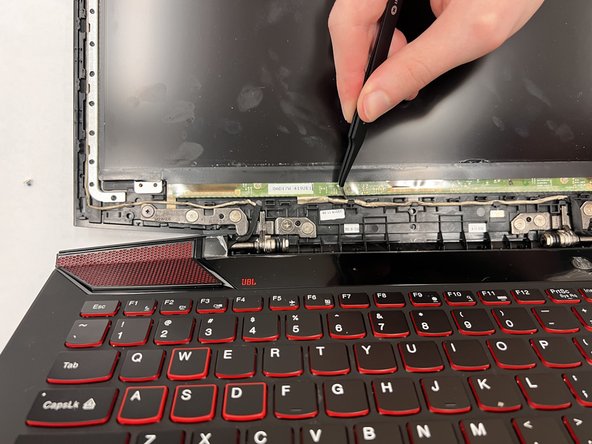
    • Before you remove or rotate the display, remove the cable connected to the display from the constraints.

  4. Lenovo IdeaPad Y700-15ACZ Display Replacement: stap 4, afbeelding 1 van 2 Lenovo IdeaPad Y700-15ACZ Display Replacement: stap 4, afbeelding 2 van 2
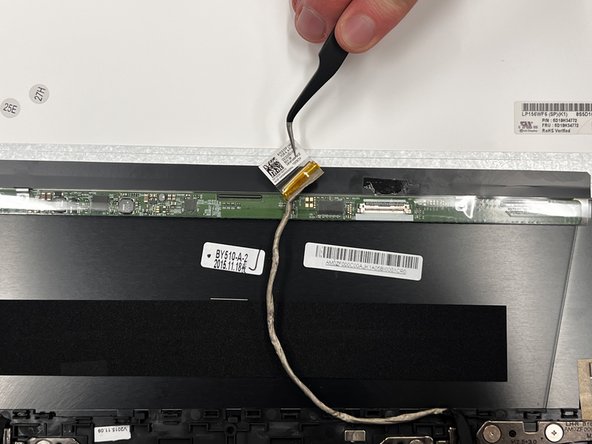
    • Rotate the display face down.

    • From the sticker carefully peel down and remove the connection from the display.

    • Attach the ribbon to the new display.

Conclusie

Repeat steps backward to put the computer back together. After you have completed the reassembly, make sure to test the new display by powering on the device.

Colin Burke

Lid sinds: 03/28/23

109 Reputatie

1 Handleiding geschreven

Team

IUPUI, Team 3-1, Harley Spring 2023 Lid van IUPUI, Team 3-1, Harley Spring 2023

IUPUI-HARLEY-S23S3G1

3 Leden

3 handleidingen geschreven

0 opmerkingen

Voeg opmerking toe

Weergavestatistieken:

Afgelopen 24 uren: 0

Afgelopen 7 dagen: 2

Afgelopen 30 dagen: 18

Altijd: 183